Create Timesheets
Overview
In GigBridge you can use timesheets to track days worked by your site operatives and tradespeople. Site managers or office teams can submit timesheets and approve which days were worked. We combine this step with cost-tracking so you can confirm what projects and cost codes that they were working on each day. Once approved, all of your cost reports are updated automatically with the costs based on the day rates set for each operative.
How to set up a timesheet
When onboarding a new operative you can create a timesheet for them by taking the following steps.
- Click on timesheets in the menu on the left hand side of the screen.
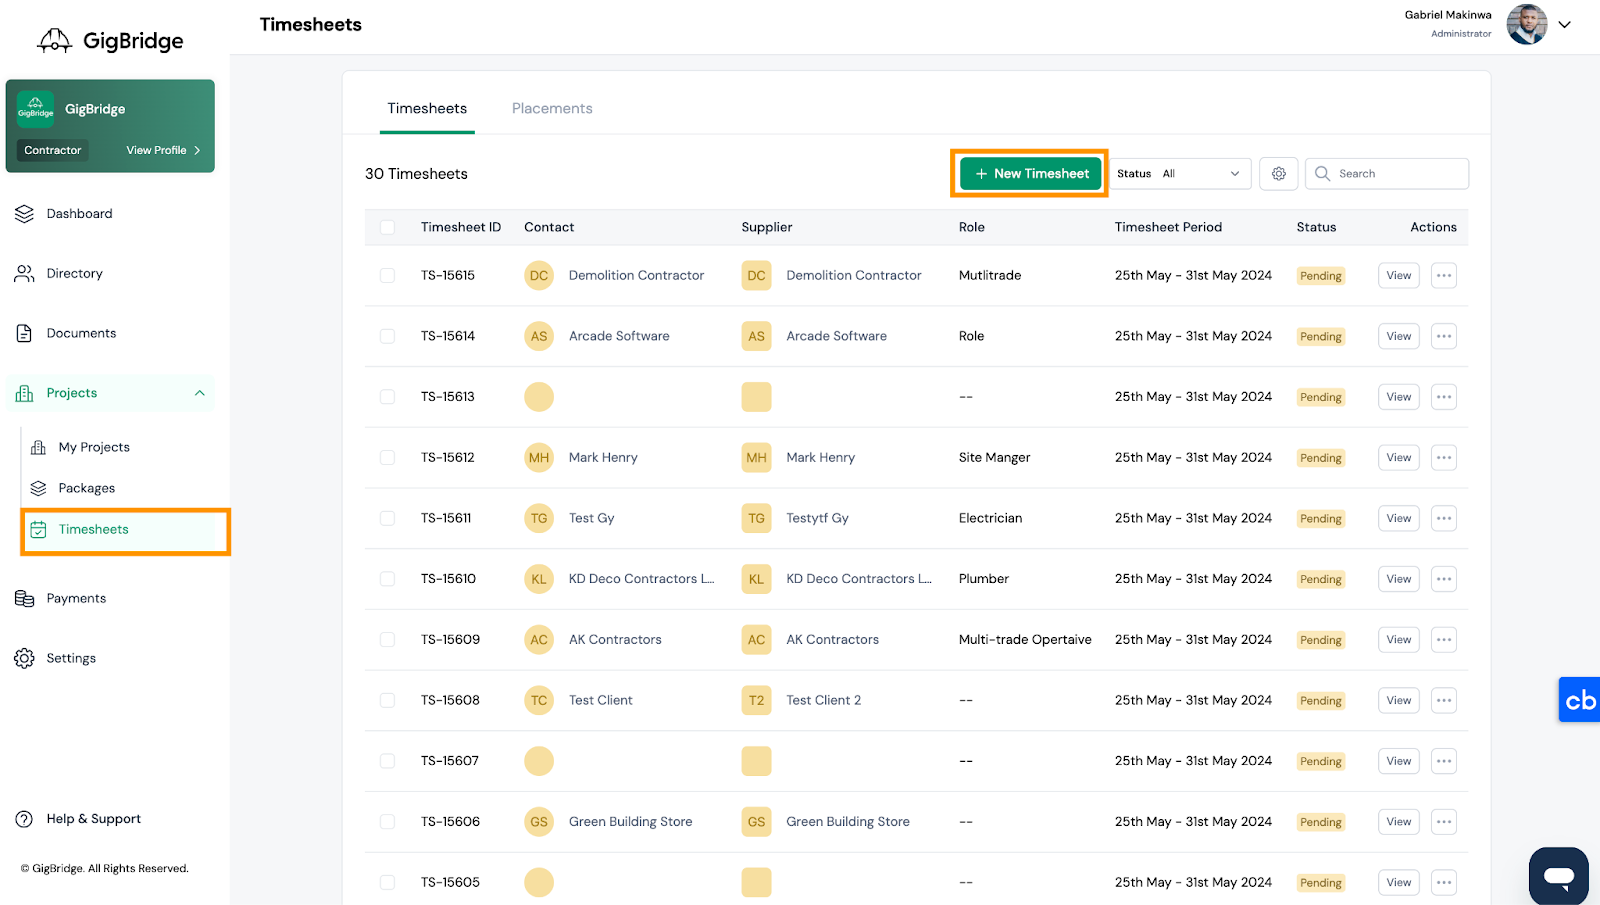
- Then click on the new timesheet on the right hand side in the right hand corner.
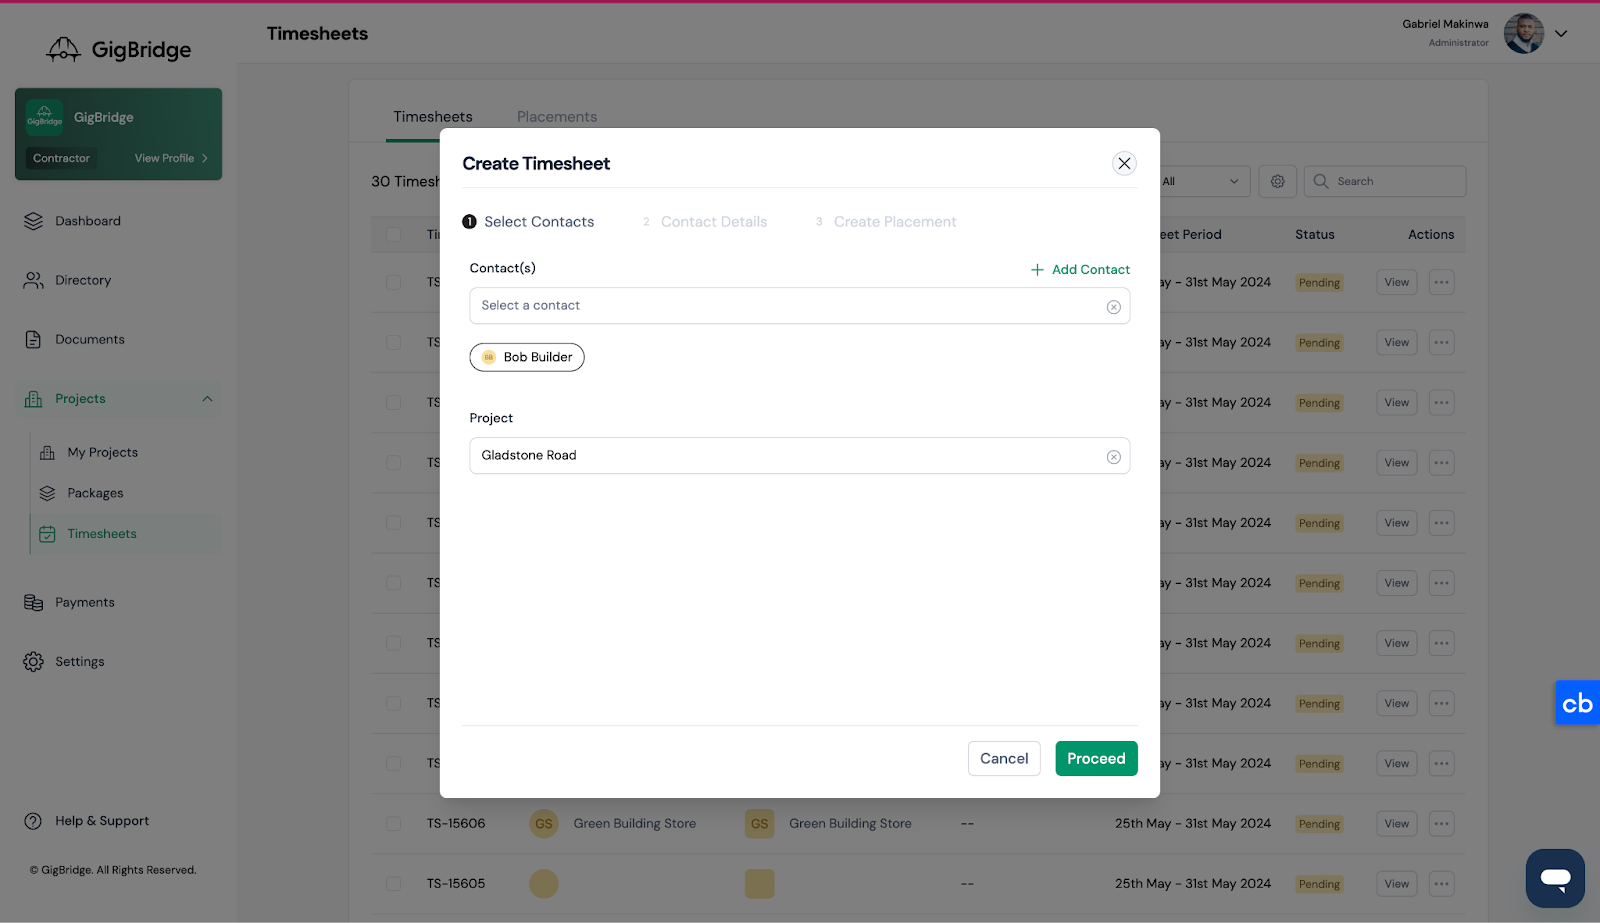
Select Contacts
- Select or add the contact that you’d like to create this timesheet for.
Note: We’d advise adding agency workers or contacts paid via a payroll company under the same supplier. For example if you have workers under two different agencies. Add the agencies as suppliers in your directory {{link to directory article}} and sync these contacts to their respective suppliers. You can learn more about adding contacts and suppliers here:
Set Placement Rate
- Once you’ve selected the contacts you’d like to create timesheets for (You can select and create for multiple contacts at once), you can then enter their role, placements rate and CIS rates (if applicable)
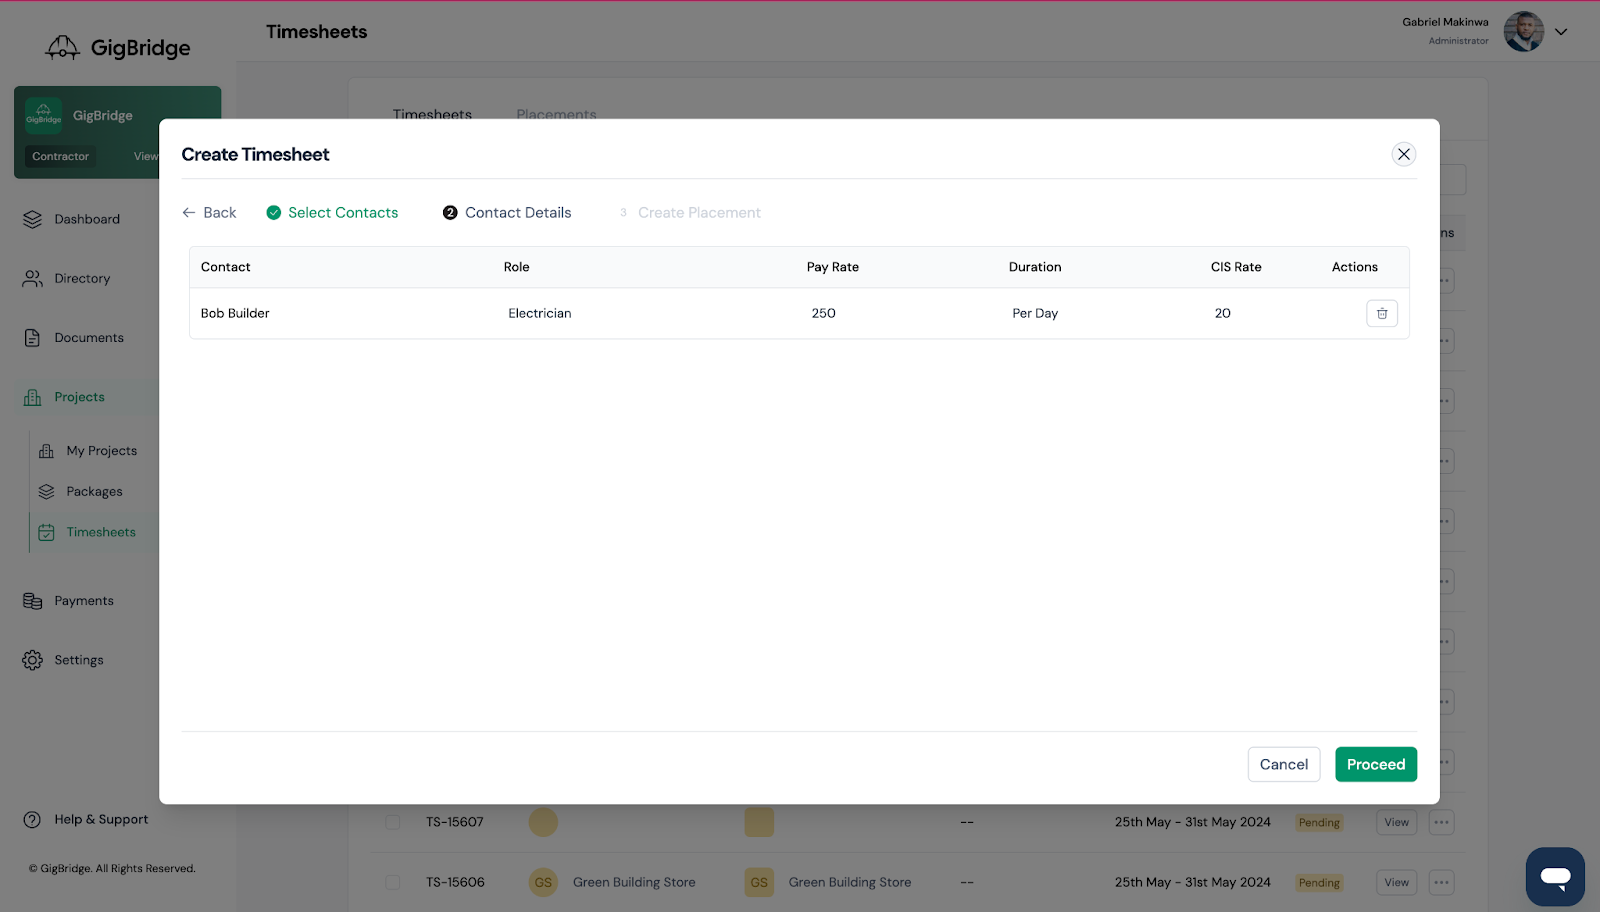
Note: a placement is a configuration for your engagement with an individual. Once set up you can then edit, pause or stop the placement. While the placement is active; timesheets will be generated for you to fill in each week.
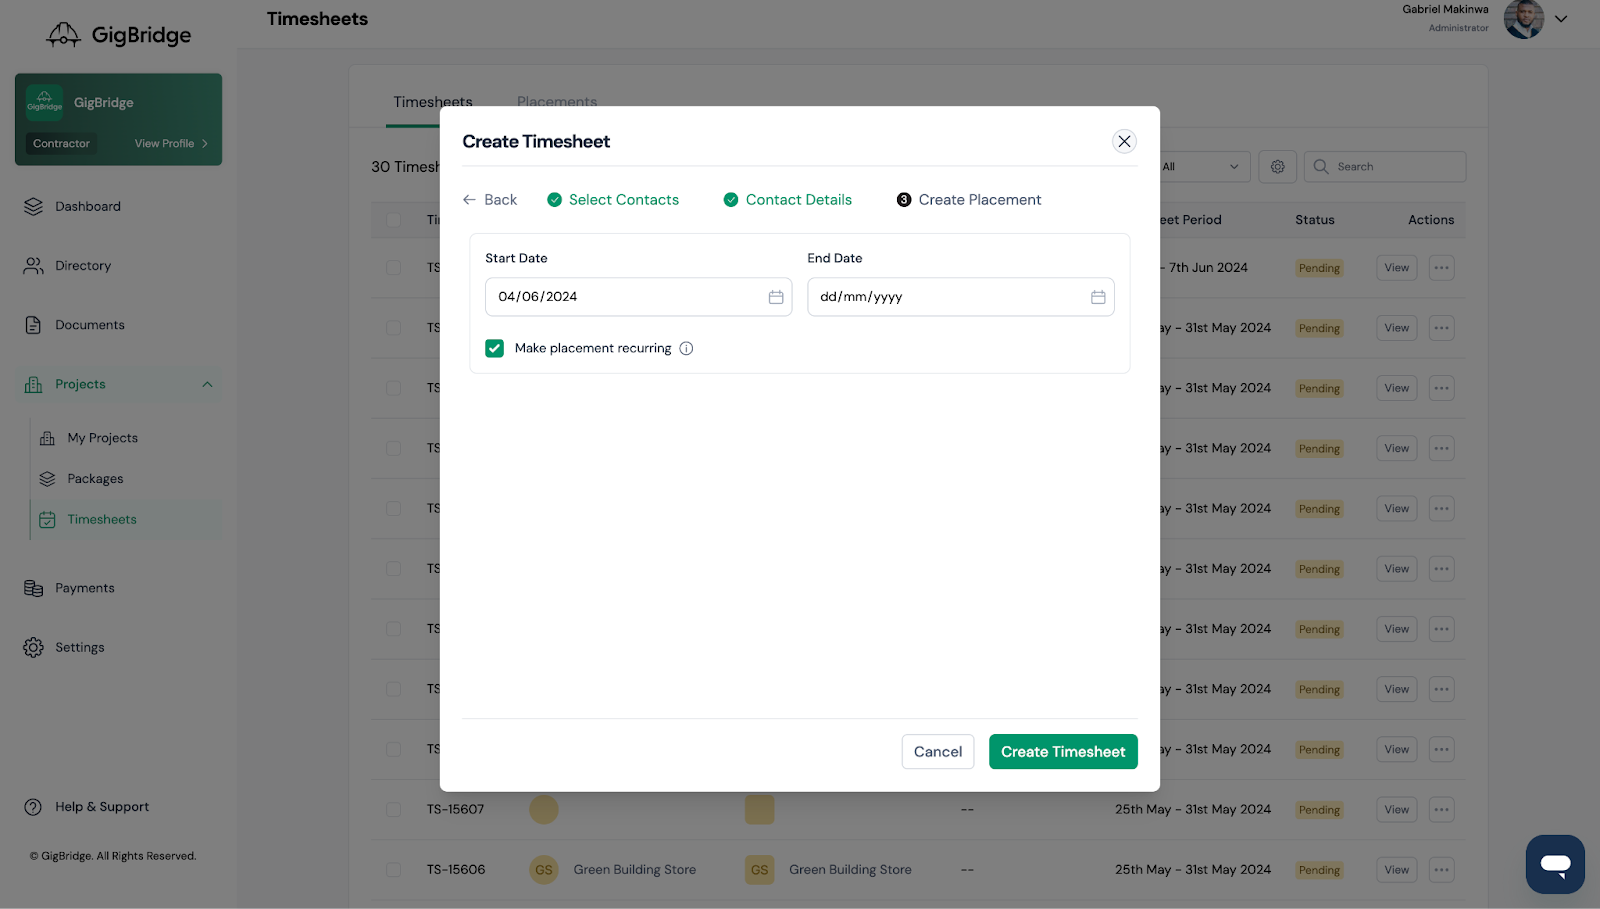
Set Start Date
- Once you’ve filled in their details; this information will be saved to that contact for future engagements.
- Proceed to the last step where you can then select the start date for this placement. This should be the first date you’d like to fill in a timesheet for. The first timesheet will be generated based on this date.