
Using GigBridge with Xero
Once you've setup your Xero integration you can now start to create and upload financial documents such as purchase orders, invoices and receipts. All of these documents will be synced with your Xero account automatically, unless you choose otherwise.
How your GigBridge data is synced with Xero
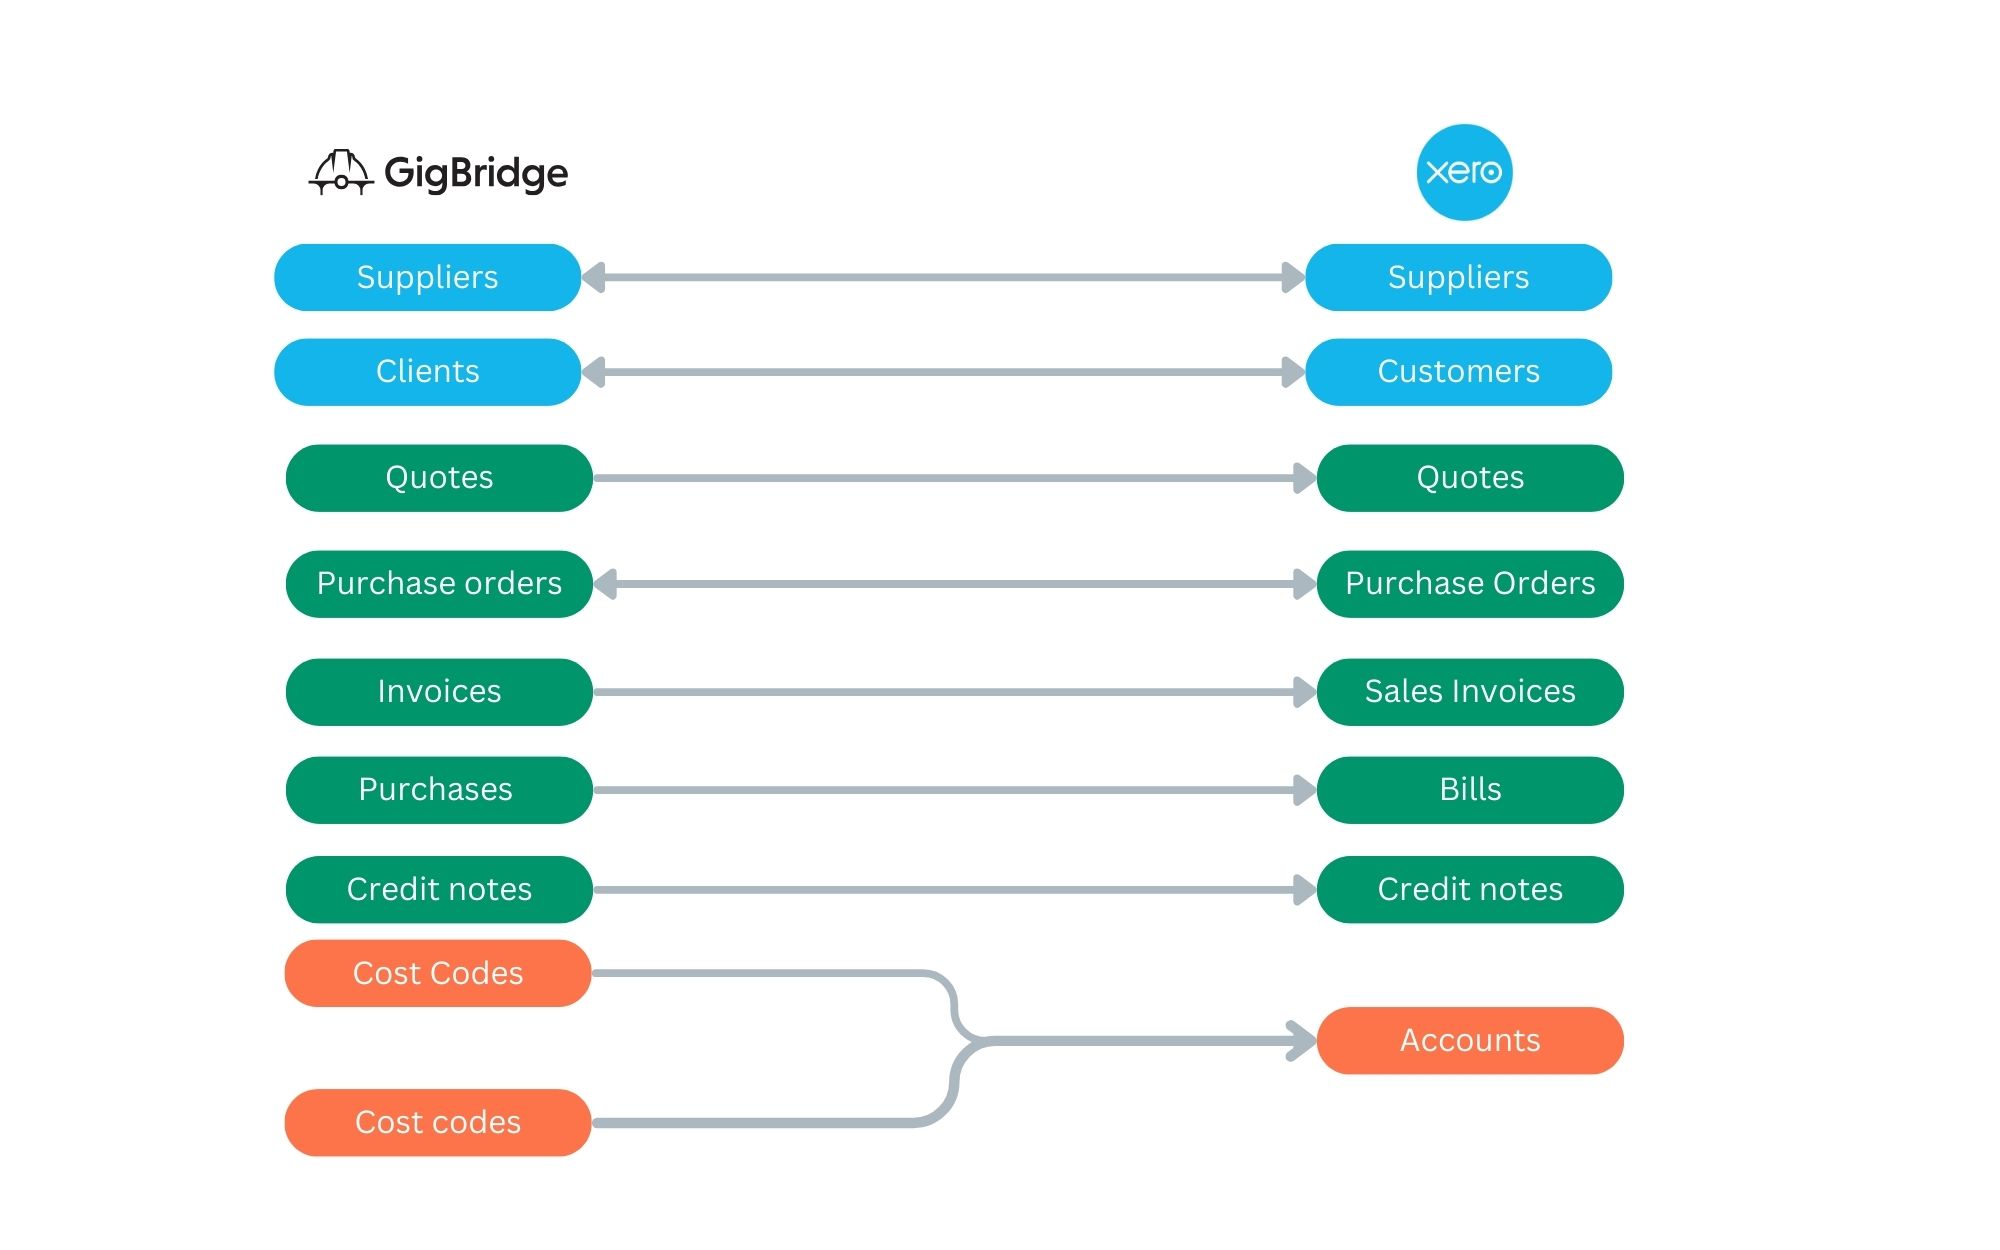
Managing your Contacts
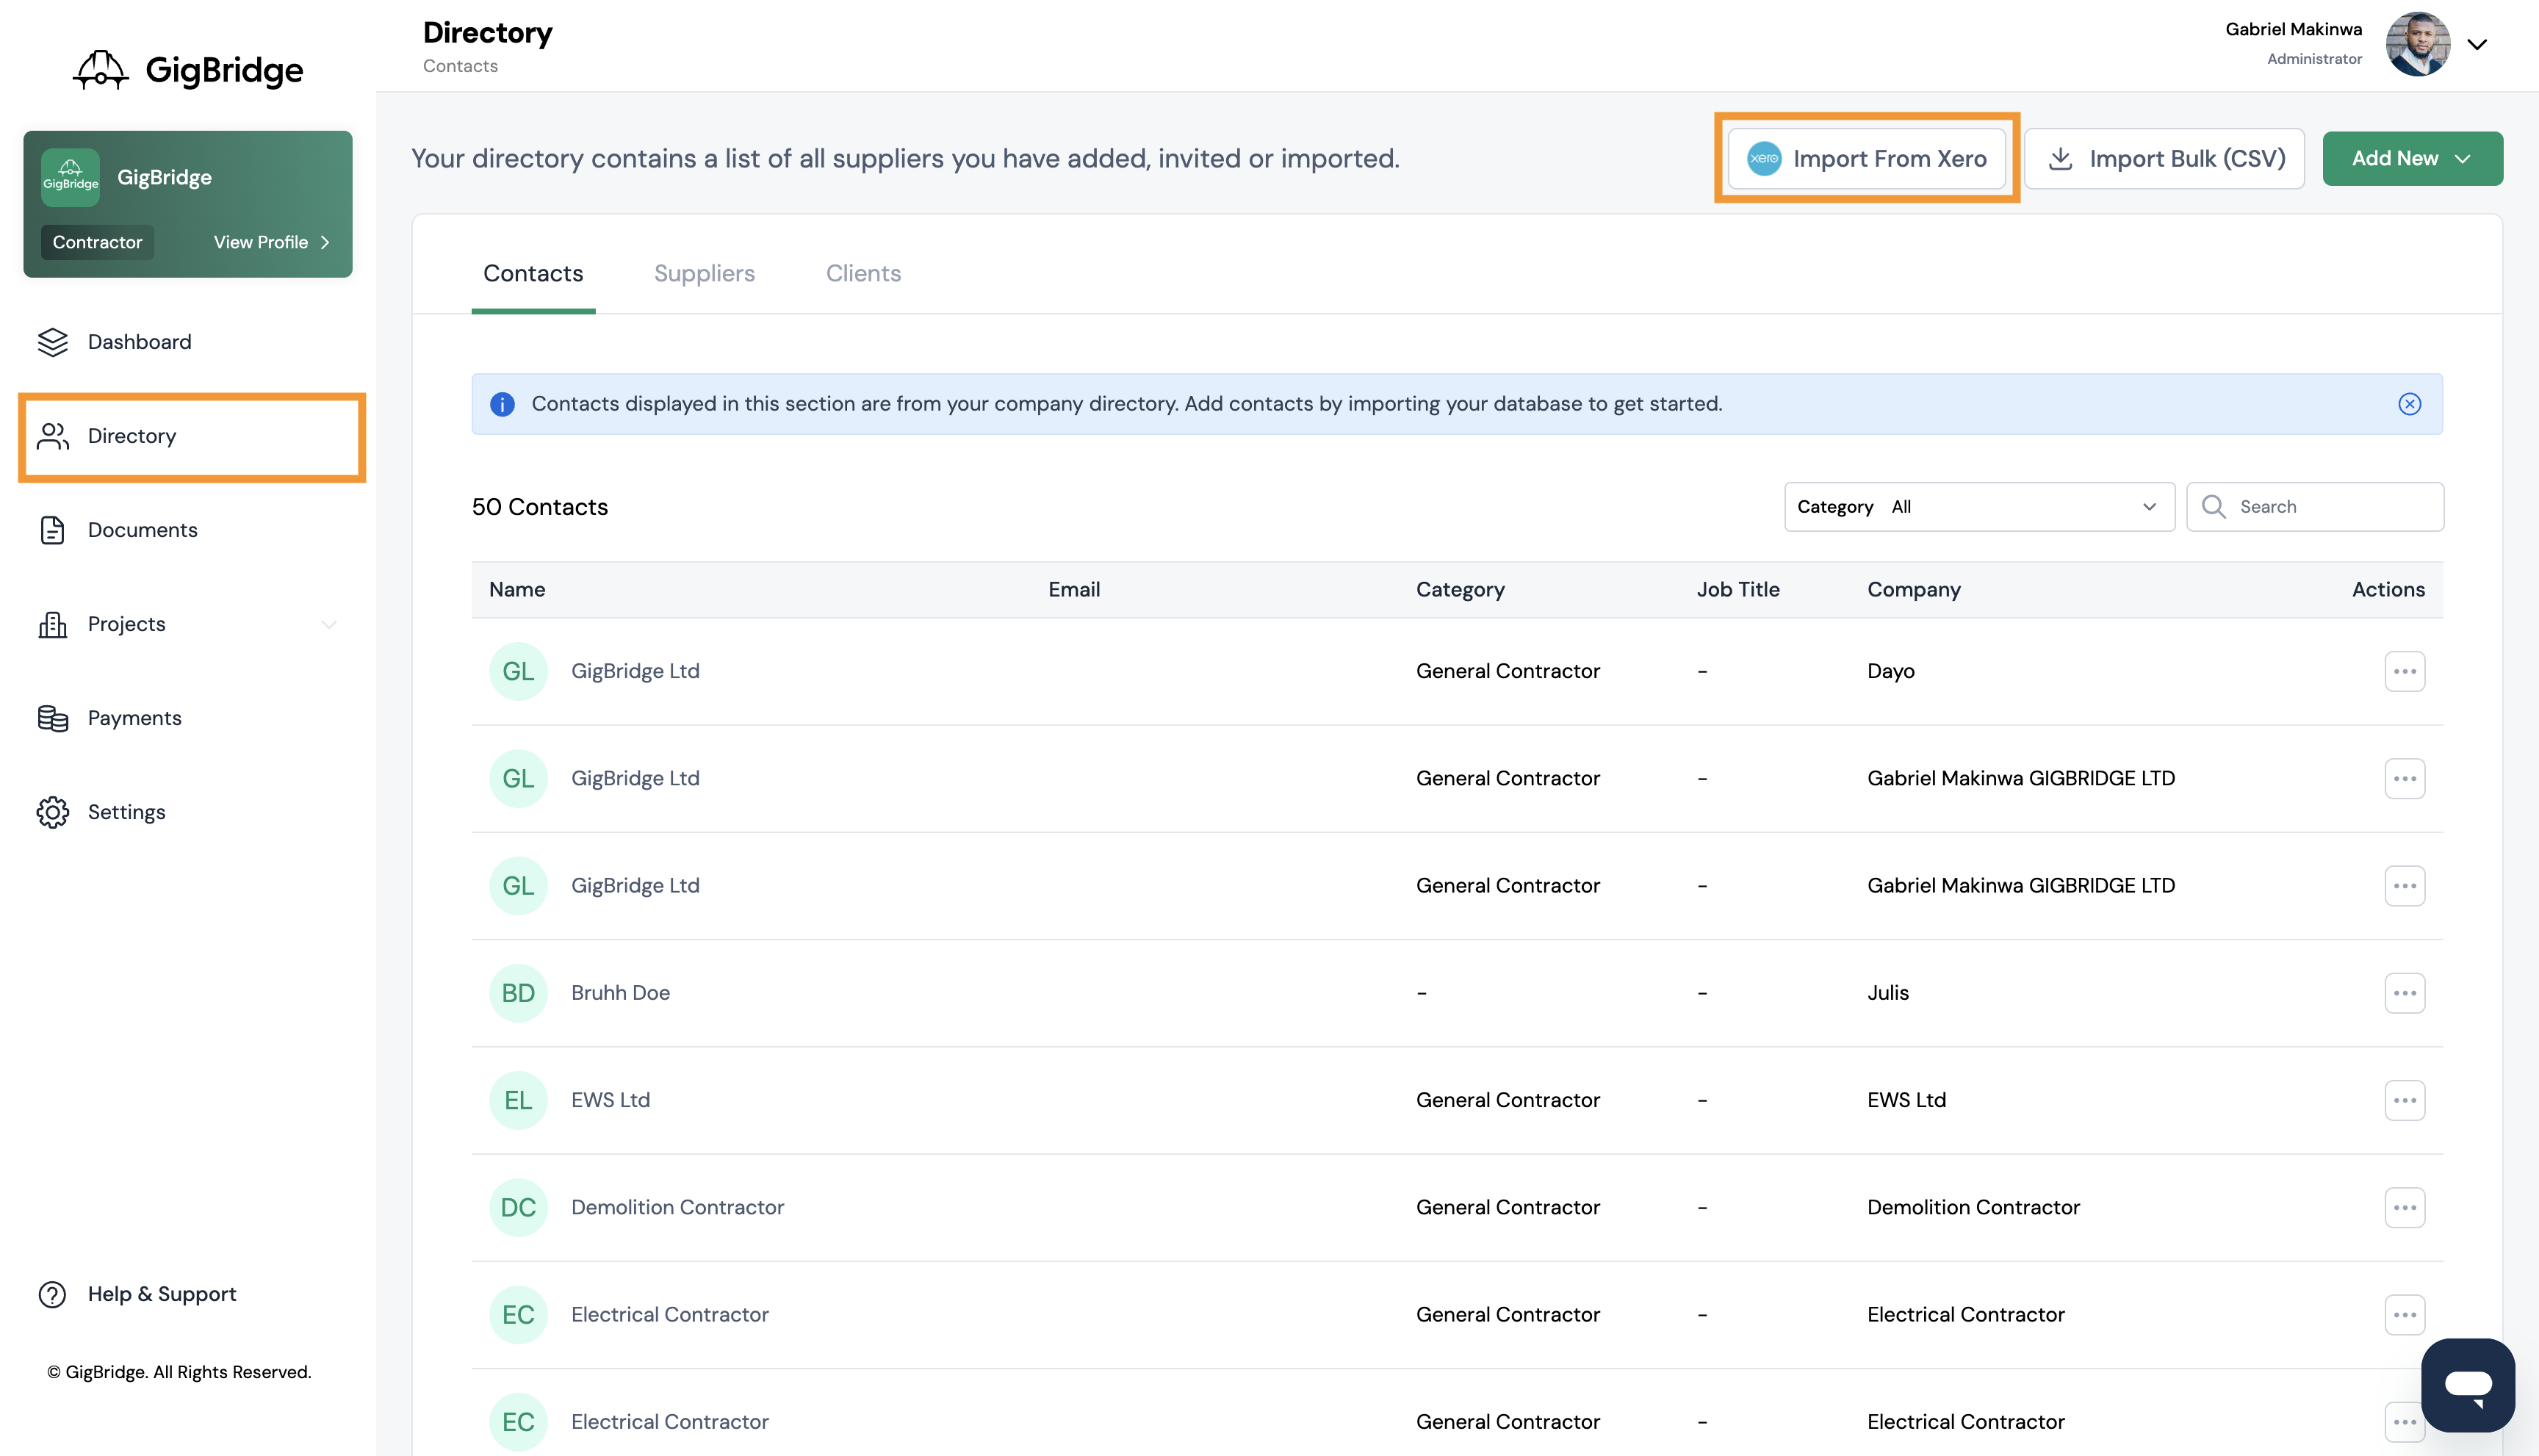
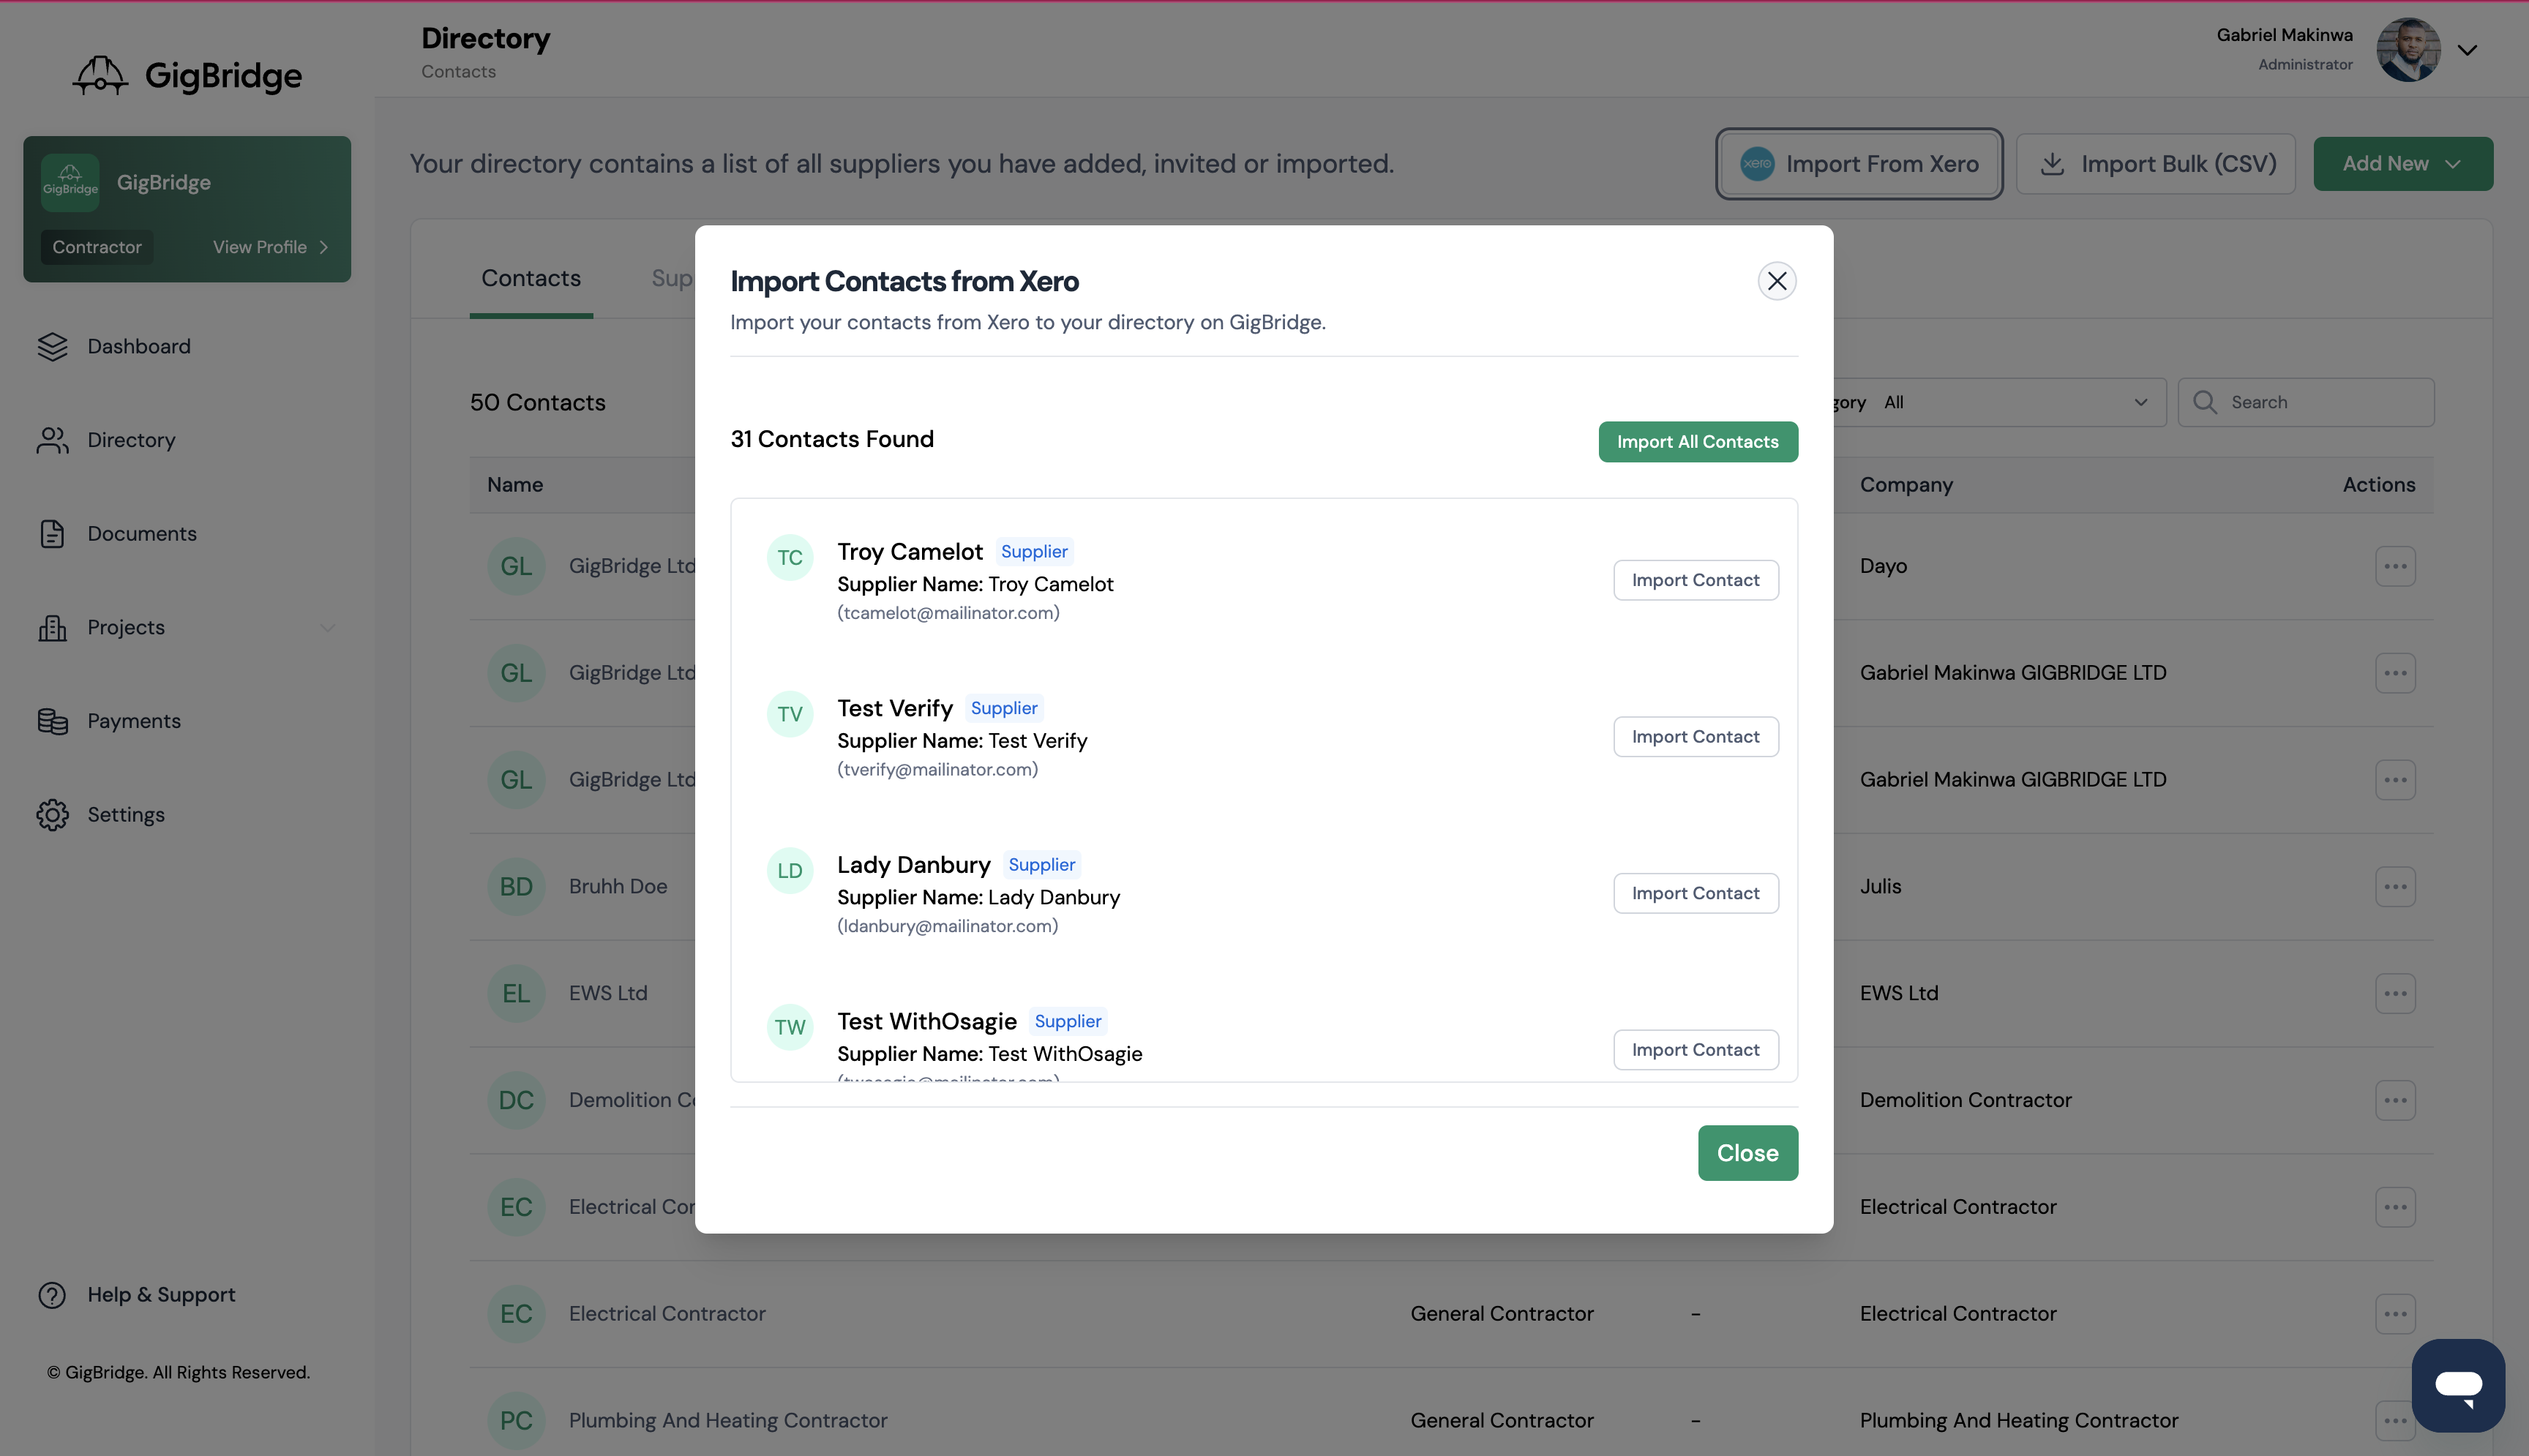
You can manage all of your contacts in the directory tab. To import your existing contacts from Xero simply click the Import from Xero button and you'll see a list of contacts that exist in your Xero account but do not yet exist in GigBridge. Beside each contact they will have one of three labels.
- Suppliers: This a contact associated with one of your suppliers. In most cases this will just be the suppliers name and may not contain further contact details like email address, phone number etc. Xero defines a supplier as any contact or copany that you've received a bill from in the past.
- Customers: This is a contact associated with one of your customers. Similar to a supplier this might just be the company that you invoice for your services.
- Contacts: This is a contact that has no association to a customer or a supplier.
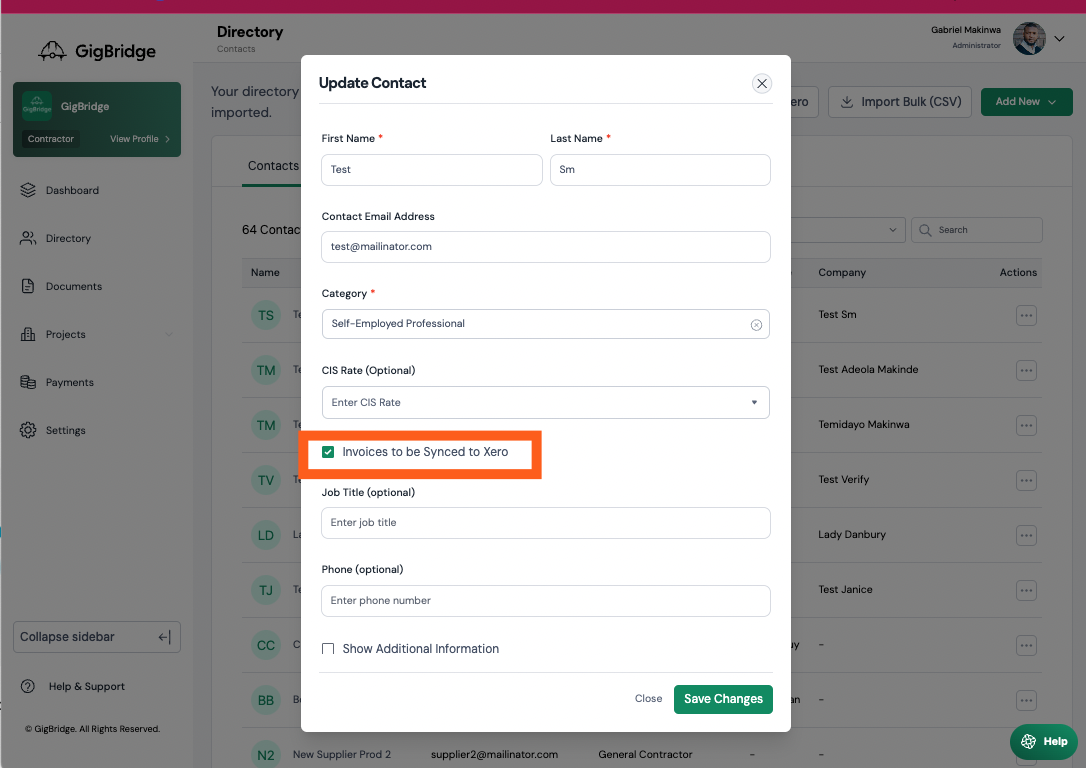
All imported contacts will be added to the contacts tab and then either suppliers or clients based on their association in Xero. Contacts that have details such an email address, phone numbers, Tax rates etc will be pulled into their contact profiles. You can edit these details by clicking edit from the action menu beside their name. Any changes to the contact details will be synced back to Xero. You can choose to turn off syncing for specific contact, customer or supplier by checking the "Don't sync to Xero" option in their edit details page.
Linking cost codes to Chart of Accounts in Xero
One of our most loved features on GigBridge is the ability to connect your project cost codes e.g. E005 - electrical containment or SUB002 - Drylining to the relevant chart of accounts (nominal codes) e.g. "Cost of Sales" in Xero. This enables you to allocate your purchases and costs to detailed cost codes in GigBridge and have them automatically synced to Xero with the right chart of accounts and tax details pre-filled. This will save your admin team hours in double data entry into Xero and then again into project cost reports.
You can link your cost codes to accounts in Xero in project settings.
Connect Cost Codes to Chart of Accounts
When syncing your purchases to GigBridge you can configure which accounts they are synced to by connecting your cost codes.
- Head over to settings then click on the projects tab
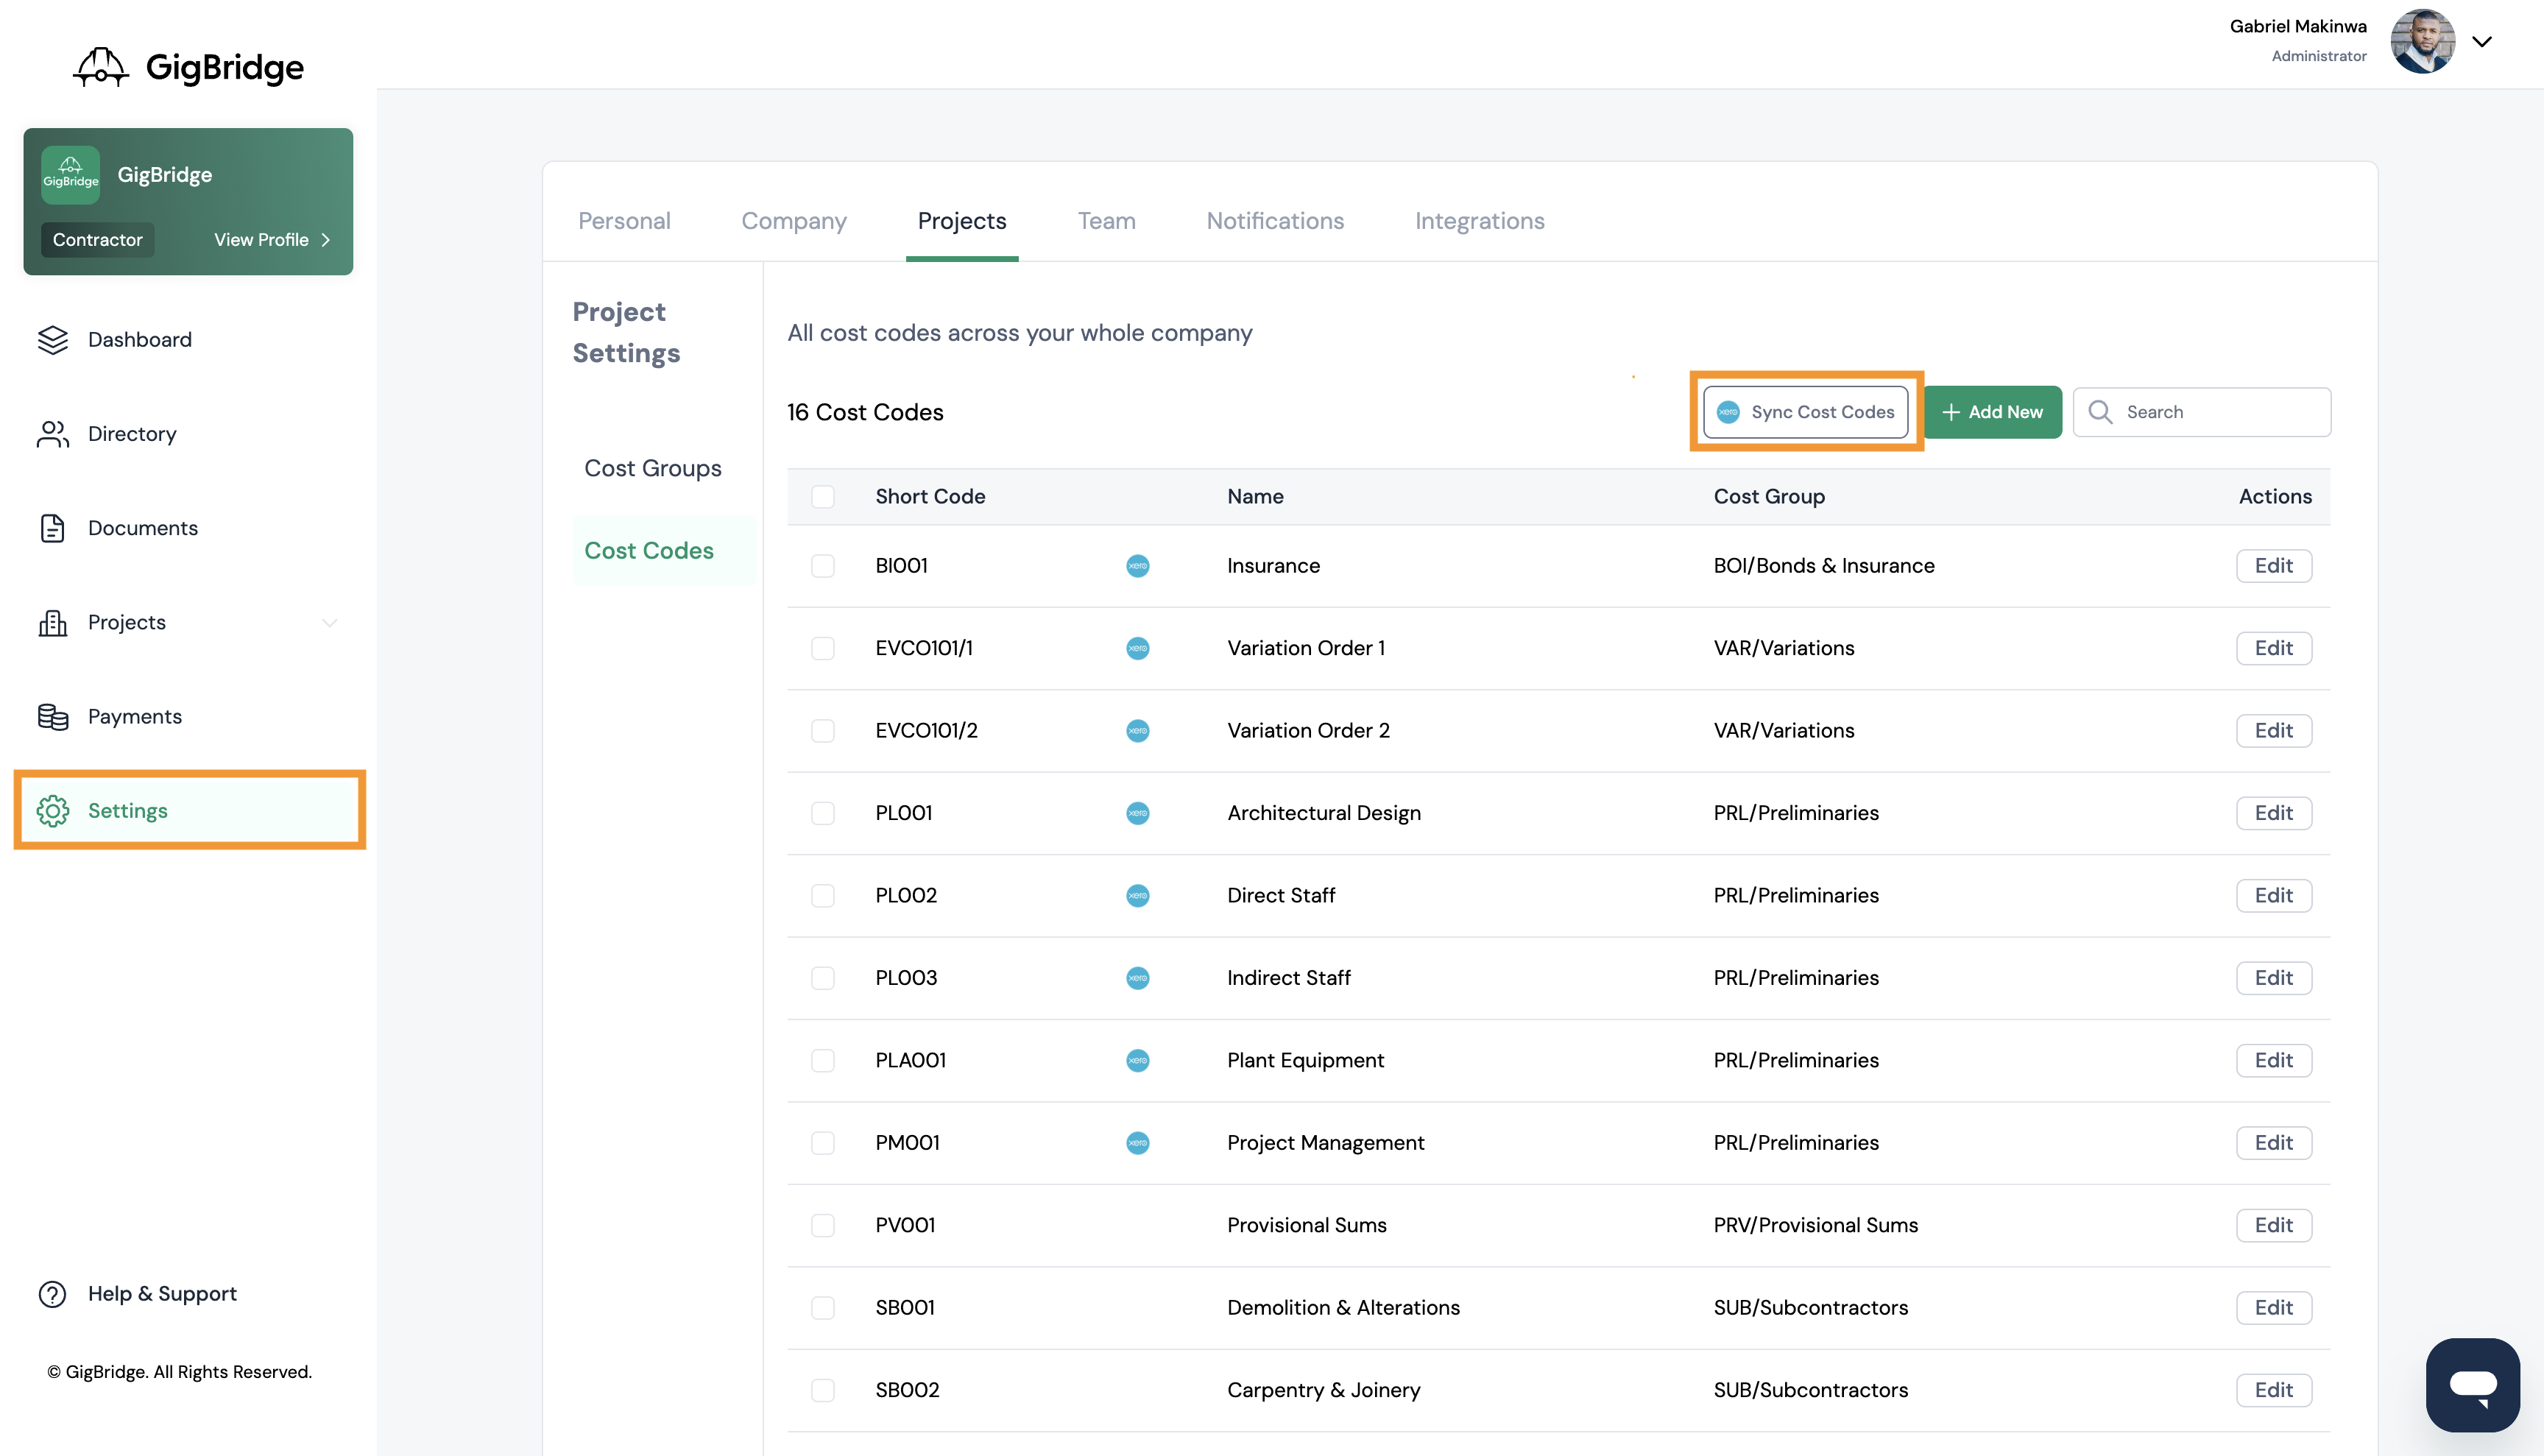
- Click on Sync cost codes
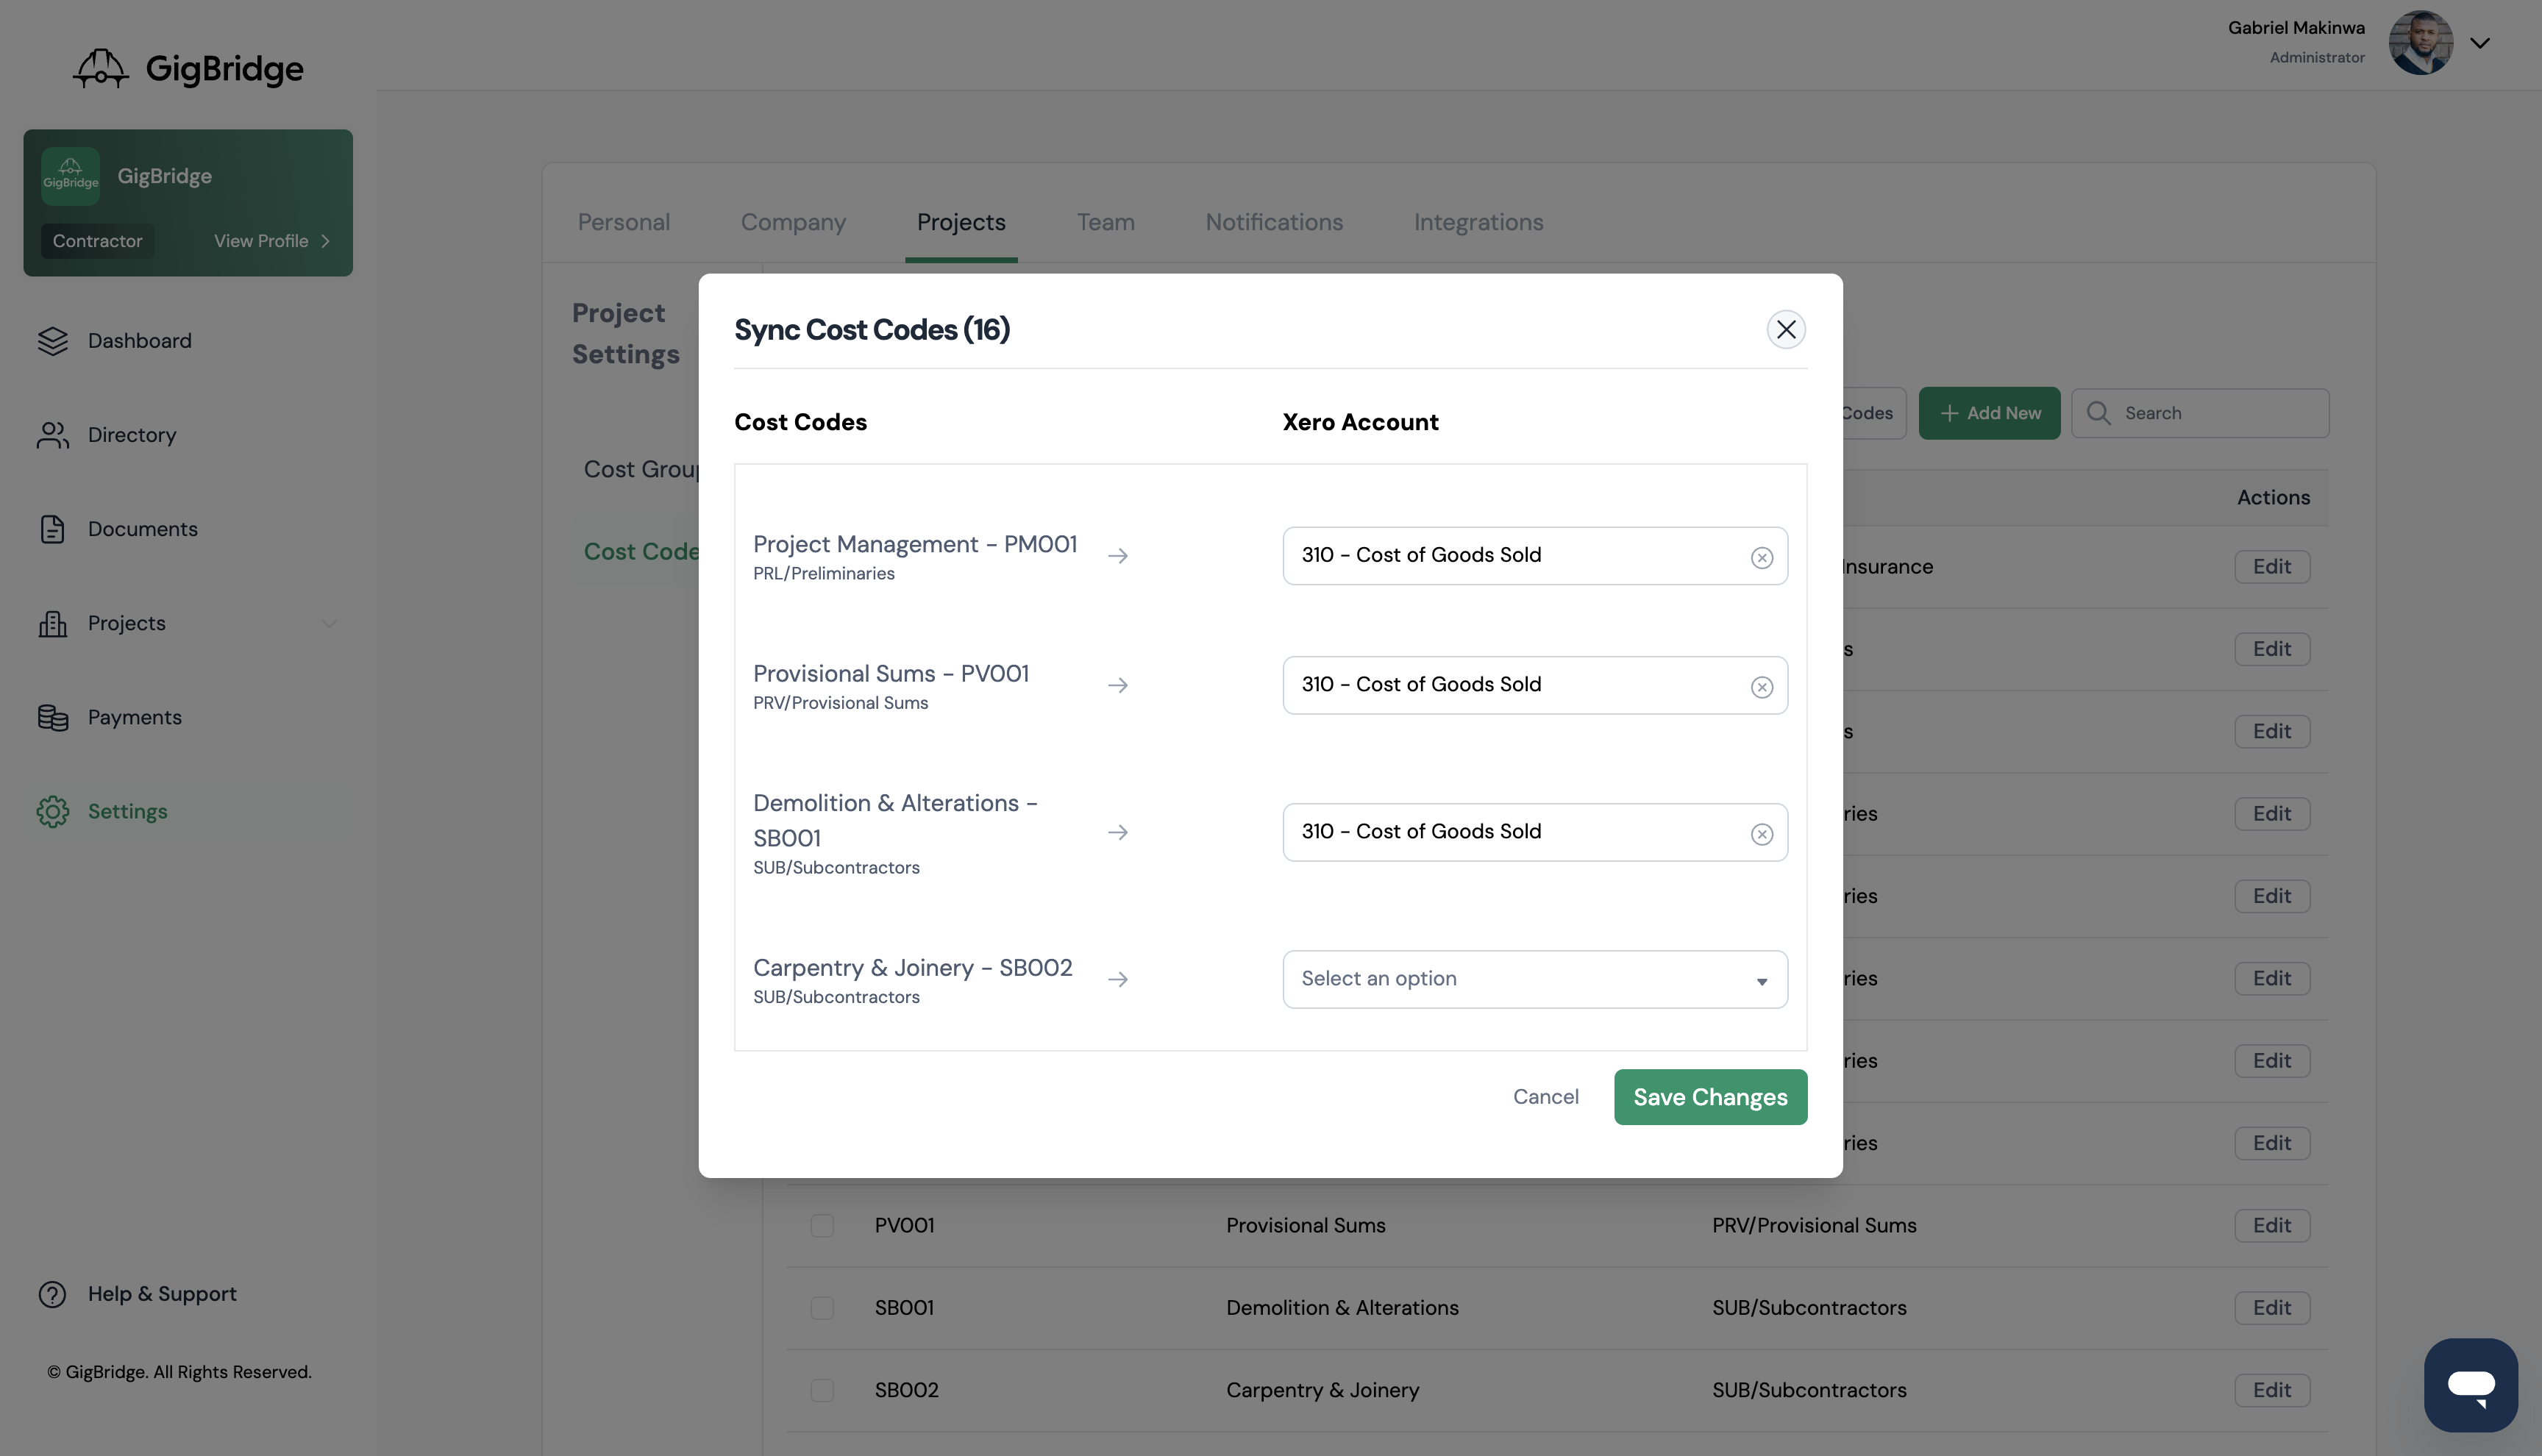
- Select which chart of account that each cost code should be synced to. By syncing a cost code to a chart of account each purchase (or part of it) assigned to this cost code will be sent into Xero and categorised to the respective account.
Syncing Purchases to Xero
To sync your purchase to Xero simply review and approve your uploaded purchases. Allocate the purchase to a project and cost code before approving. Check all of the details are correct. Once approved the purchase will be sent to Xero as an unpaid bill. All of the relevant fields will be fille din with the information approved in GigBridge.
| GigBridge Field | Xero Bill Field |
| Document Type | |
| Project | |
| Cost Code | Linked chart of accounts |
| Invoice Number | Reference |
| Purchase Order Number | |
| Company (Supplier) | From |
| Cost Title | - |
| Currency | Currency (if multi-currency is enabled) |
| Issue Date | Date |
| Due Date | Due Date |
| Subtotal | Subtotal |
| Tax Exclusive or Inclusive | Amounts are |
| VAT | VAT |
| Discount | Discount |
| Retention | not sent |
| CIS Amount | Sent as a line item deduction |
| Total | TOTAL |
| Total Paid | Less Payment |
| Net Amount Due | Amount Due |
| Line items - individual line items are only sent when you split costs | |
| - | Item |
| Item Description | Description |
| Quantity | Quantity |
| Unit Price | Unit price |
| Cost code | Account (linked accounts) |
| VAT Rate | Tax Rate |
| Amount | Amount |
| CIS Type | Not sent |
| CIS rate | Not sent |
| CIS Amount | Sent as a line item deduction |