How to setup your directory
Note: You can add contacts for your suppliers and clients. We know that most suppliers don’t need or won’t have a contact so this is not required. However all contacts must belong to either a client or supplier profile. You can use contact details to communicate with your suppliers and invite them to the supplier portal.
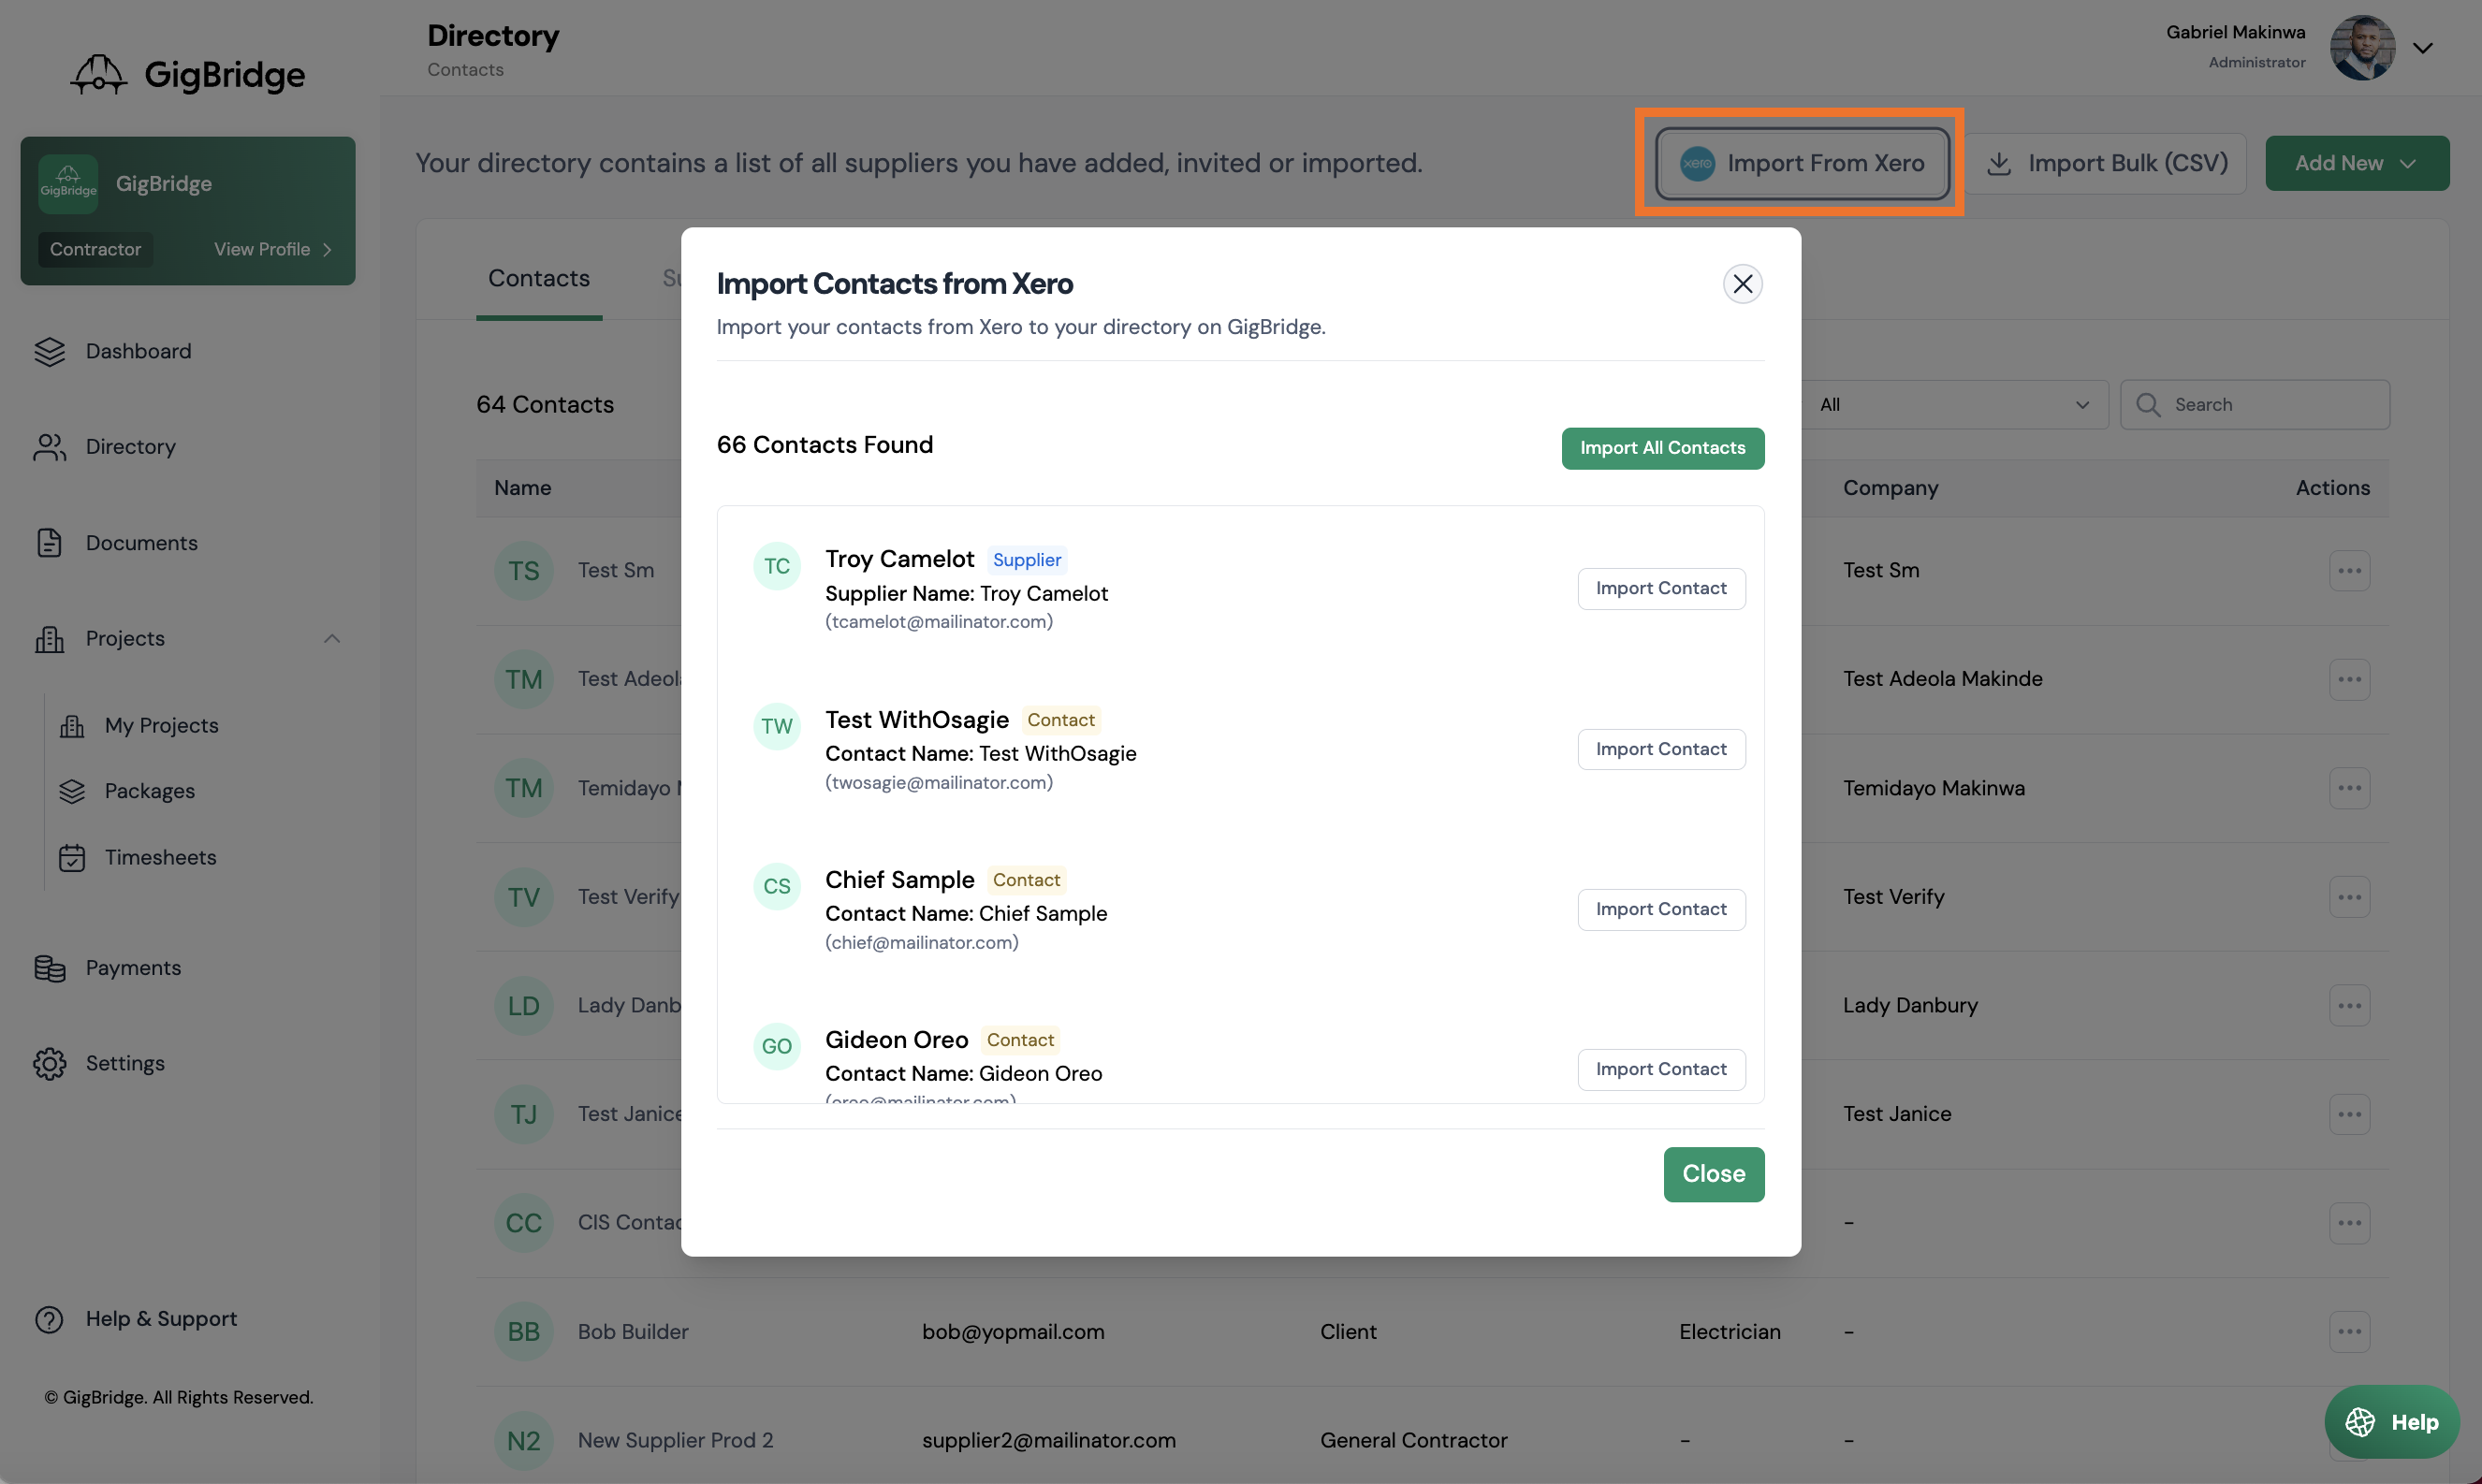
You can add contacts, suppliers and clients individually, from your accounting system or by importing them in a CSV.
Adding Contacts
To add a contact individually:
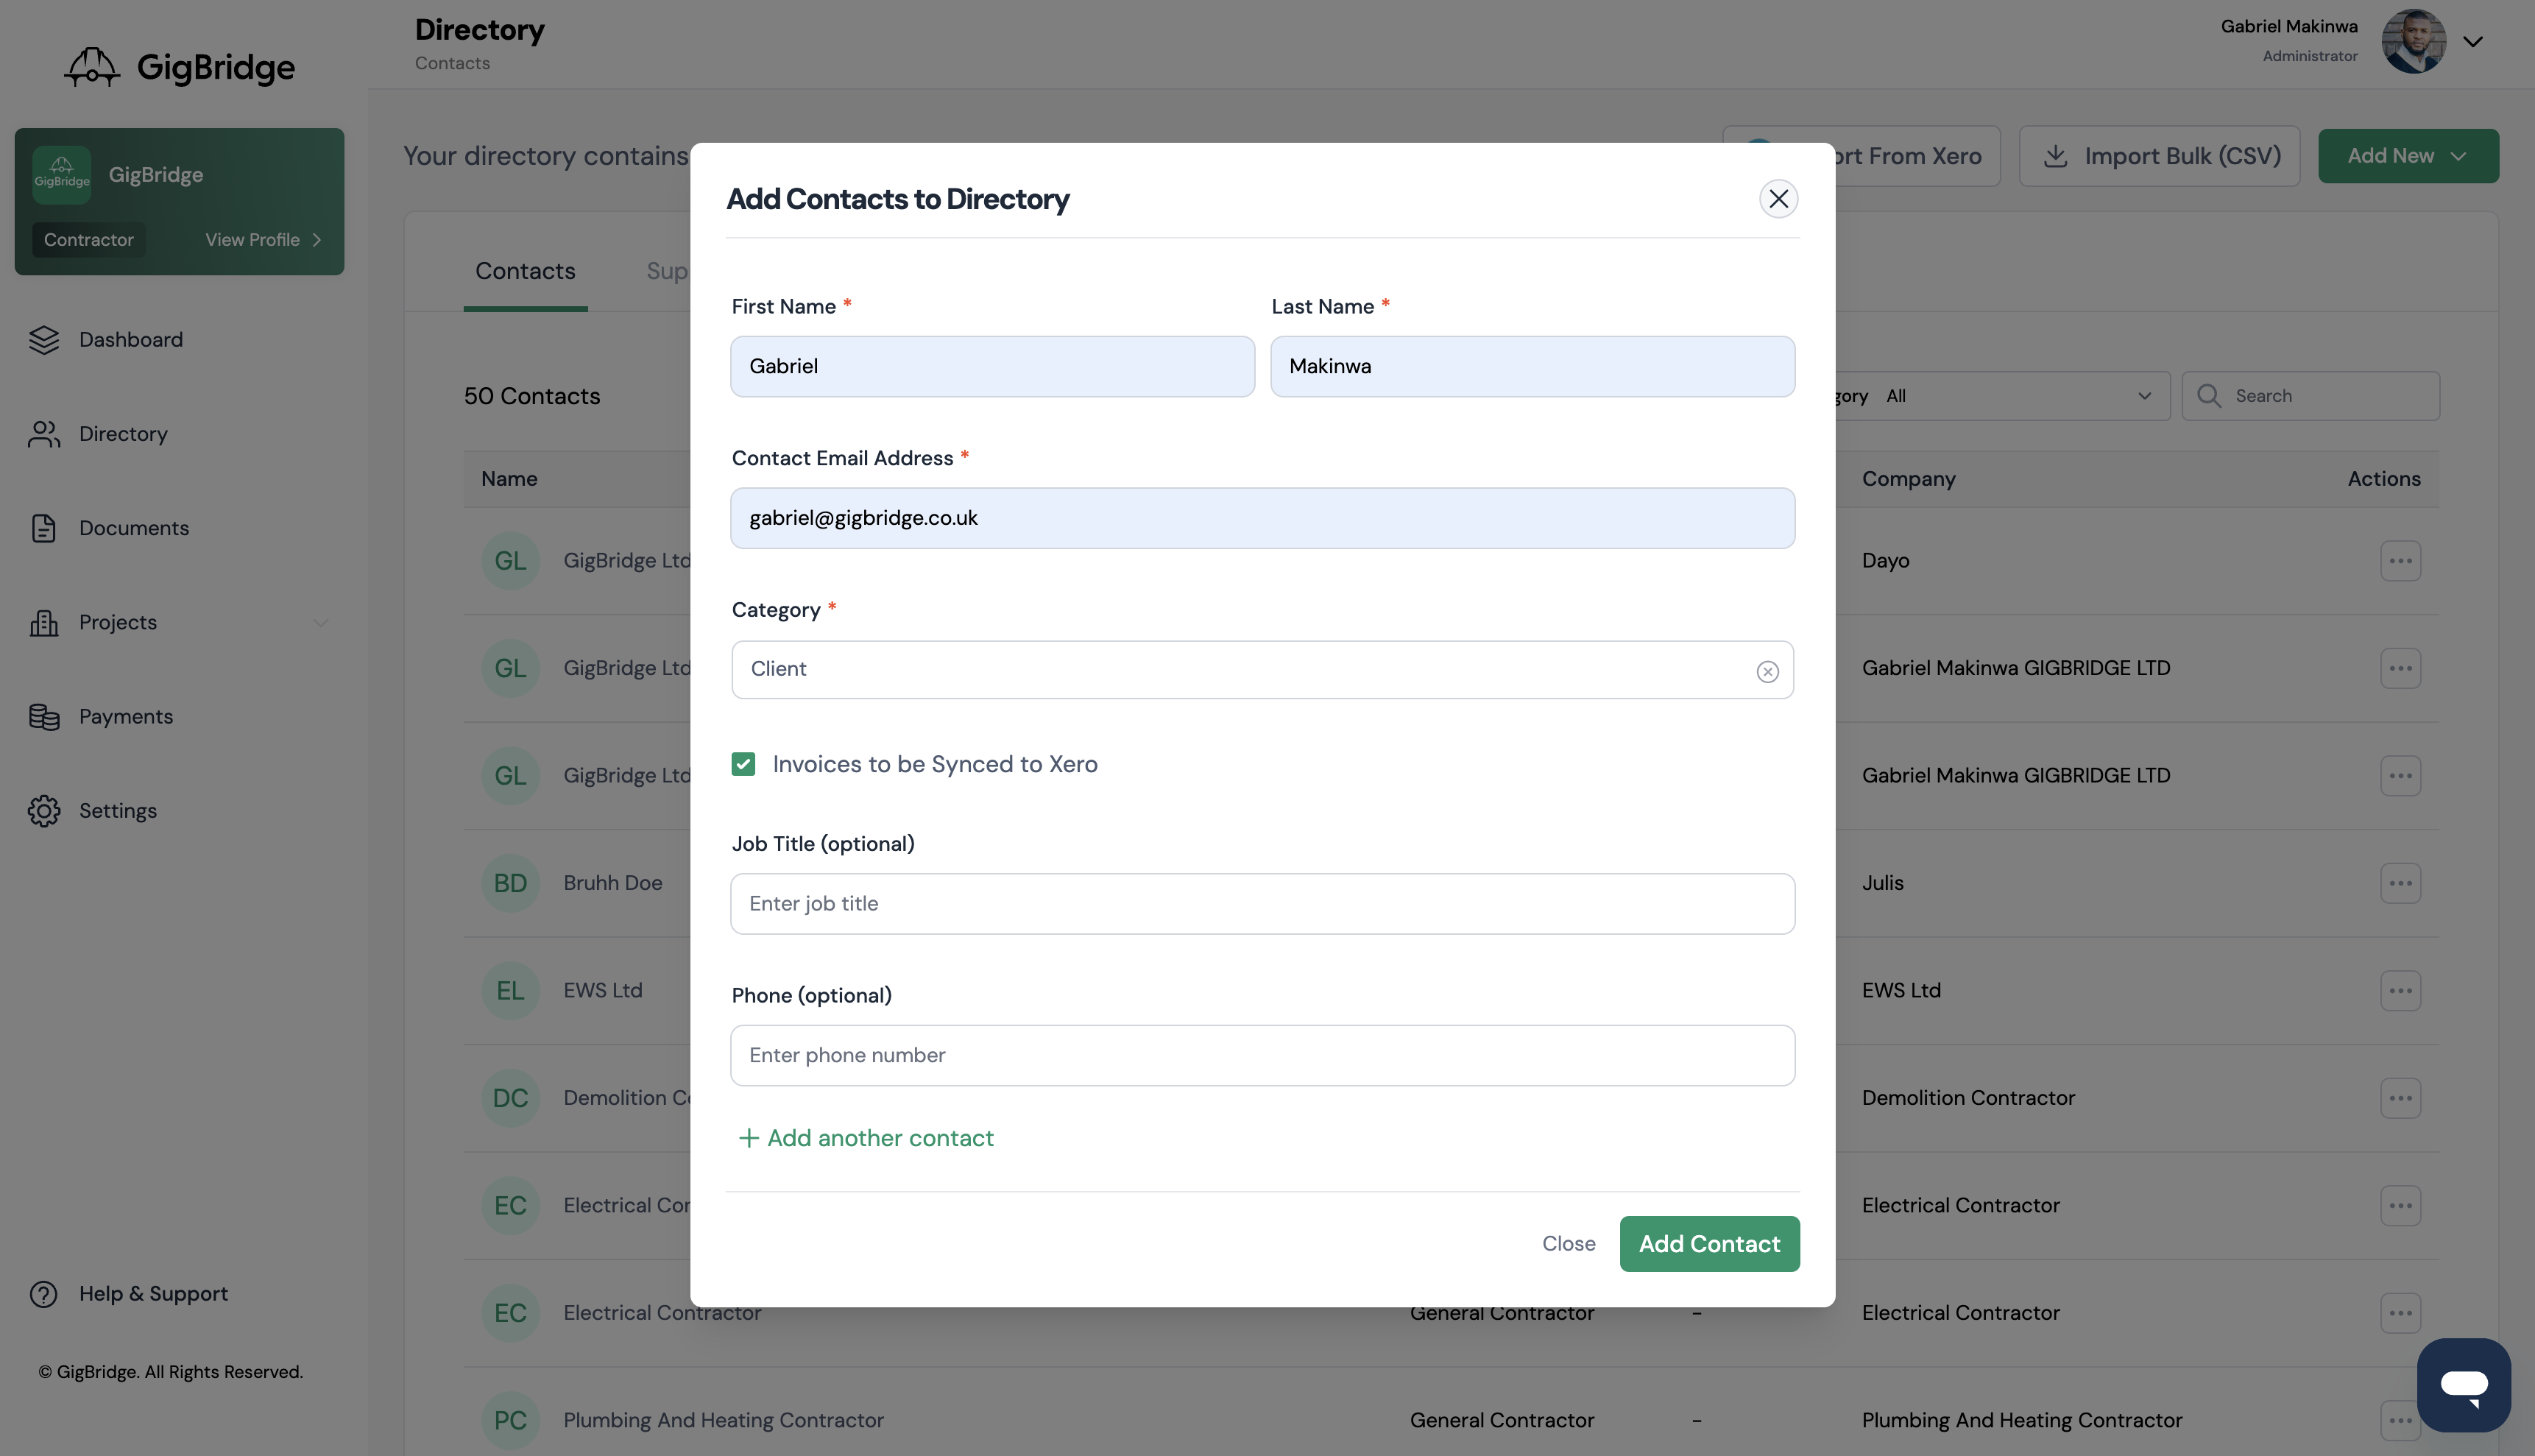
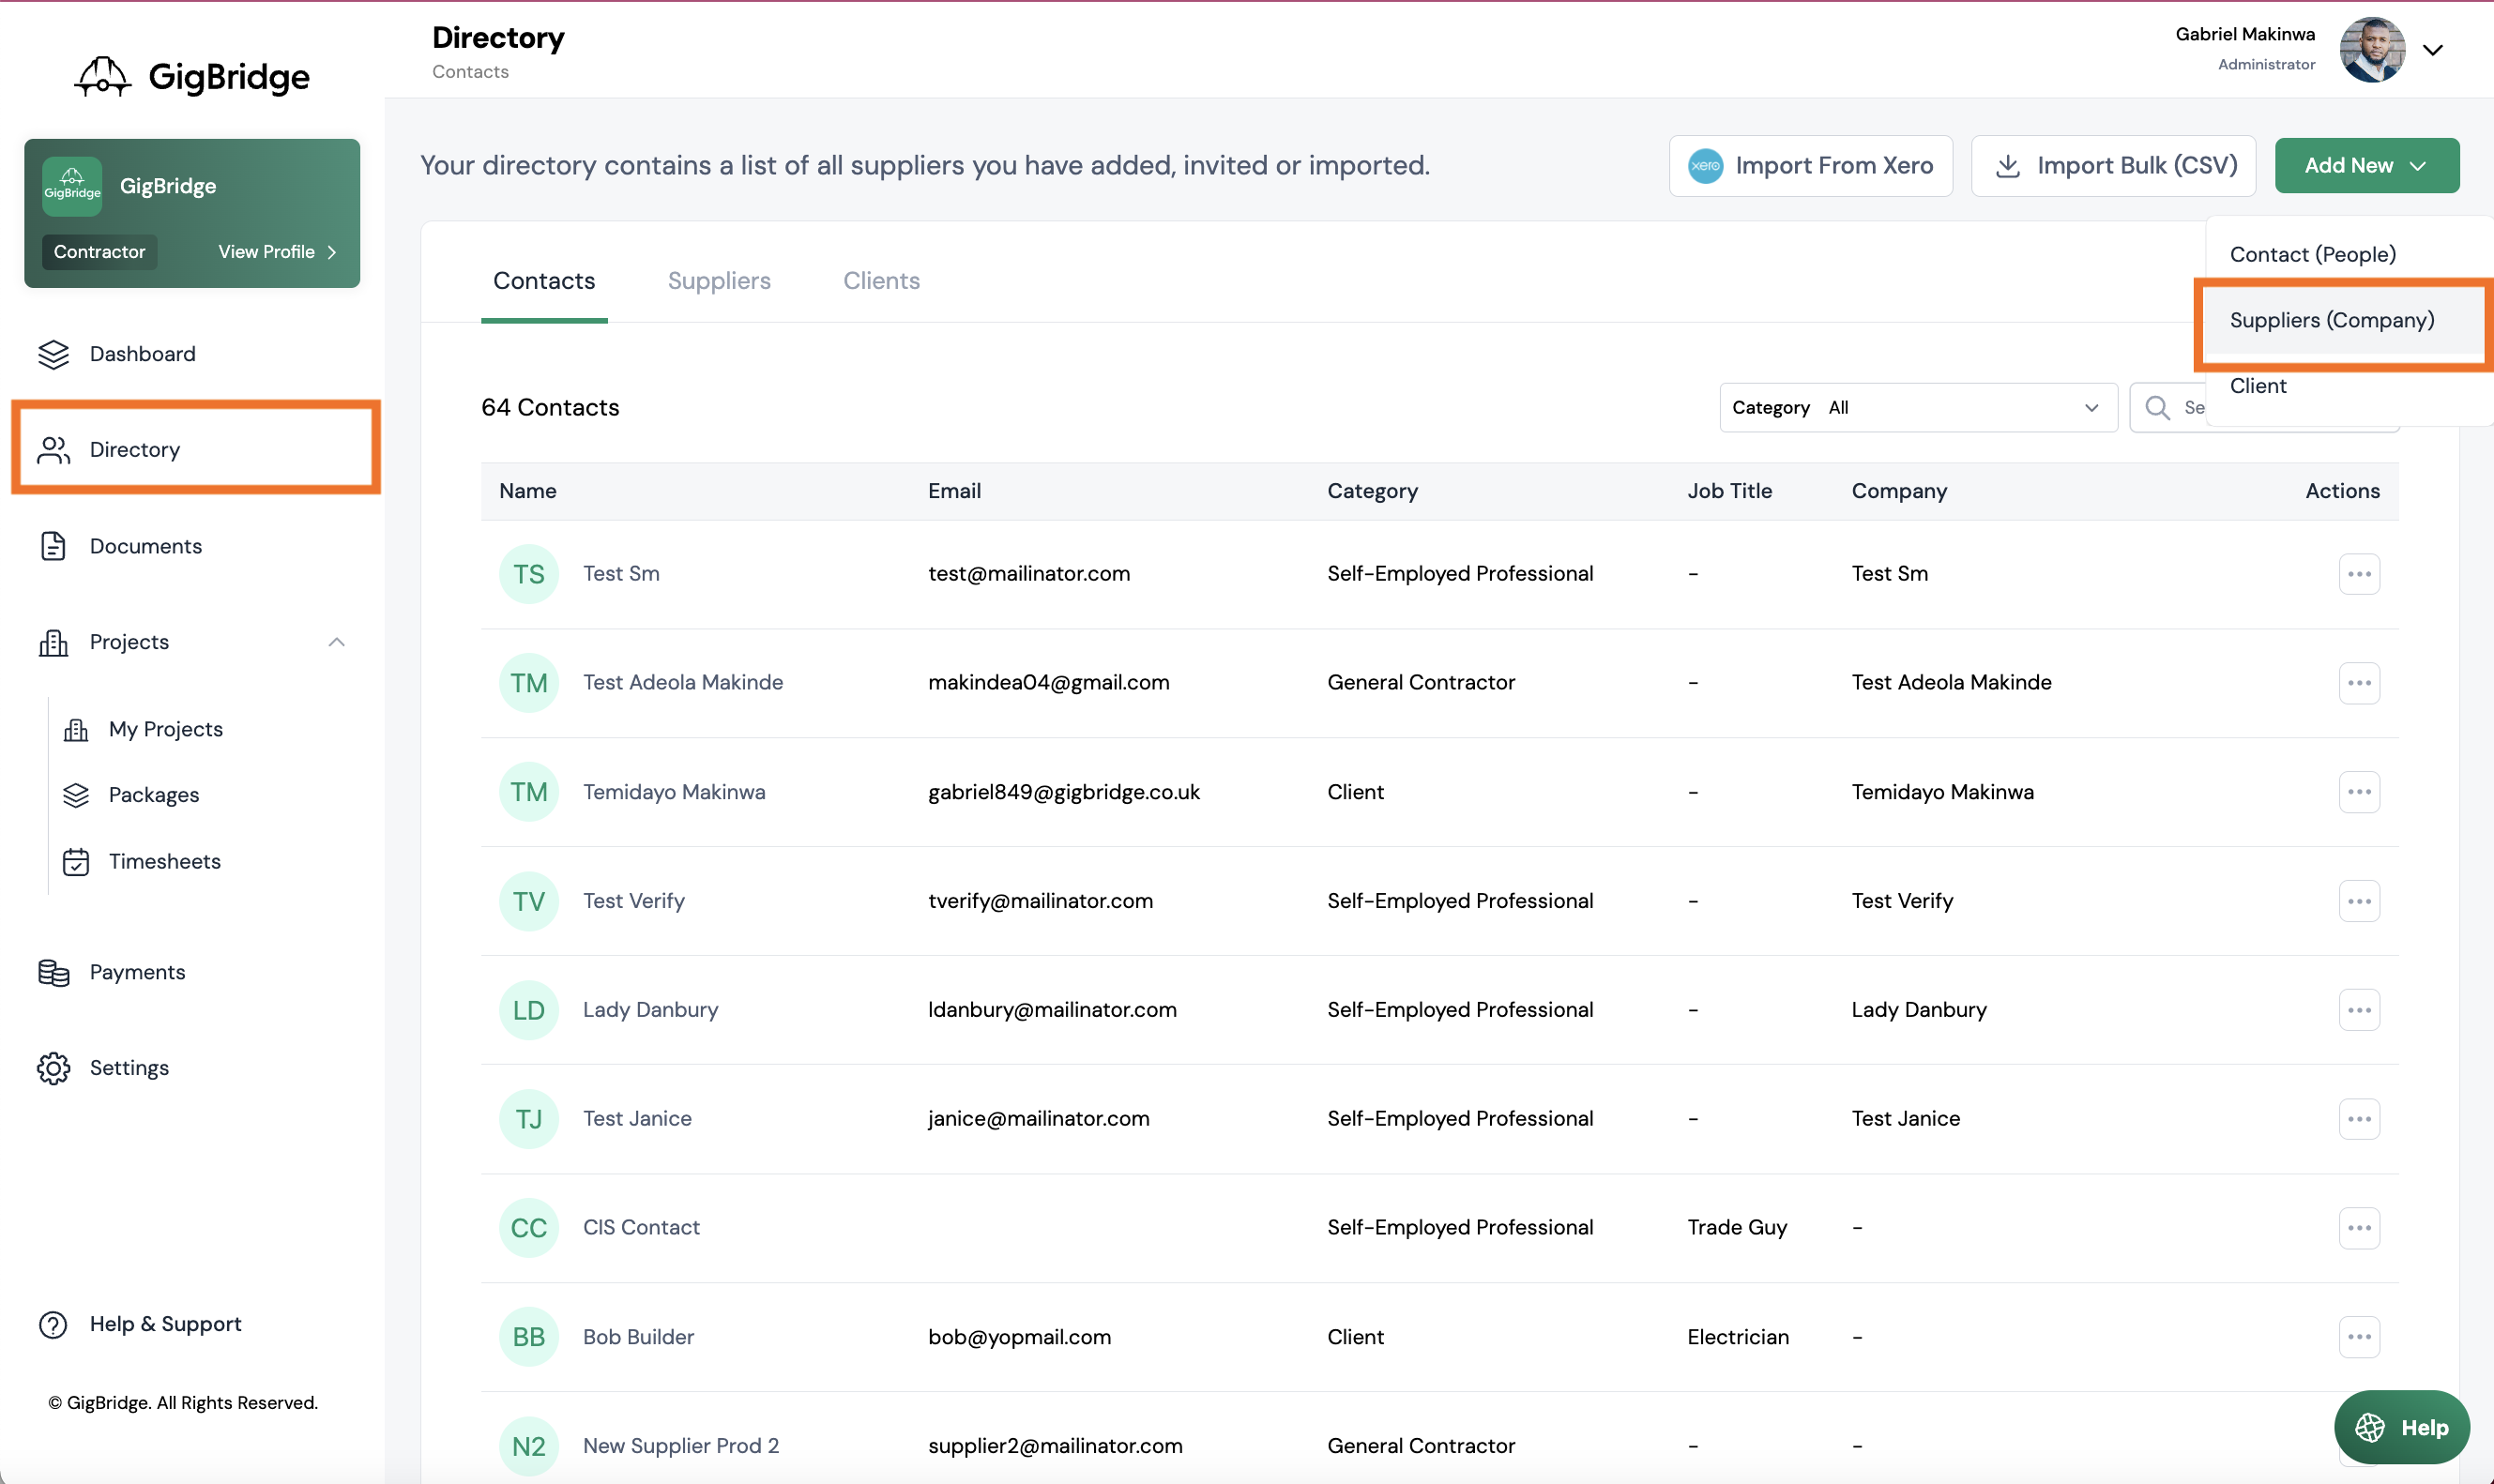
- Click on Directory in the side menu
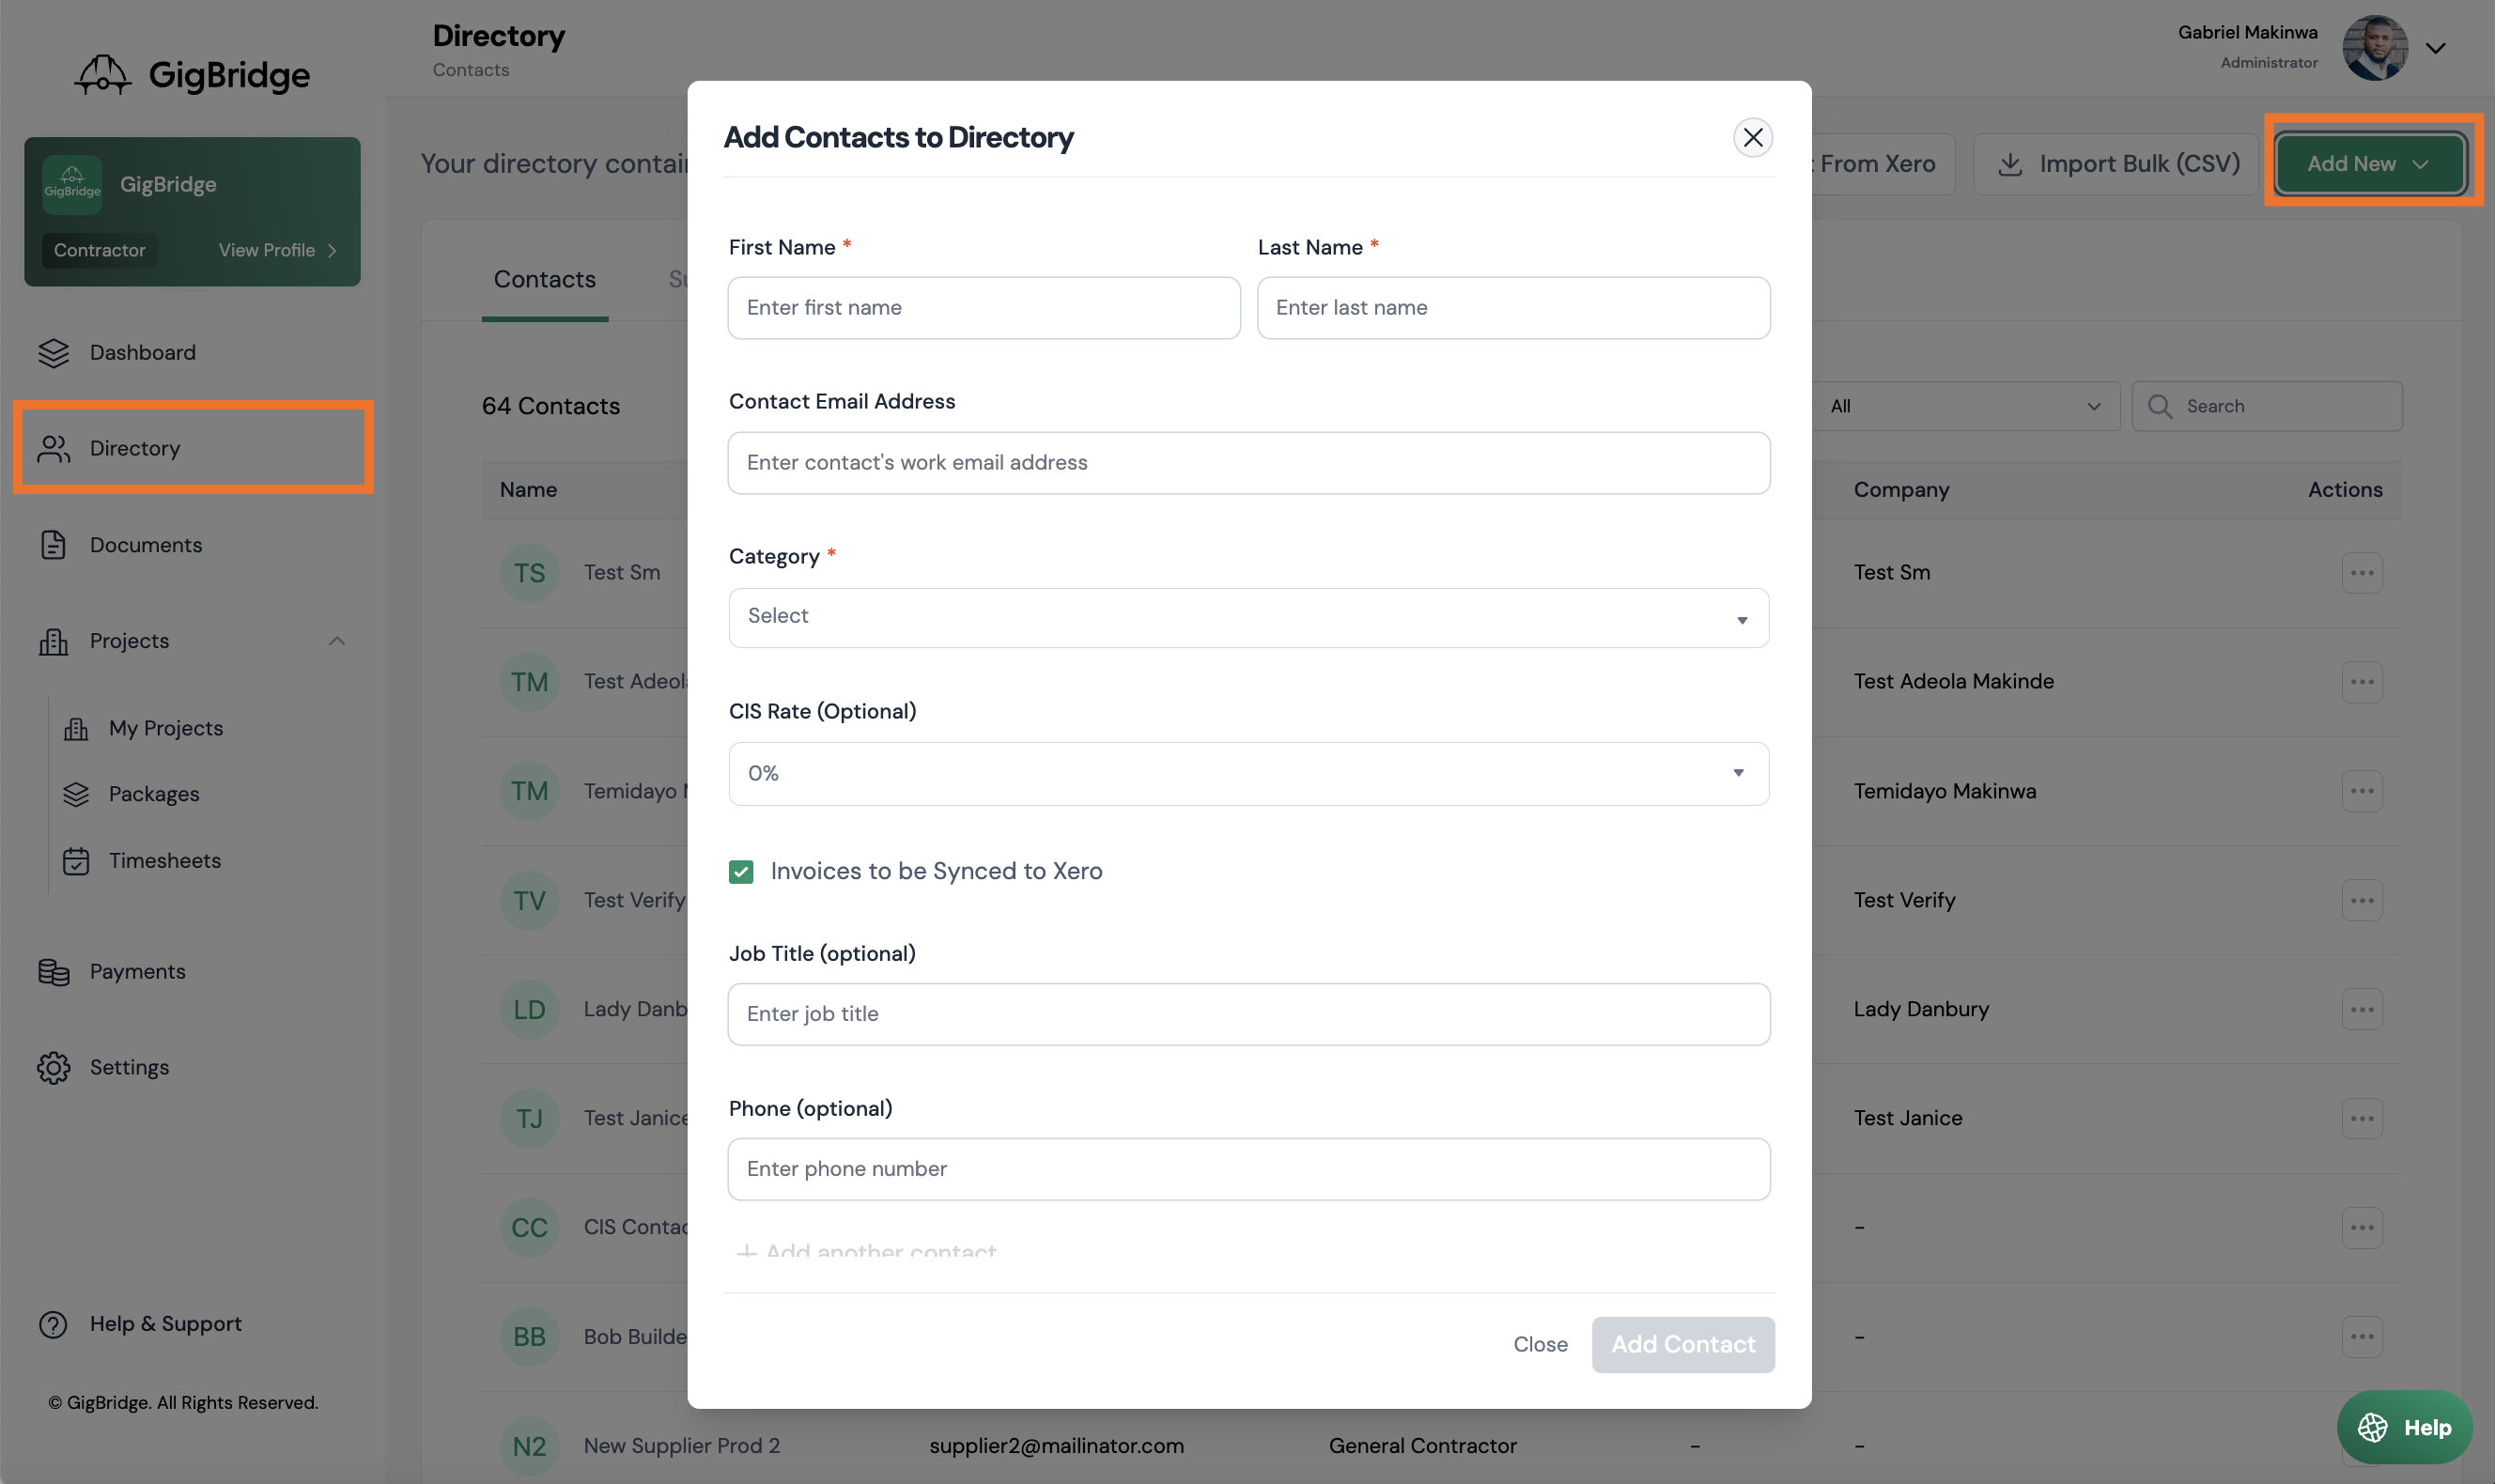
- Click on add new button in the right hand corner. Select Contact.
- Enter the contact details which include.
- First name
- Last Name
- Email Address
- Category
- Sync to Xero: You can uncheck this if you don't want invoice from this contact to be synced to Xero
- Job Title
- Phone Number
Once you’ve added a contact to your directory you can edit their details by clicking the 3 dots beside their name in the contacts tab.
Only the fields marked* are required.
Add contacts via Bulk Import
If you want to import several contacts at once it might be easier to use our Bulk Import feature. You can import a CSV with several clients and add them all at once.

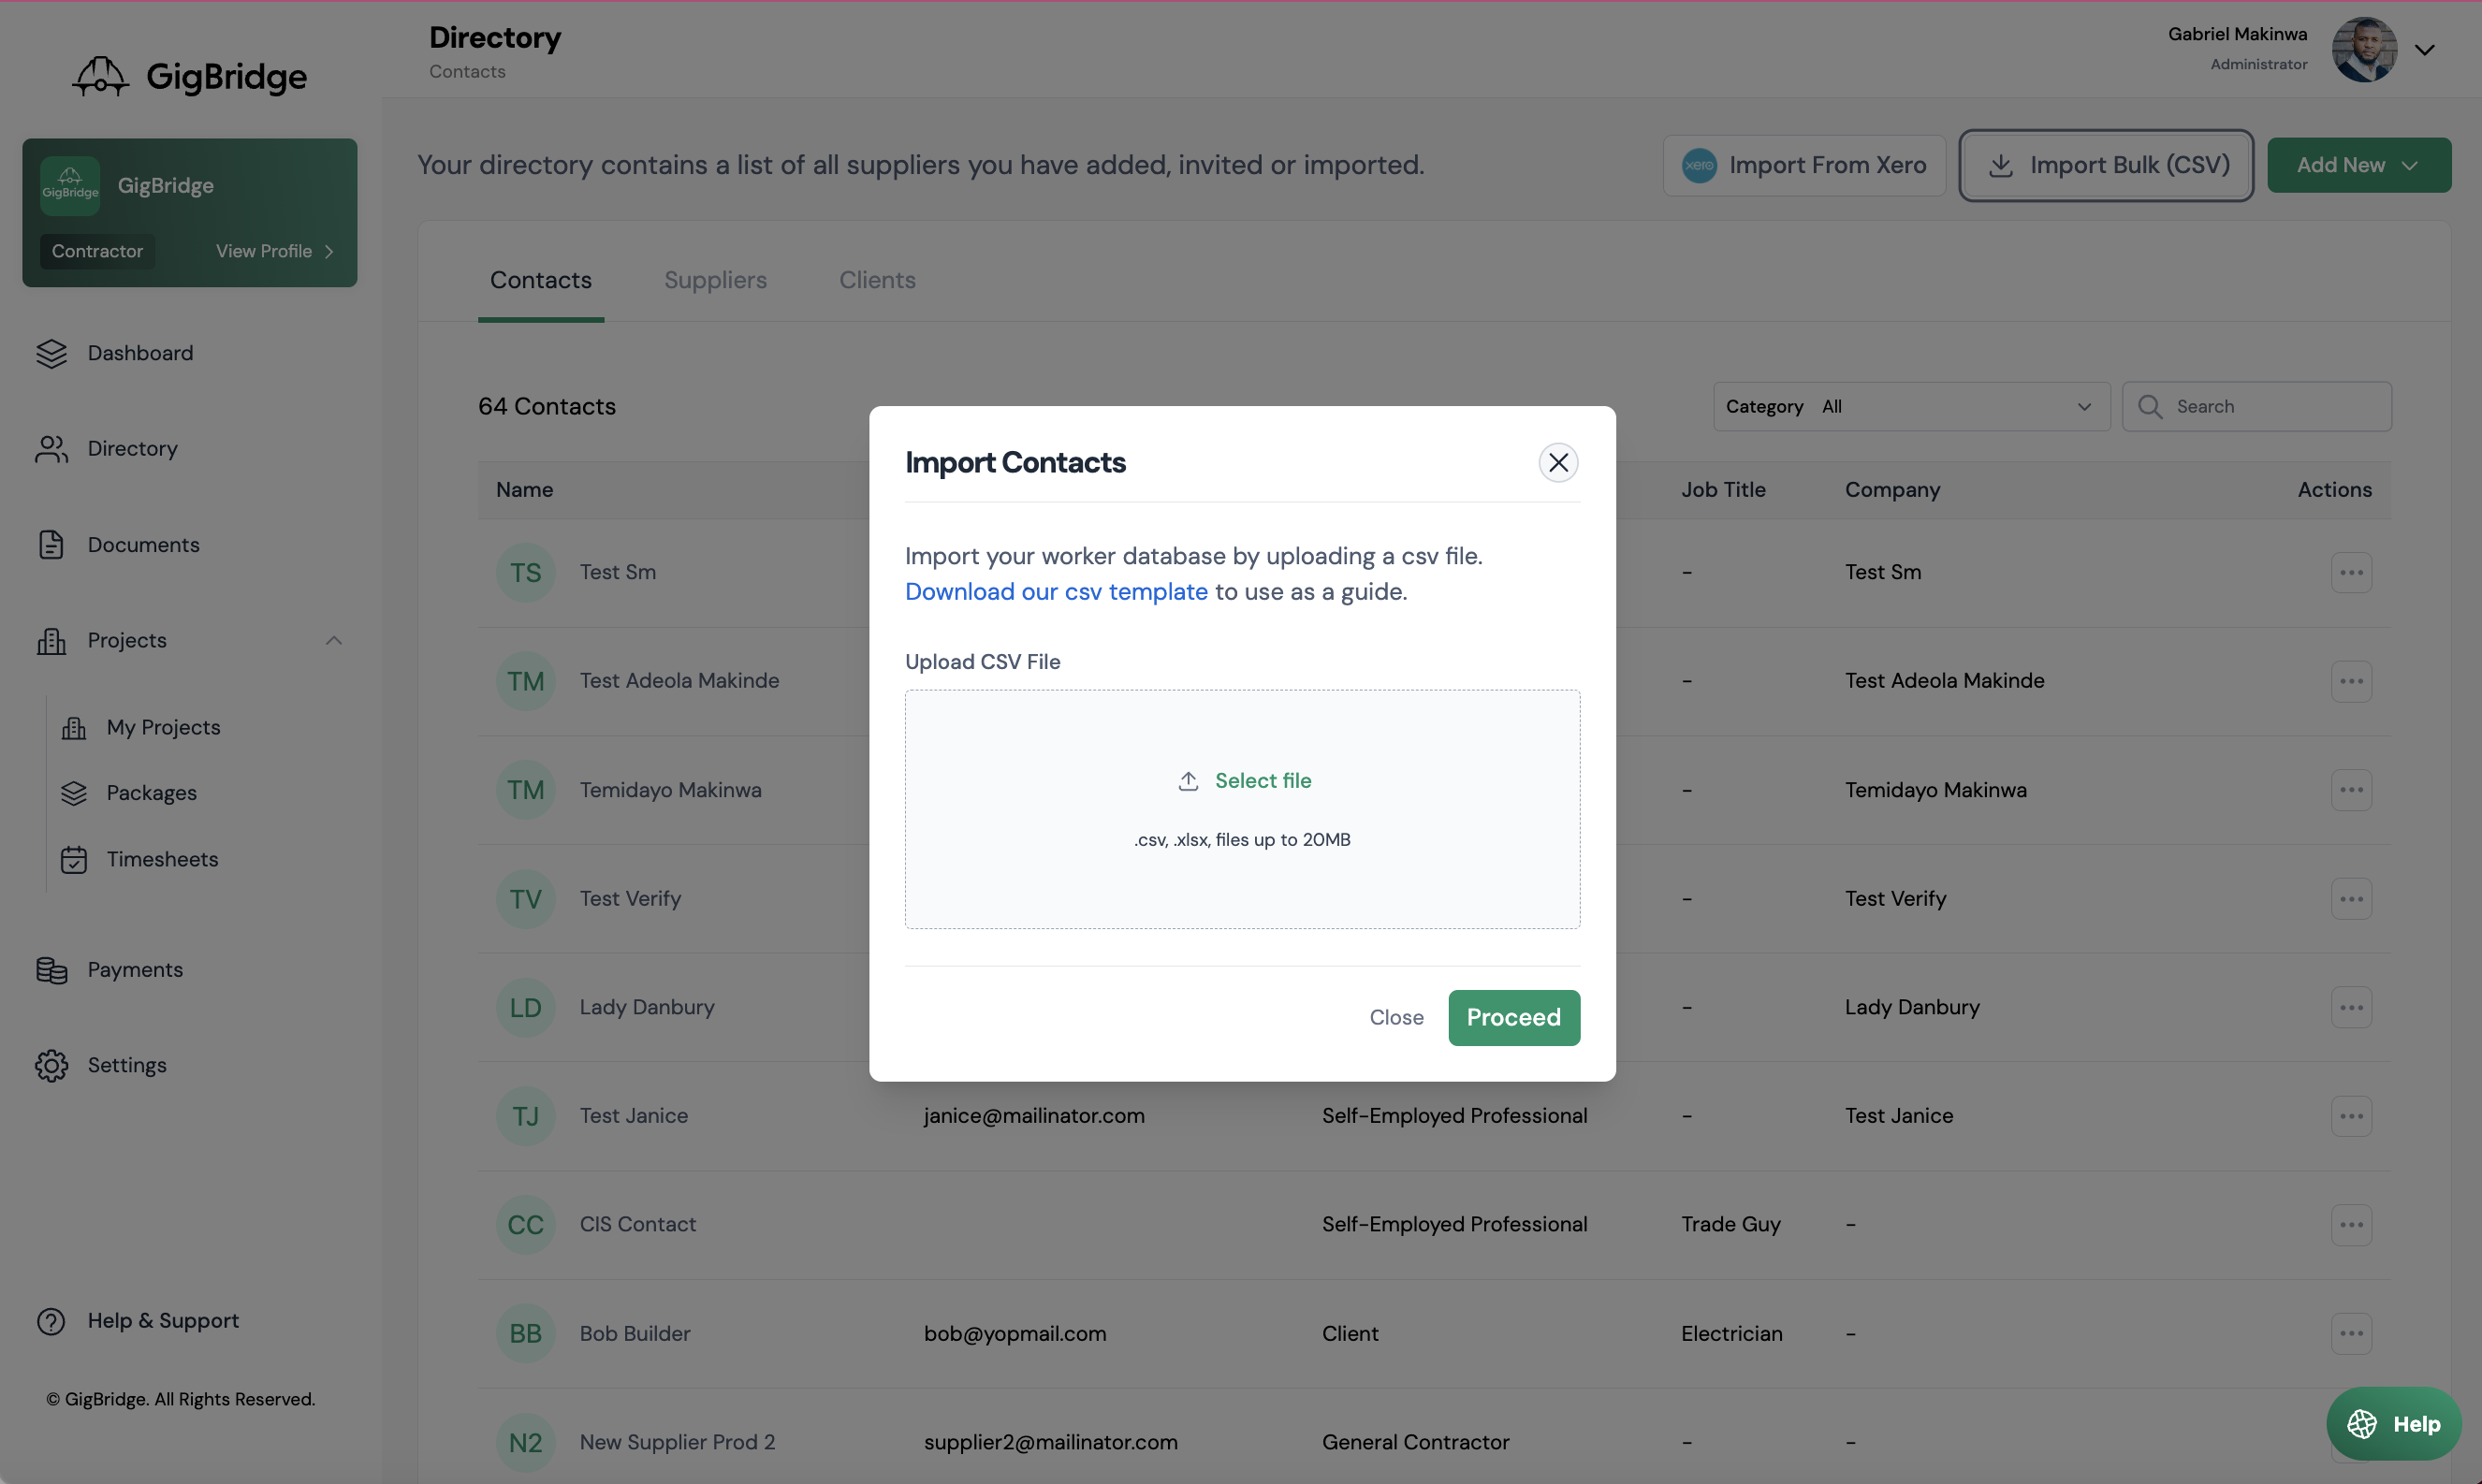
- In the Directory page, click on Import Bulk (CSV).
- You can download our CSV template and fill this in or upload your own CSV.
- The CSV can include the following details for each Client: Contact First Name, Contact First Name, Category, Job Title, Company, Email Address & Phone Number
Adding Suppliers
To add a supplier individually:
- Click on Directory in the side menu
- Click on add new button in the right hand corner. Select Supplier.
- Enter the supplier details which include
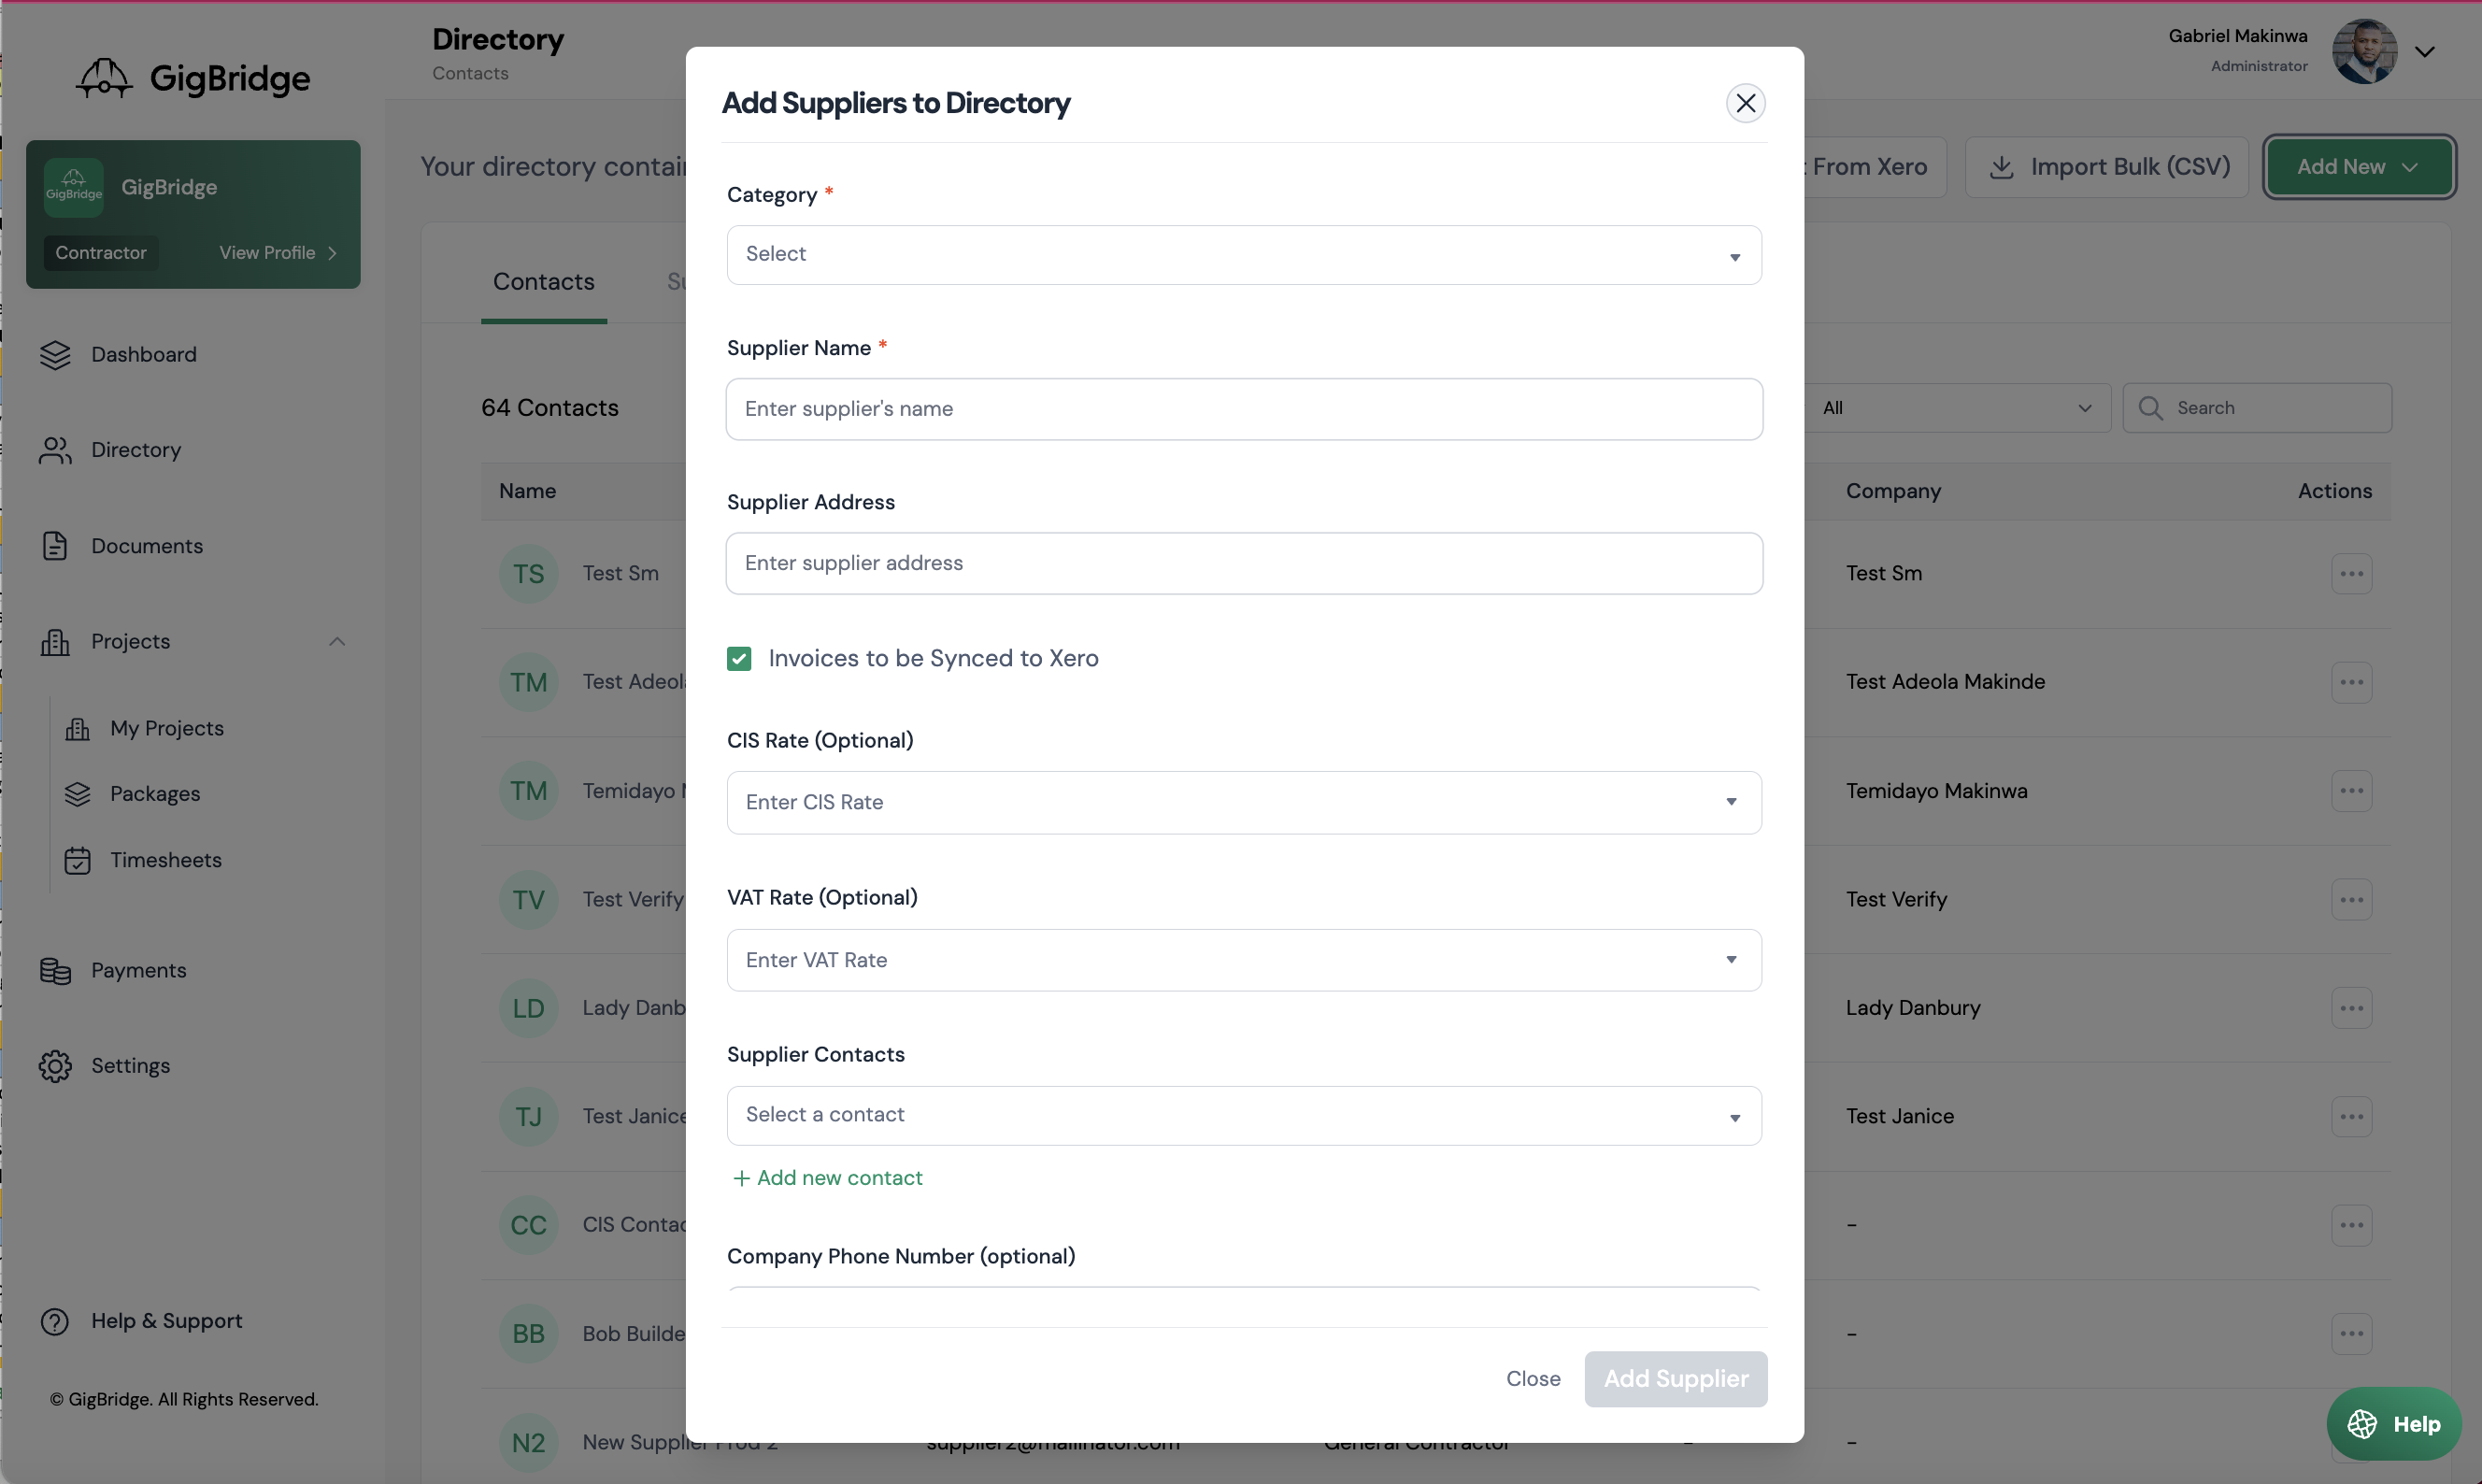
- Specialist Category: Enter the category of supplier you are adding. This date will be useful in future to show you which categories you are spending on.
- Supplier Name; The full company name; as you would expect it to be on official documents e.g. JL & Sons Ltd
- CIS Rate*: For companies that are CIS registered; add in their CIS rate. arrangements,
- VAT Rate**: The standard VAT rate for this supplier.
- Supplier contacts: This is where you can add a new existing contact to this supplier. You can send information from GigBridge to this contact in future.
- Phone Number: This is a phone number for the company.
Add suppliers via Bulk Import
If you want to import several suppliers at once it might be easier to use our Bulk Import feature. You can import a CSV with several suppliers and add them all at once.
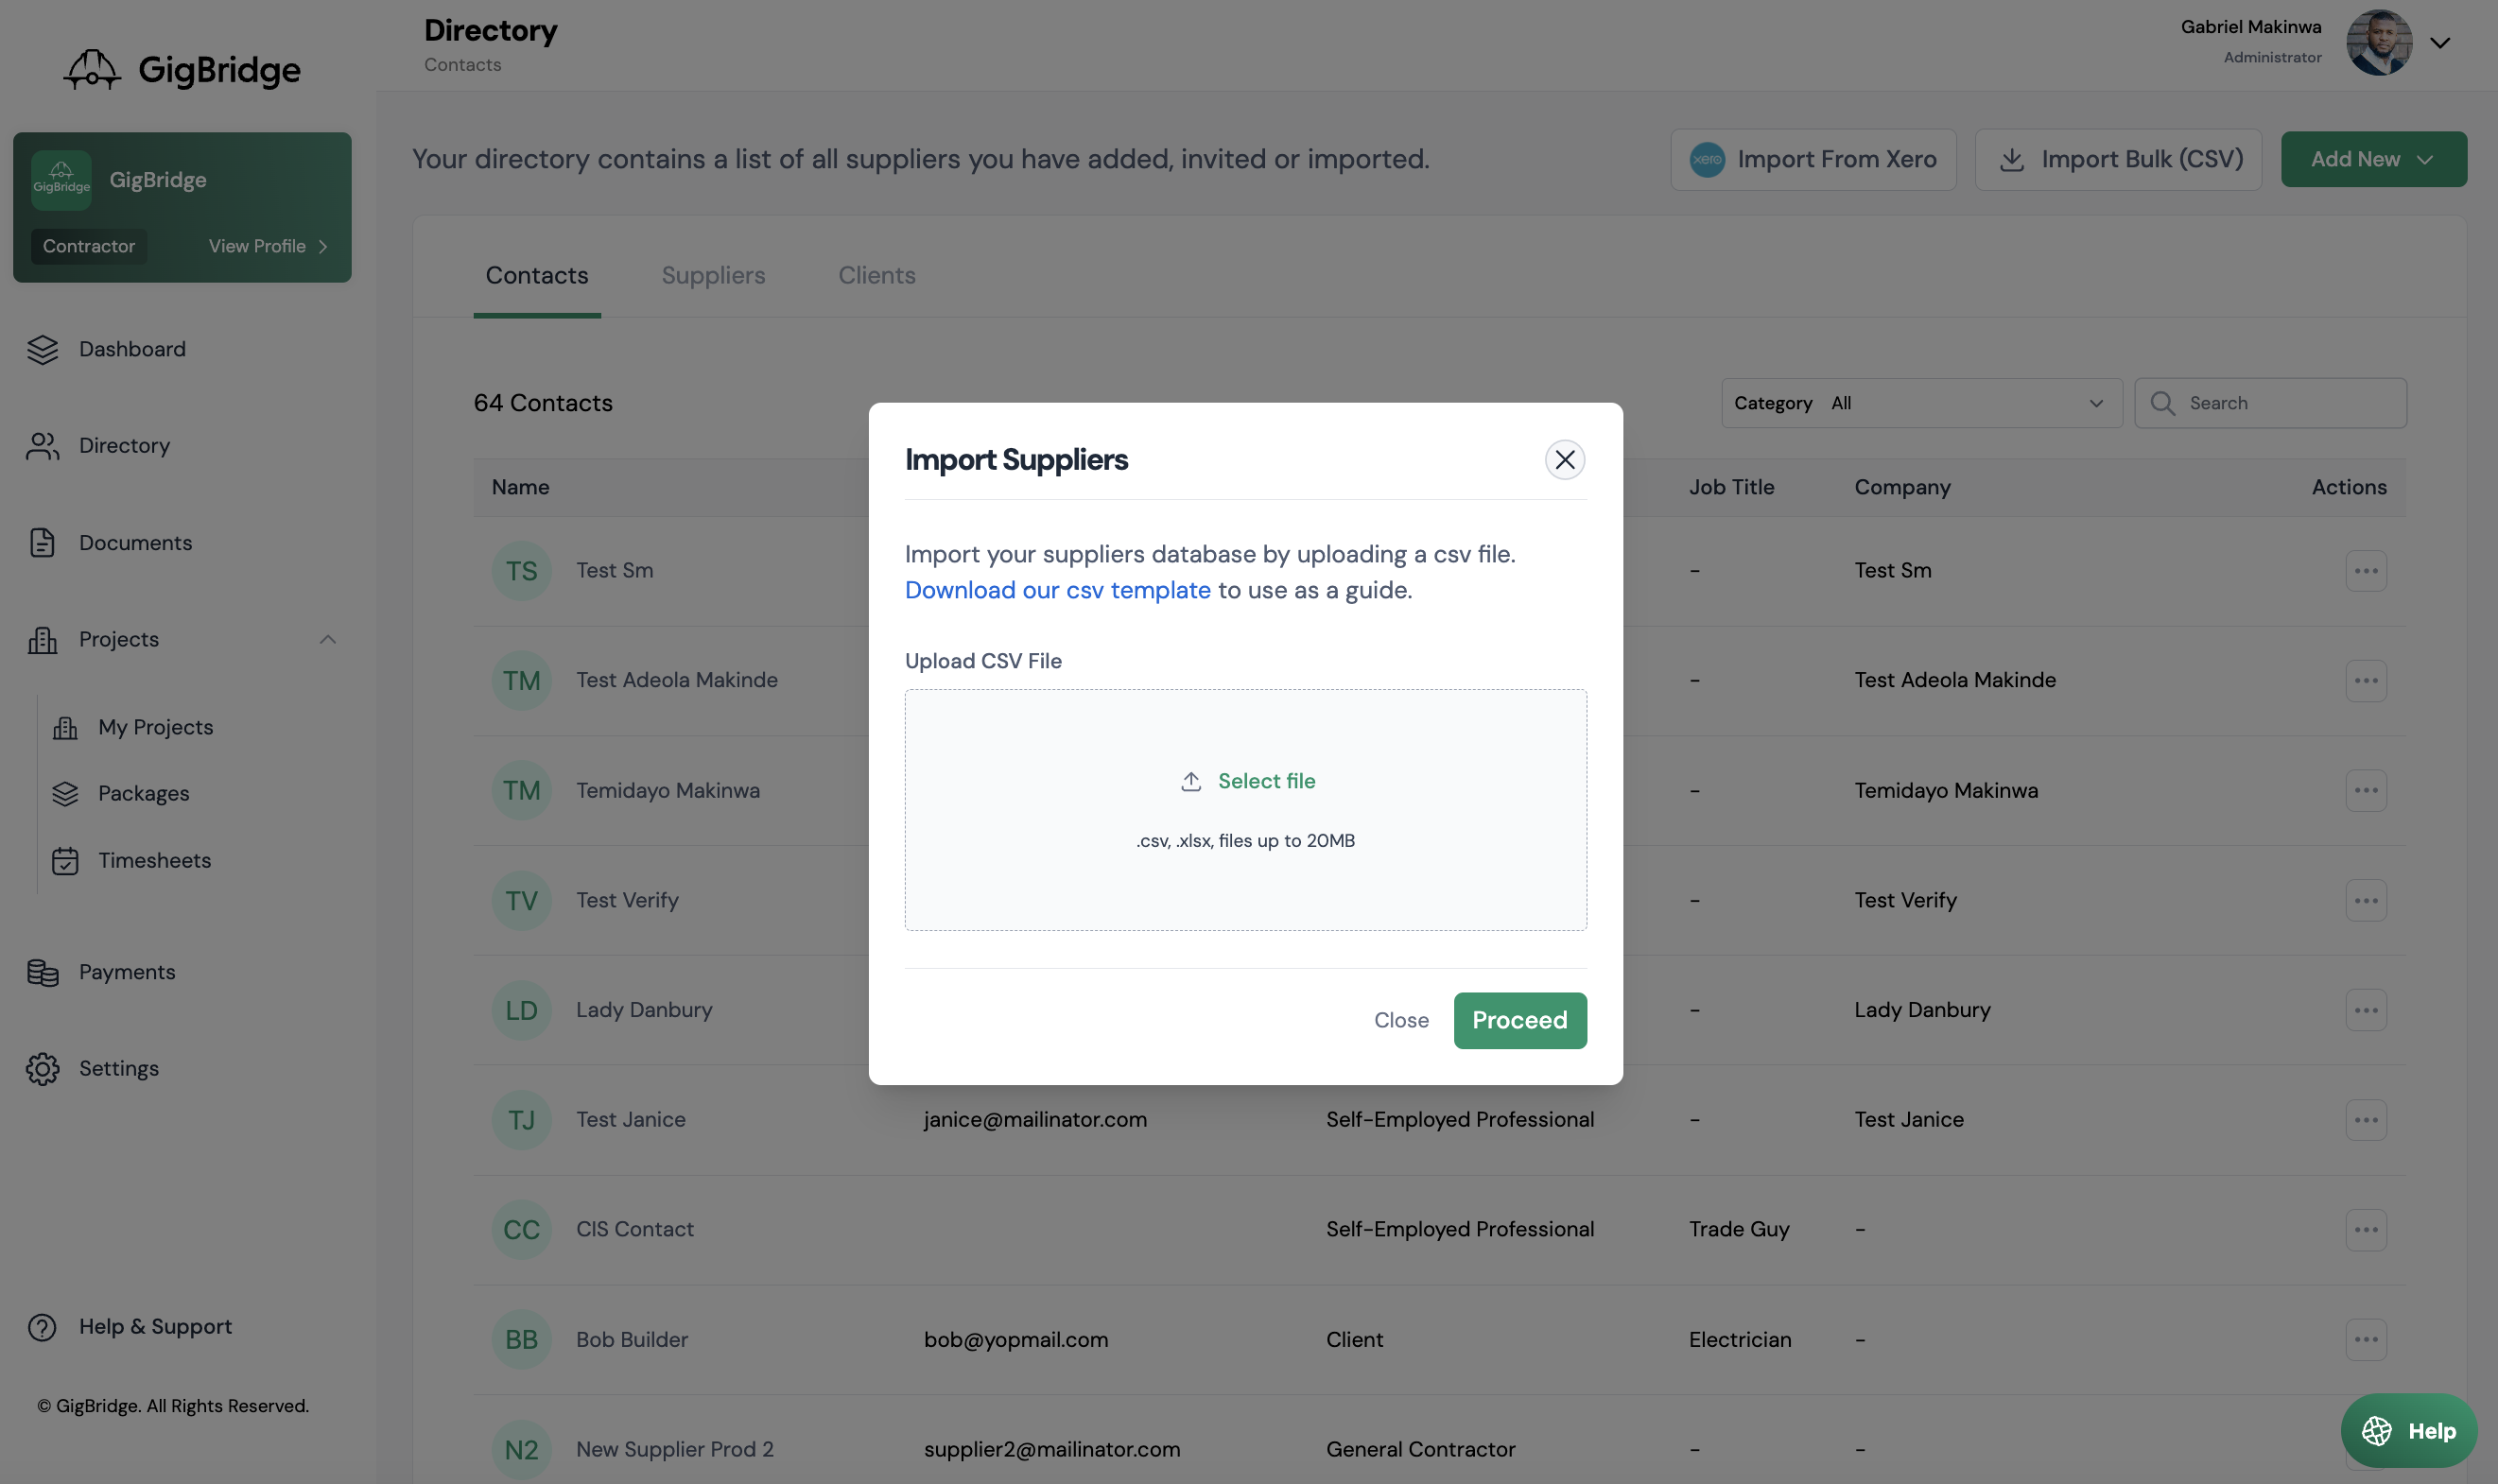
- In the Directory page, click on Import Bulk (CSV).
- You can download our CSV template and fill this in or upload your own CSV.
- The CSV can have the following details for each supplier: Supplier Name, Supplier Category3, CIS Rate, VAT Rate, Supplier Phone Number.
*CIS Rate: This will feed into documents like invoices generated from timesheets or any other arrangement where you are generating invoices for your suppliers/subcontractors e.g. self-billing.
*VAT Rate: When bills are sent to your accounting system. Each line item of the bill is mapped to an account. This account may have a default VAT rate which will override the actual VAT rate of the invoice. To avoid this entering the VAT rate here will override the account VAT rate for invoices from this supplier.
Adding Clients
To add a client individually:
- Click on Directory in the side menu
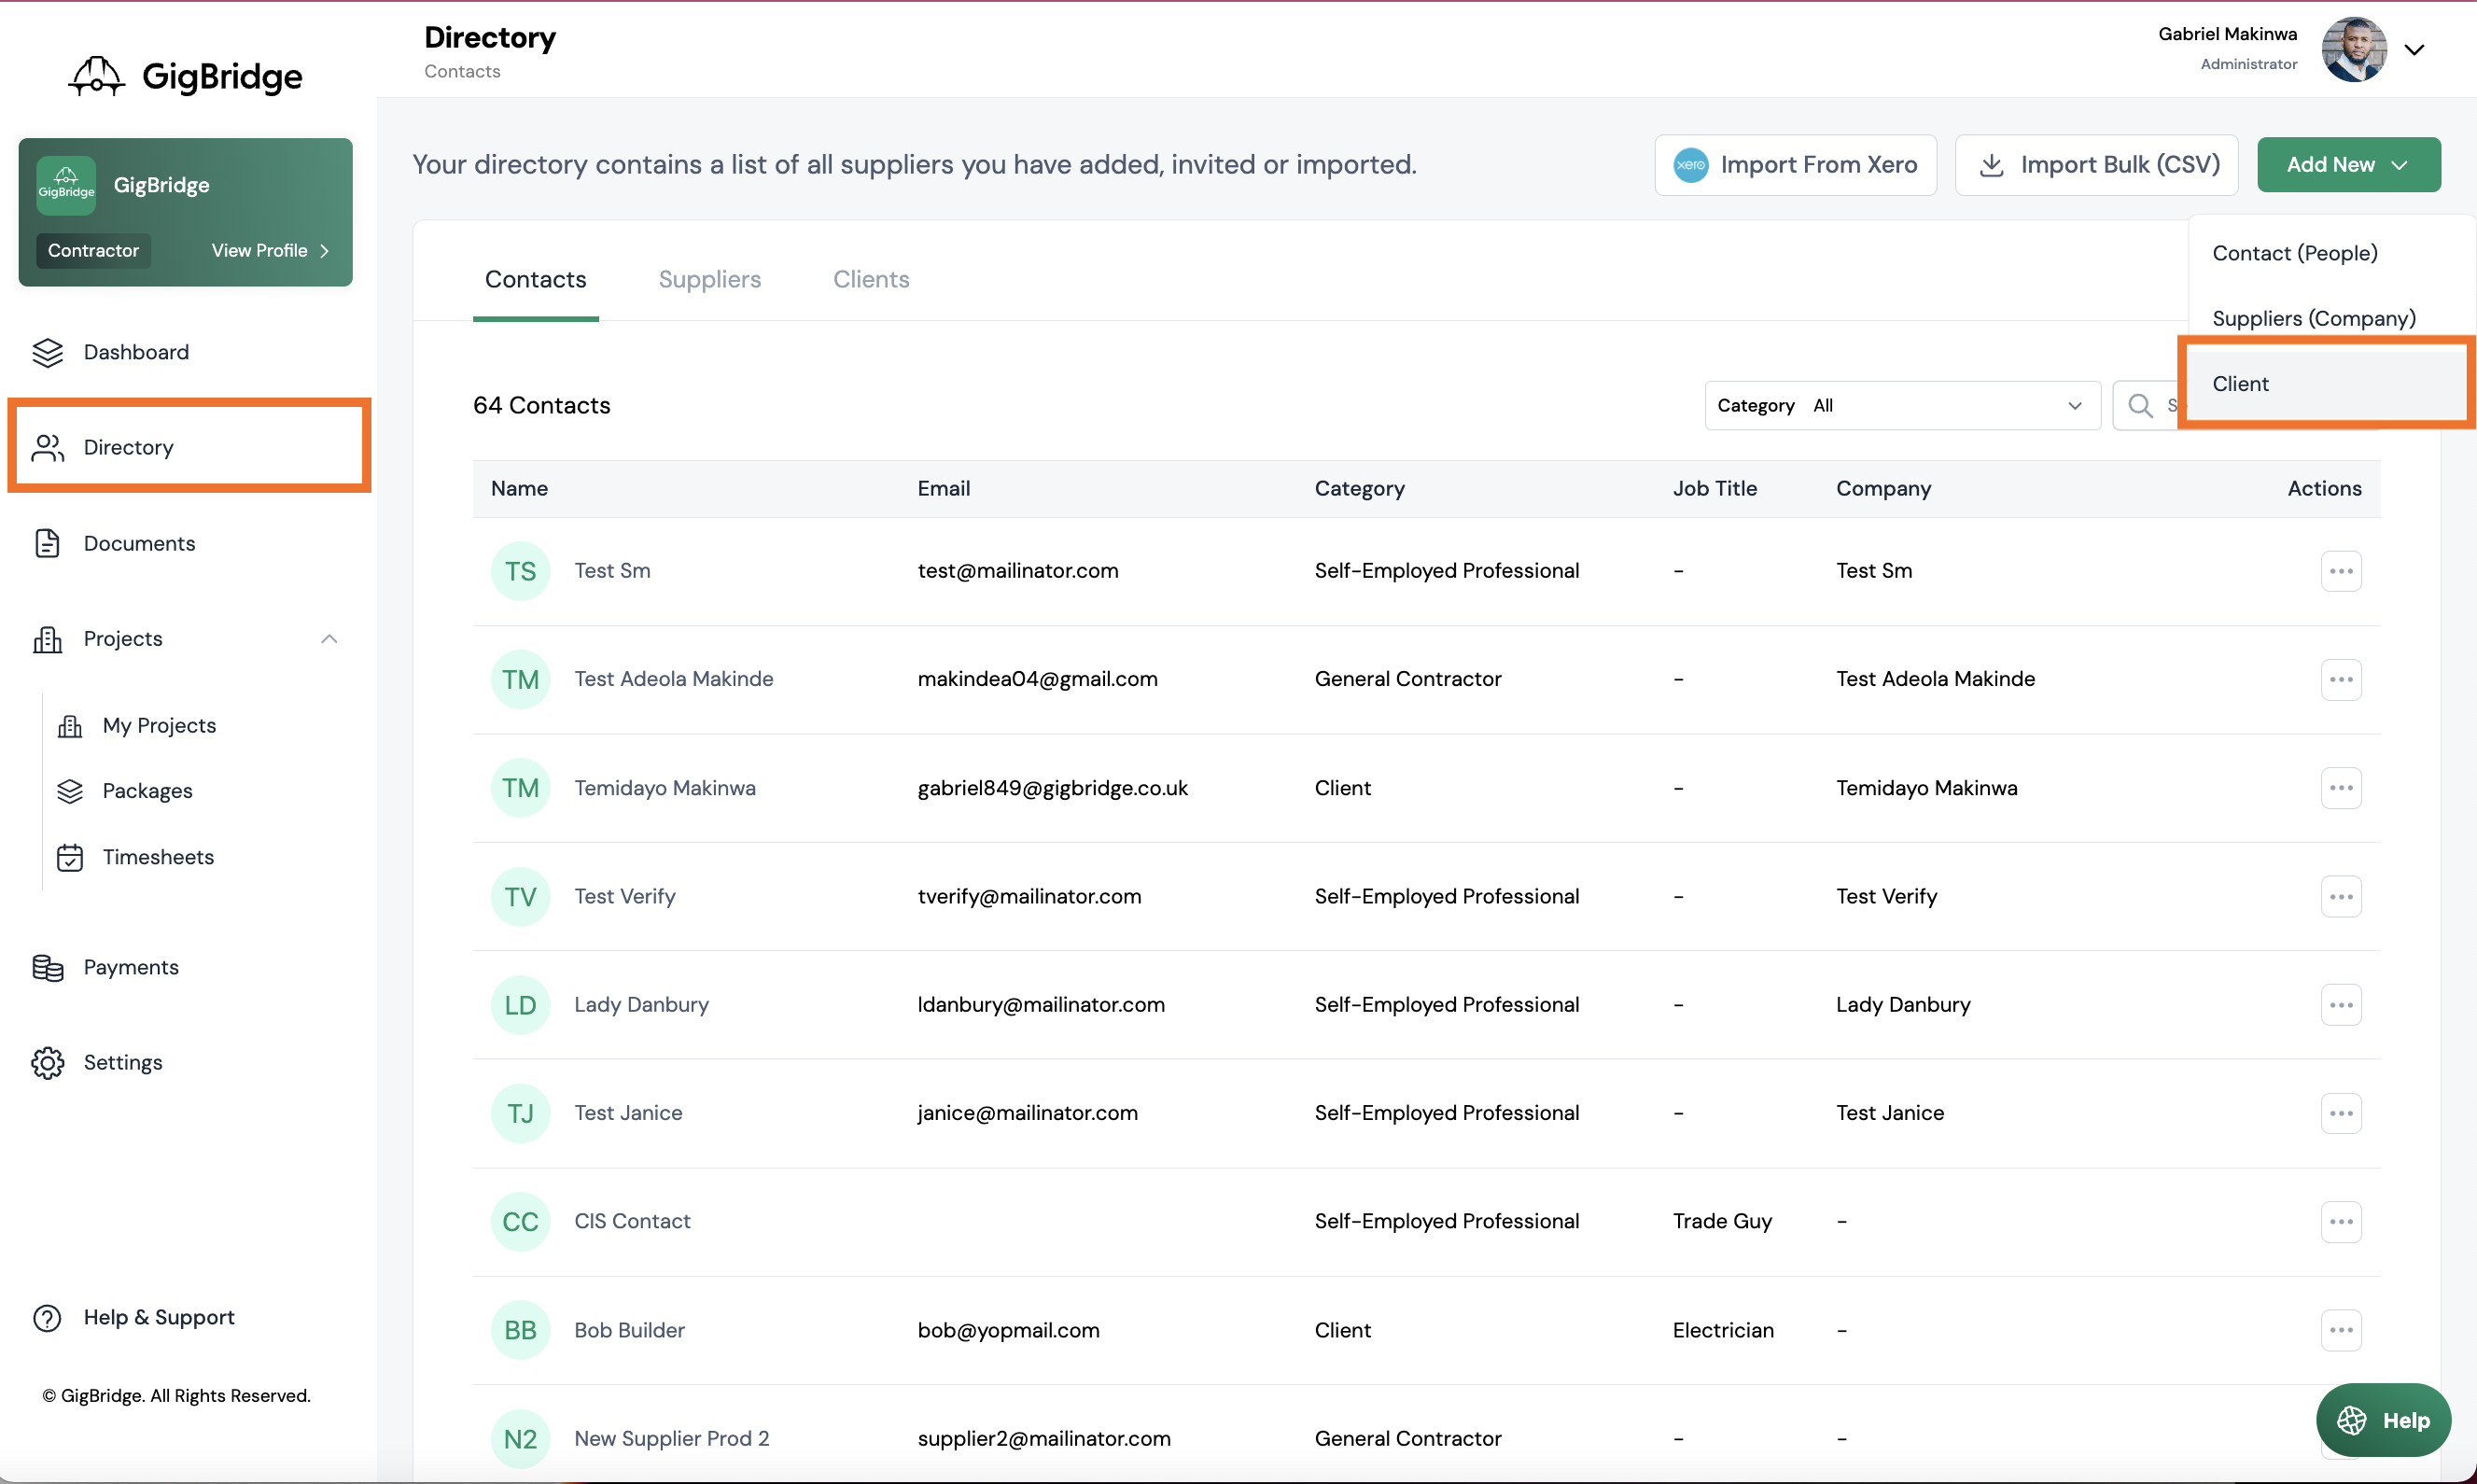
- Click on add new button in the right hand corner. Select Client.
- Enter the client details which include. The required fields are marked with a red asterix*
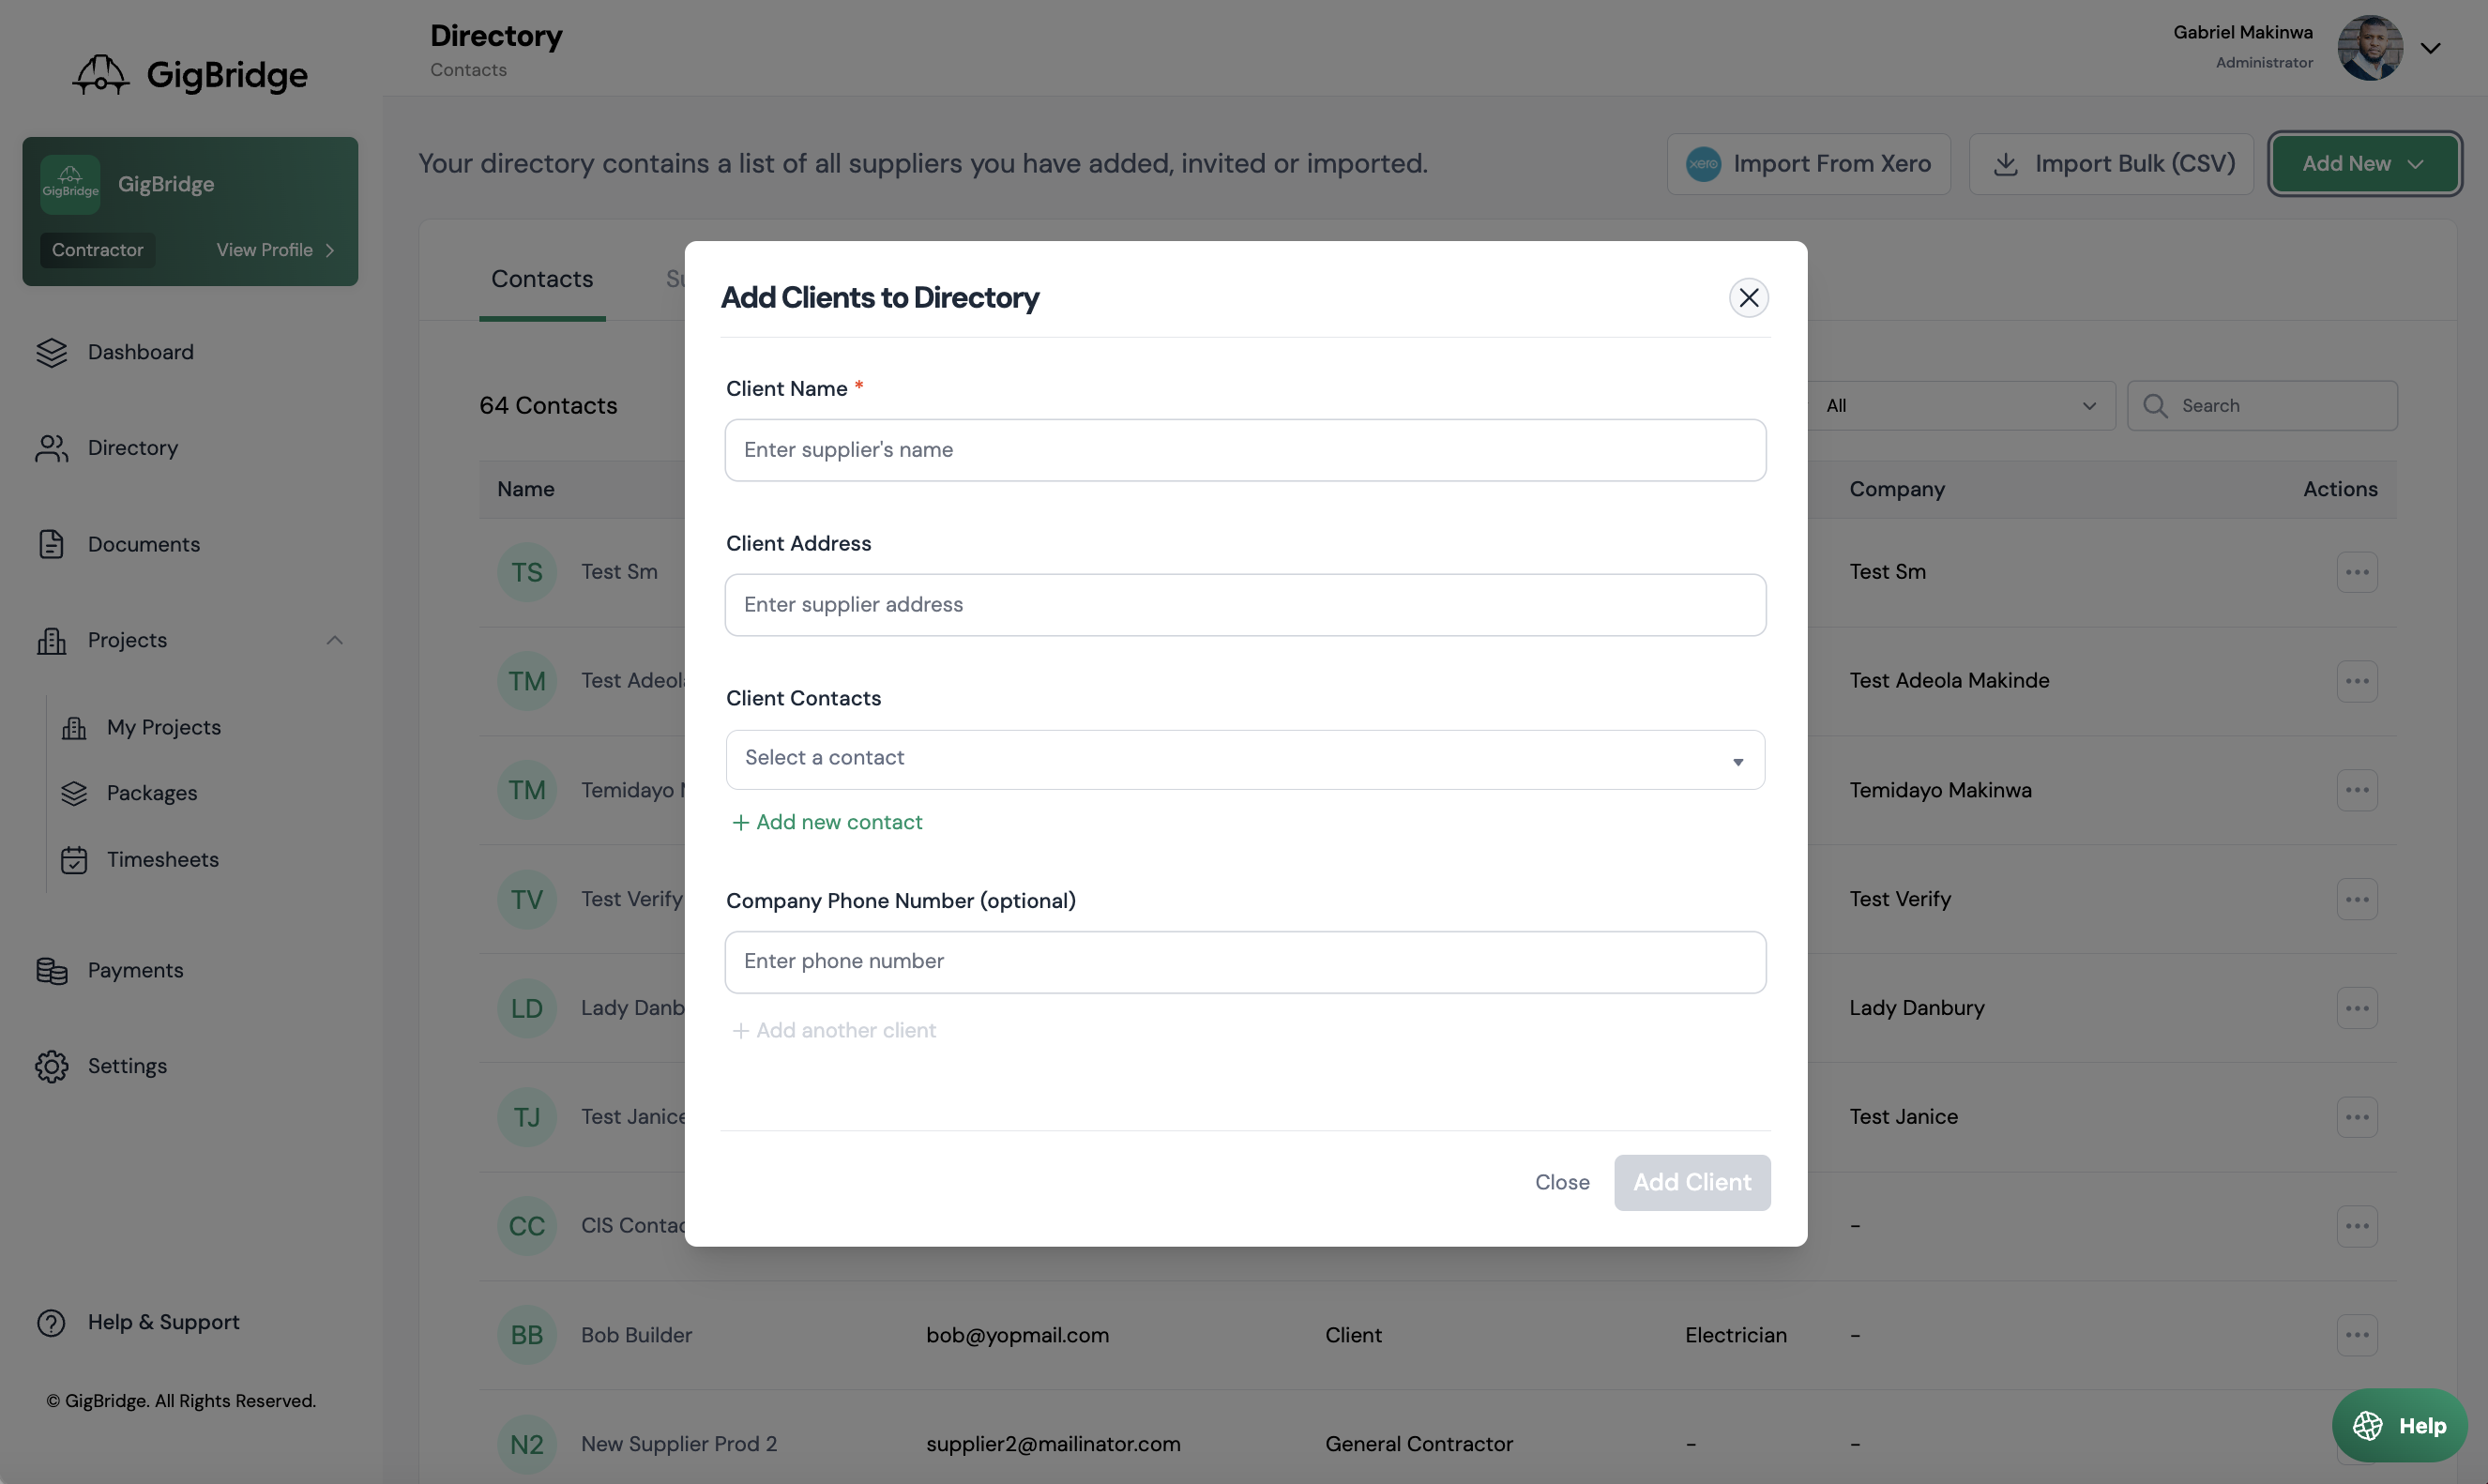
- Client Name:
- Client VAT Rate:
- Client Email Address: Select the default email address for this client.
- Select Contact: You can select an existing contact or add a new contact here.
- Client Phone Number
Only the fields marked with the red asterix* are required.
Once you’ve added a client you can edit their details by clicking the 3 dots beside their name in the clients tab.
Add clients via Bulk Import
If you want to import several clients at once it might be easier to use our Bulk Import feature. You can import a CSV with several clients and add them all at once.
- In the Directory page, click on Import Bulk (CSV).
- You can download our CSV template and fill this in or upload your own CSV.
- The CSV can include the following details for each Client: Client Name, Client Phone Number, Client Email Address
Importing from your accounting system:
Once you’ve connected your accounting system you’ll be prompted to import your contacts, suppliers & contacts. If you want to add more contacts after the initial import an admin can do this in the Integration settings page.