
Setting up the Xero integration with GigBridge
Overview
GigBridge makes it easy to process purchases and update your project cost reports and sync with your accounting system all in one workflow. Now you no longer have to enter data twice into your accounting system and then again into your project cost reports.
How to set up your Xero integration
Connecting to Xero
First ensure you already have an existing account on Xero. If you haven’t please register here: https://www.xero.com/uk/signup/
- Head to Settings tab on the left hand side.
- Click on the integrations tab in settings Integrations.
- Click on connect to Xero
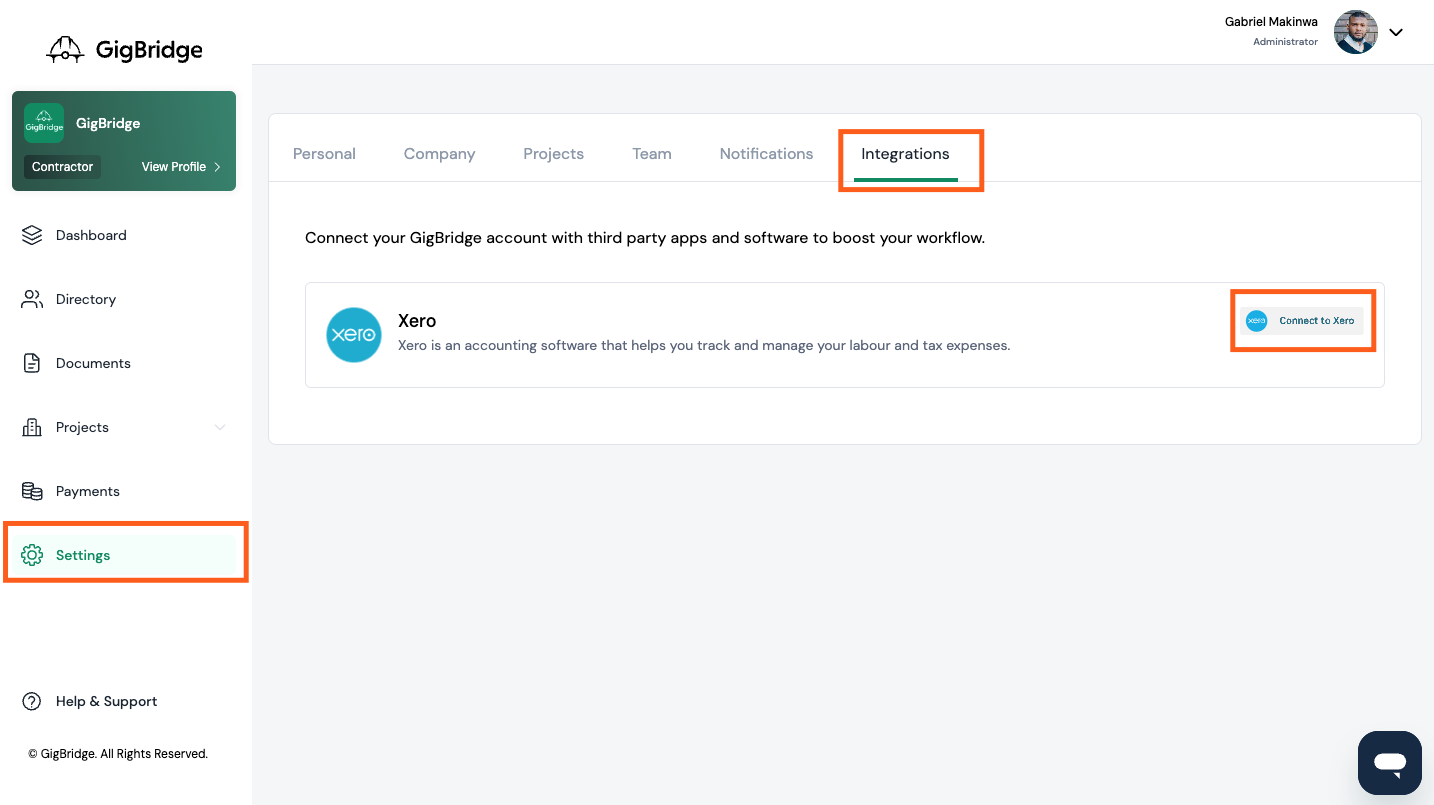
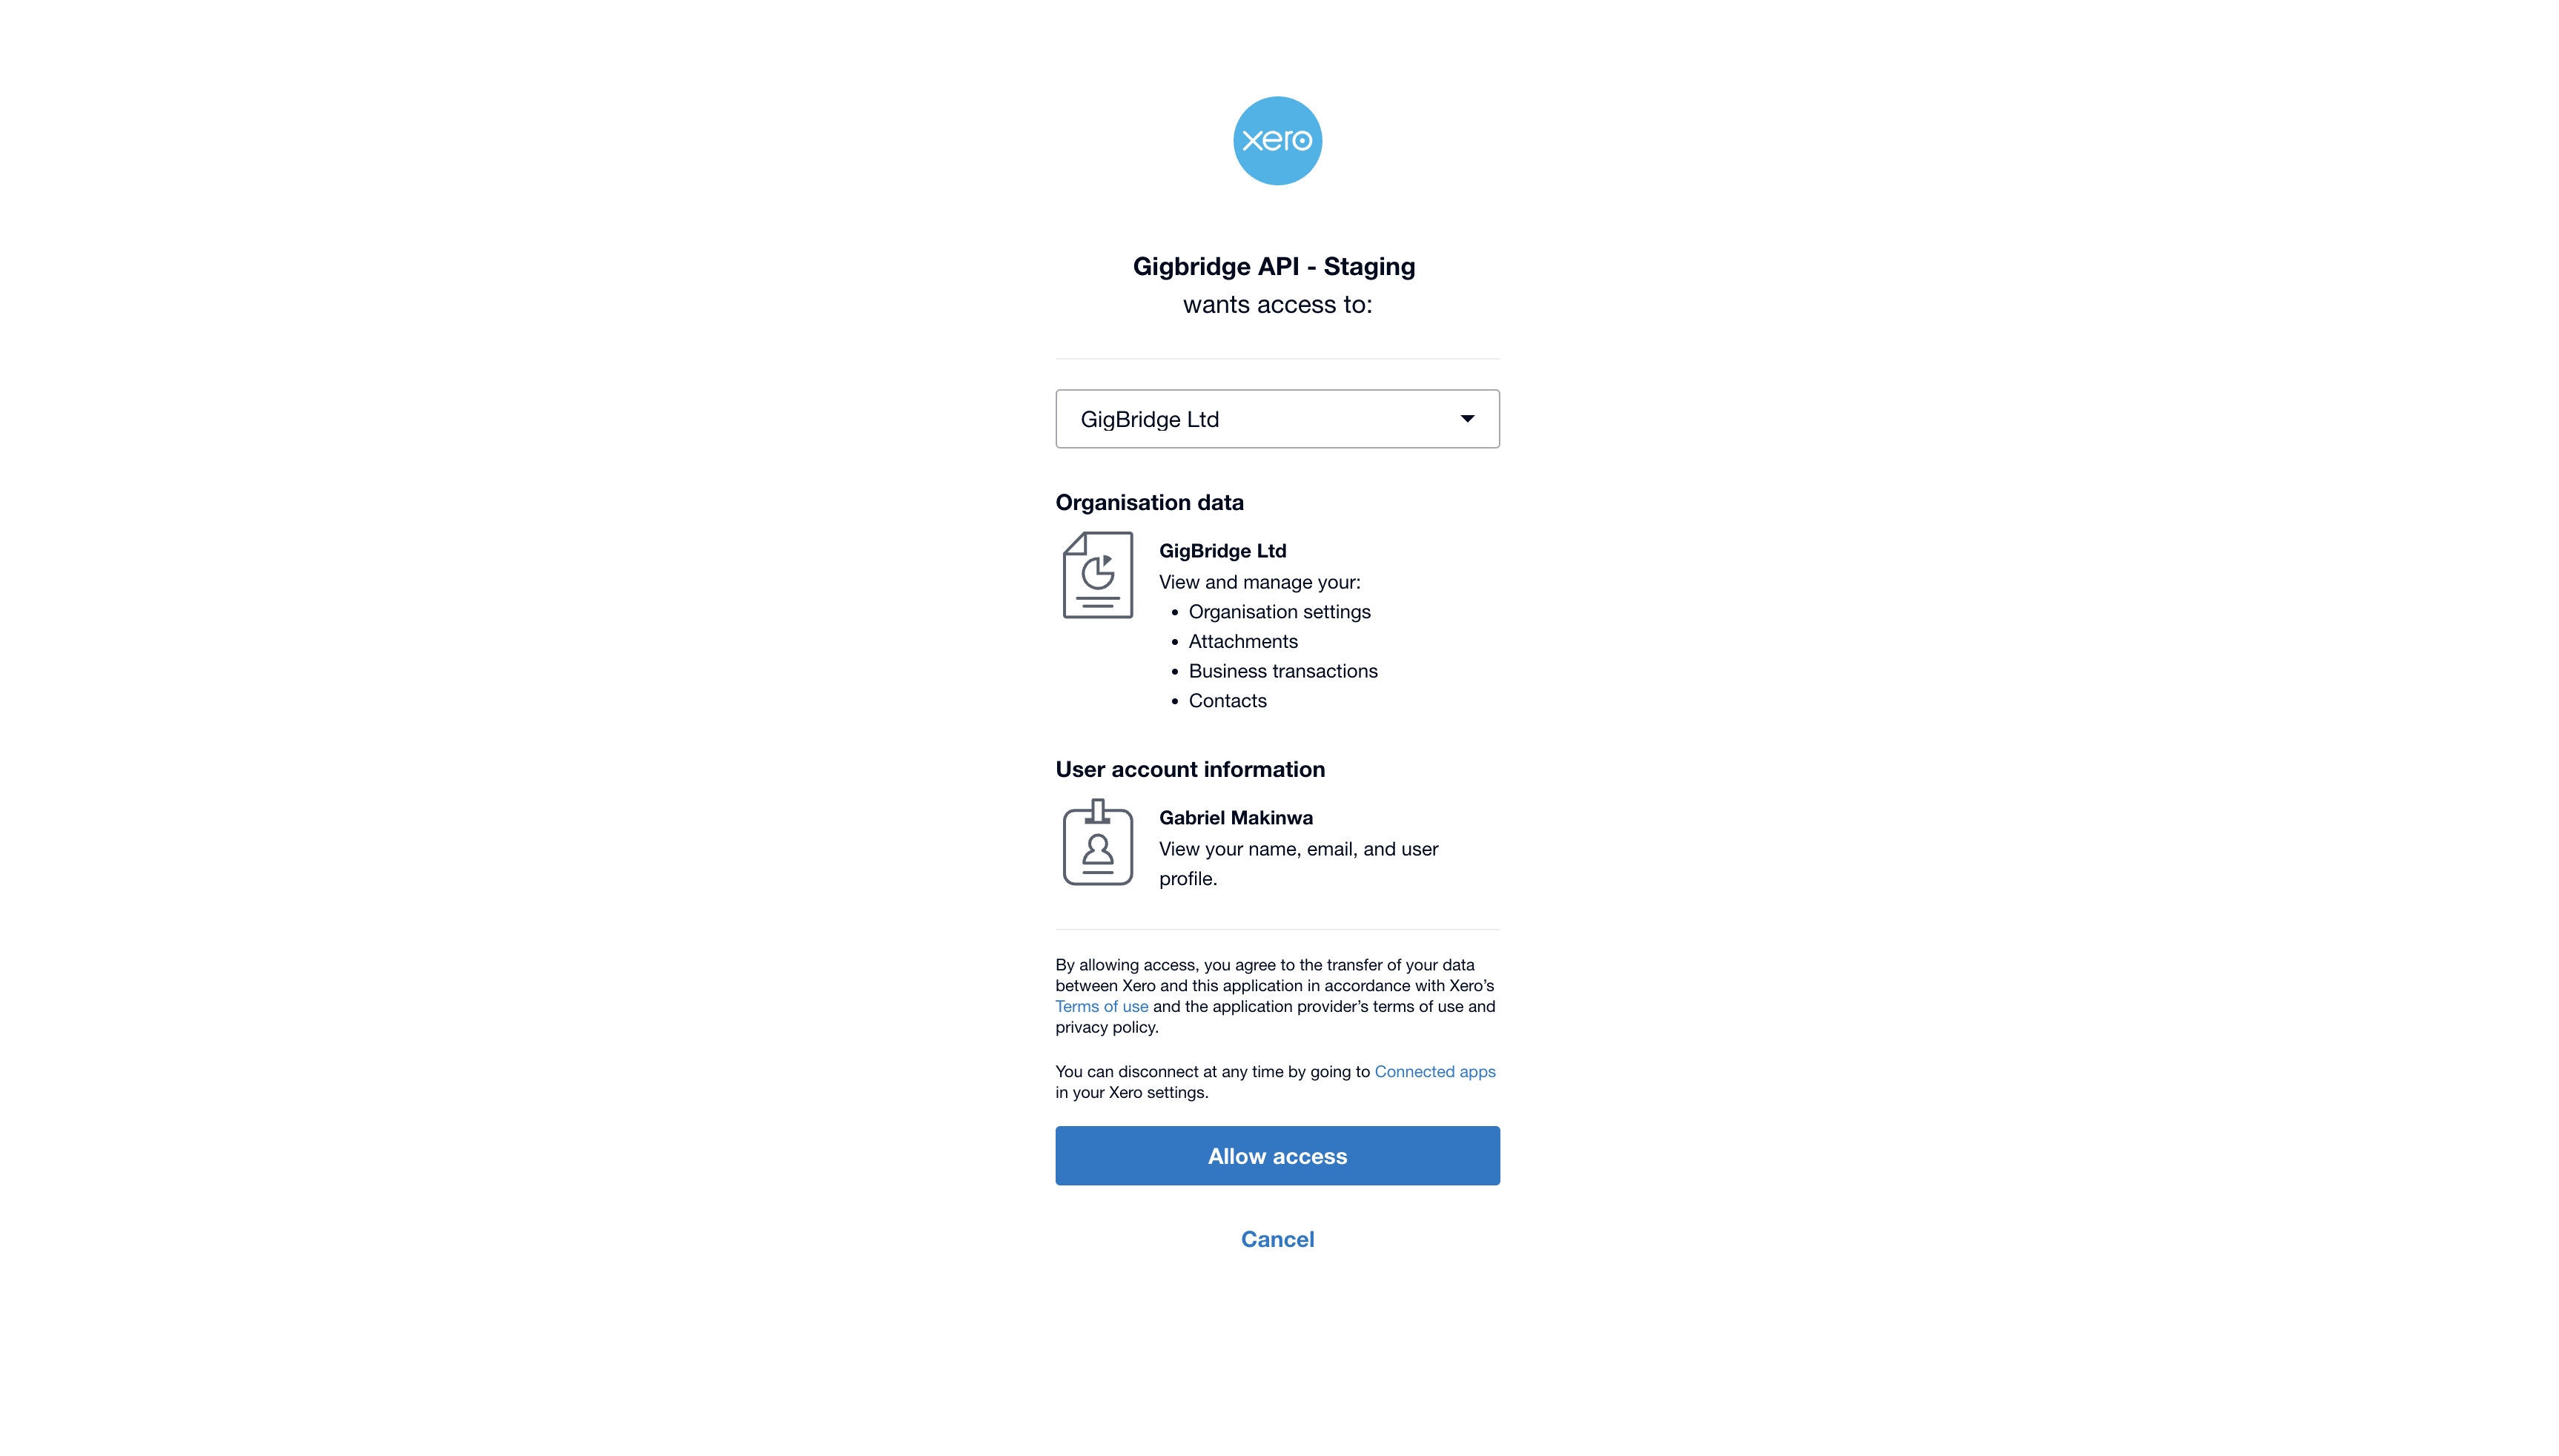
- You’ll be redirected to the Xero authentication page to login and authorise GigBridge to access your accounting system.
Once you’ve connected Xero and allowed access to your account; you'll see the connected checkmark beside the Xero login on the integrations page.
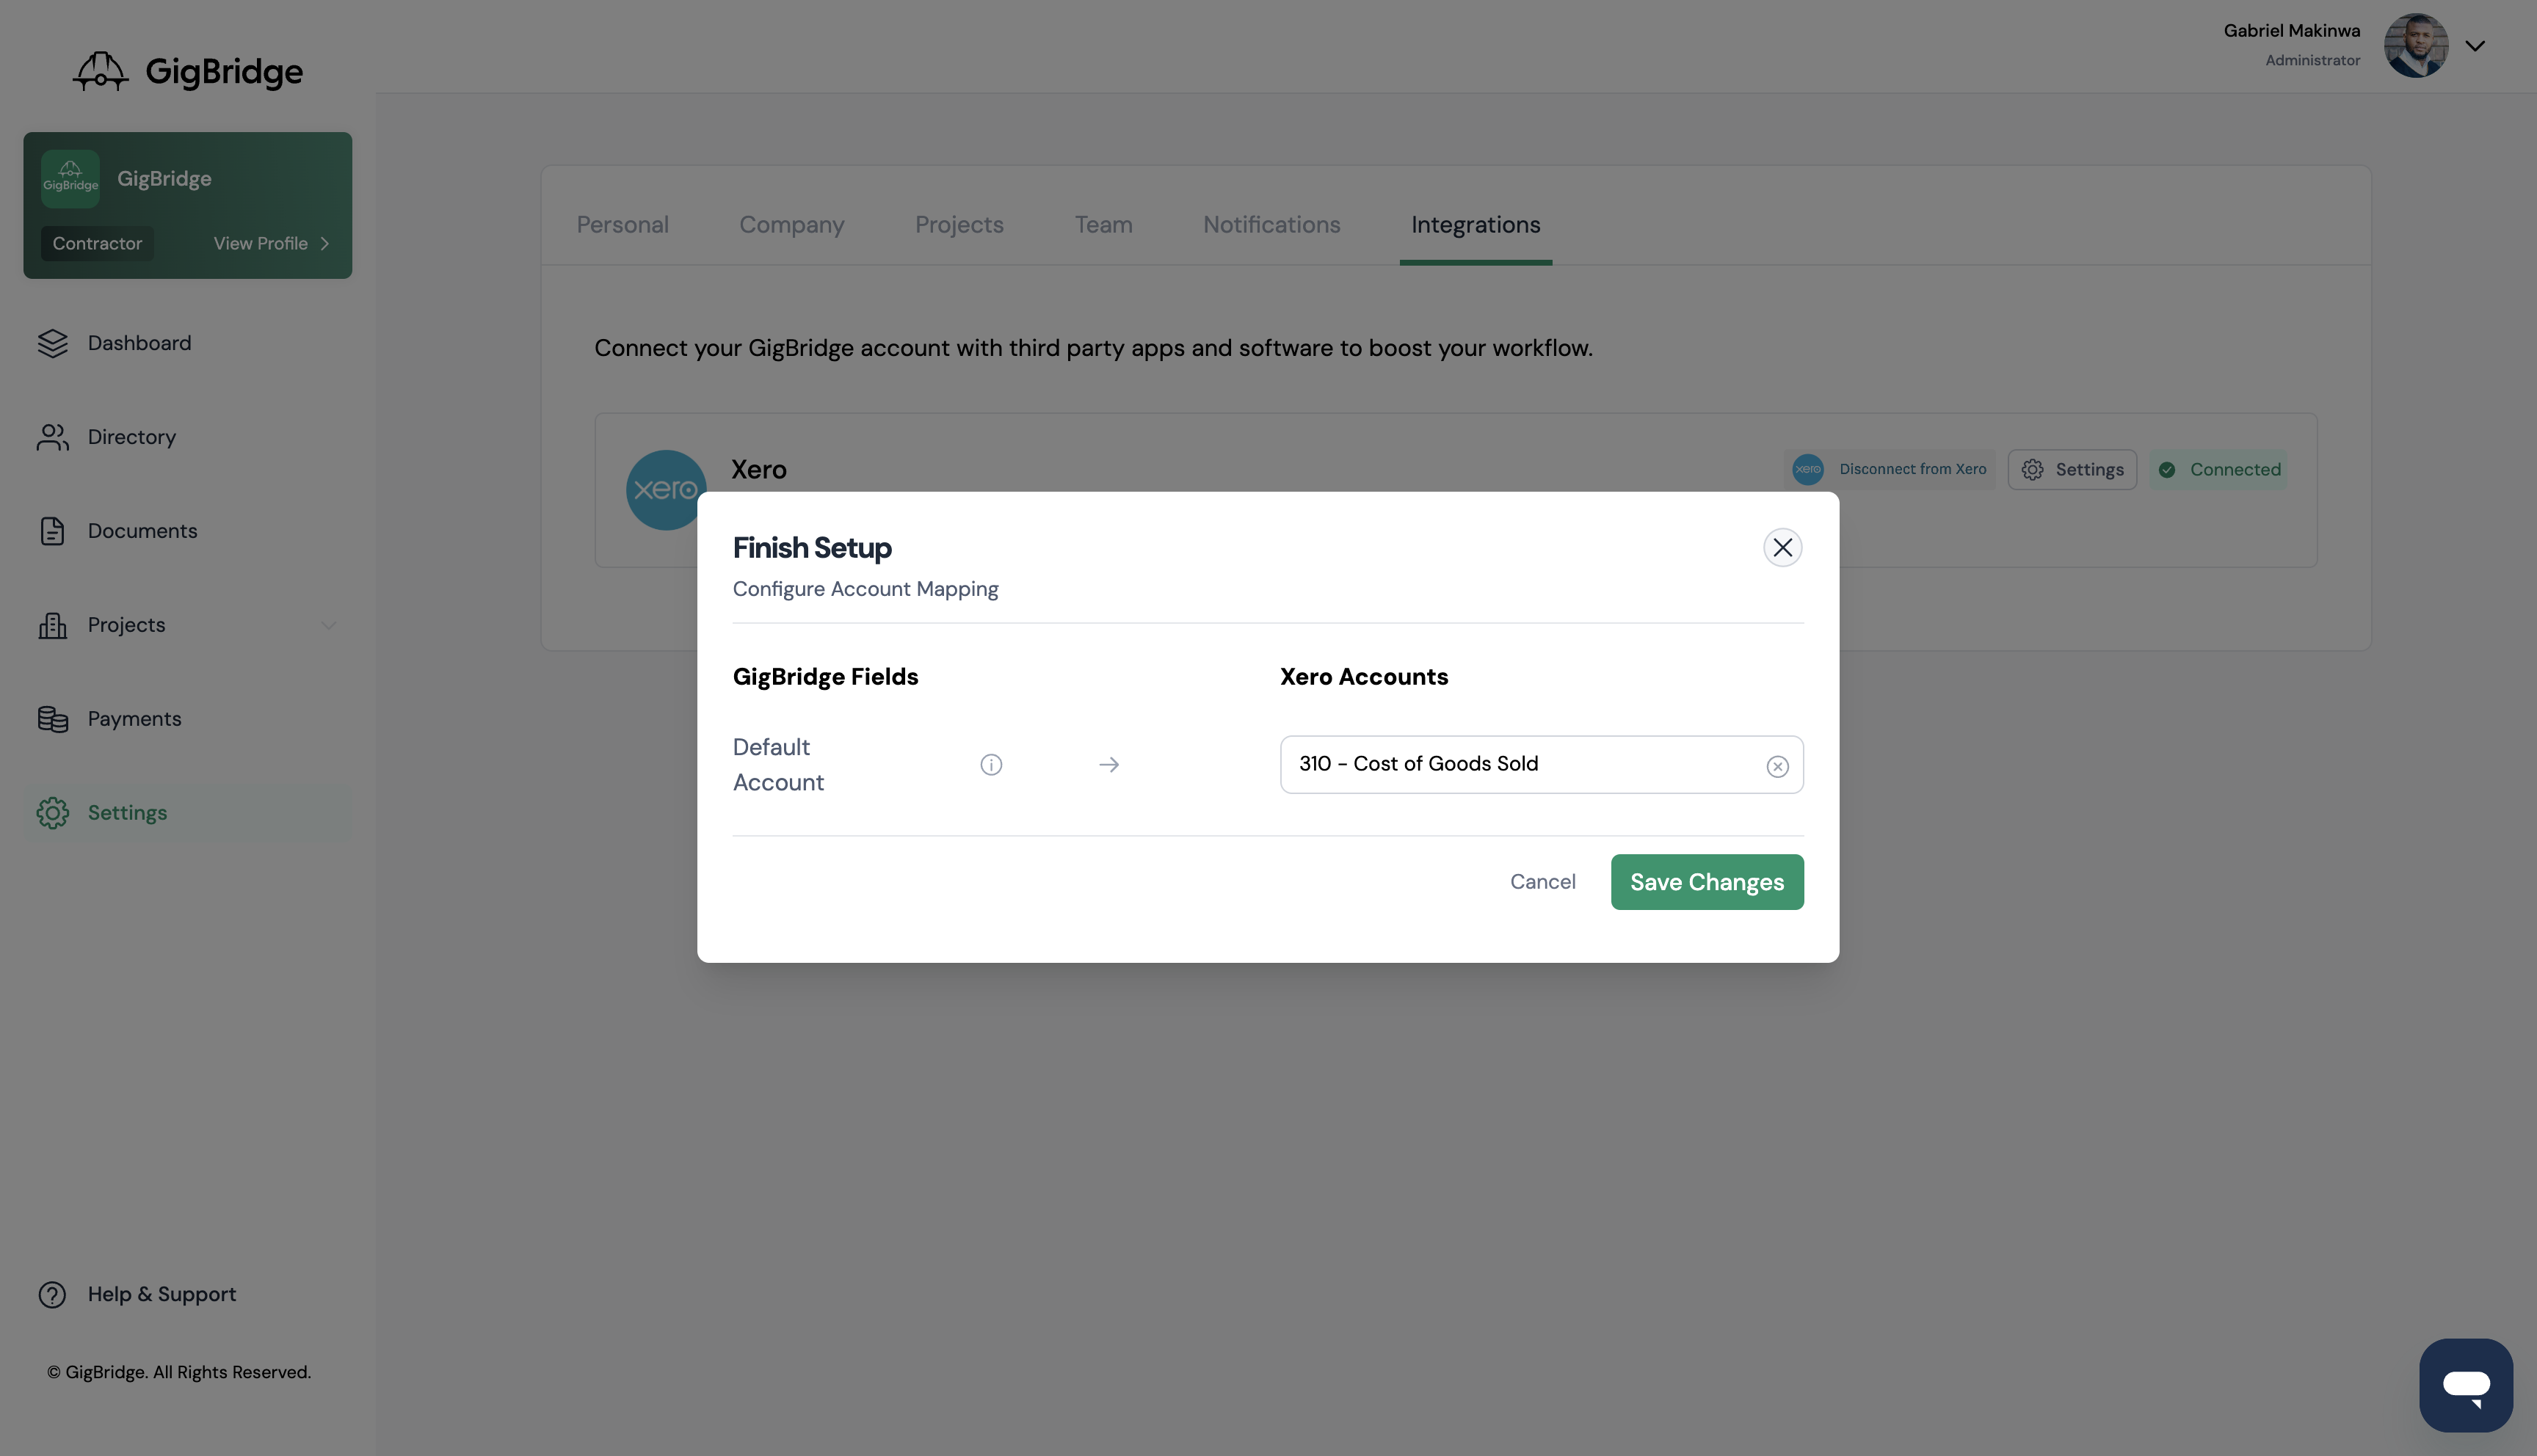
You'll be prompted to finish your setup by selecting a default Xero account. This is the default chart of accounts your purchases will be allocated to when synced to Xero. You can control which accounts specific purchases are synced to by syncing your cost codes to specific accounts.
Note: The chart of accounts is a list of all accounts you can use to record your transactions in Xero. It helps you categorise your transactions correctly and group similar accounts together to generate reports about your organisation.
Now that you've connected your Xero account you can do a few more things to ensure your purchases processed in GigBridge are synced to Xero correctly.
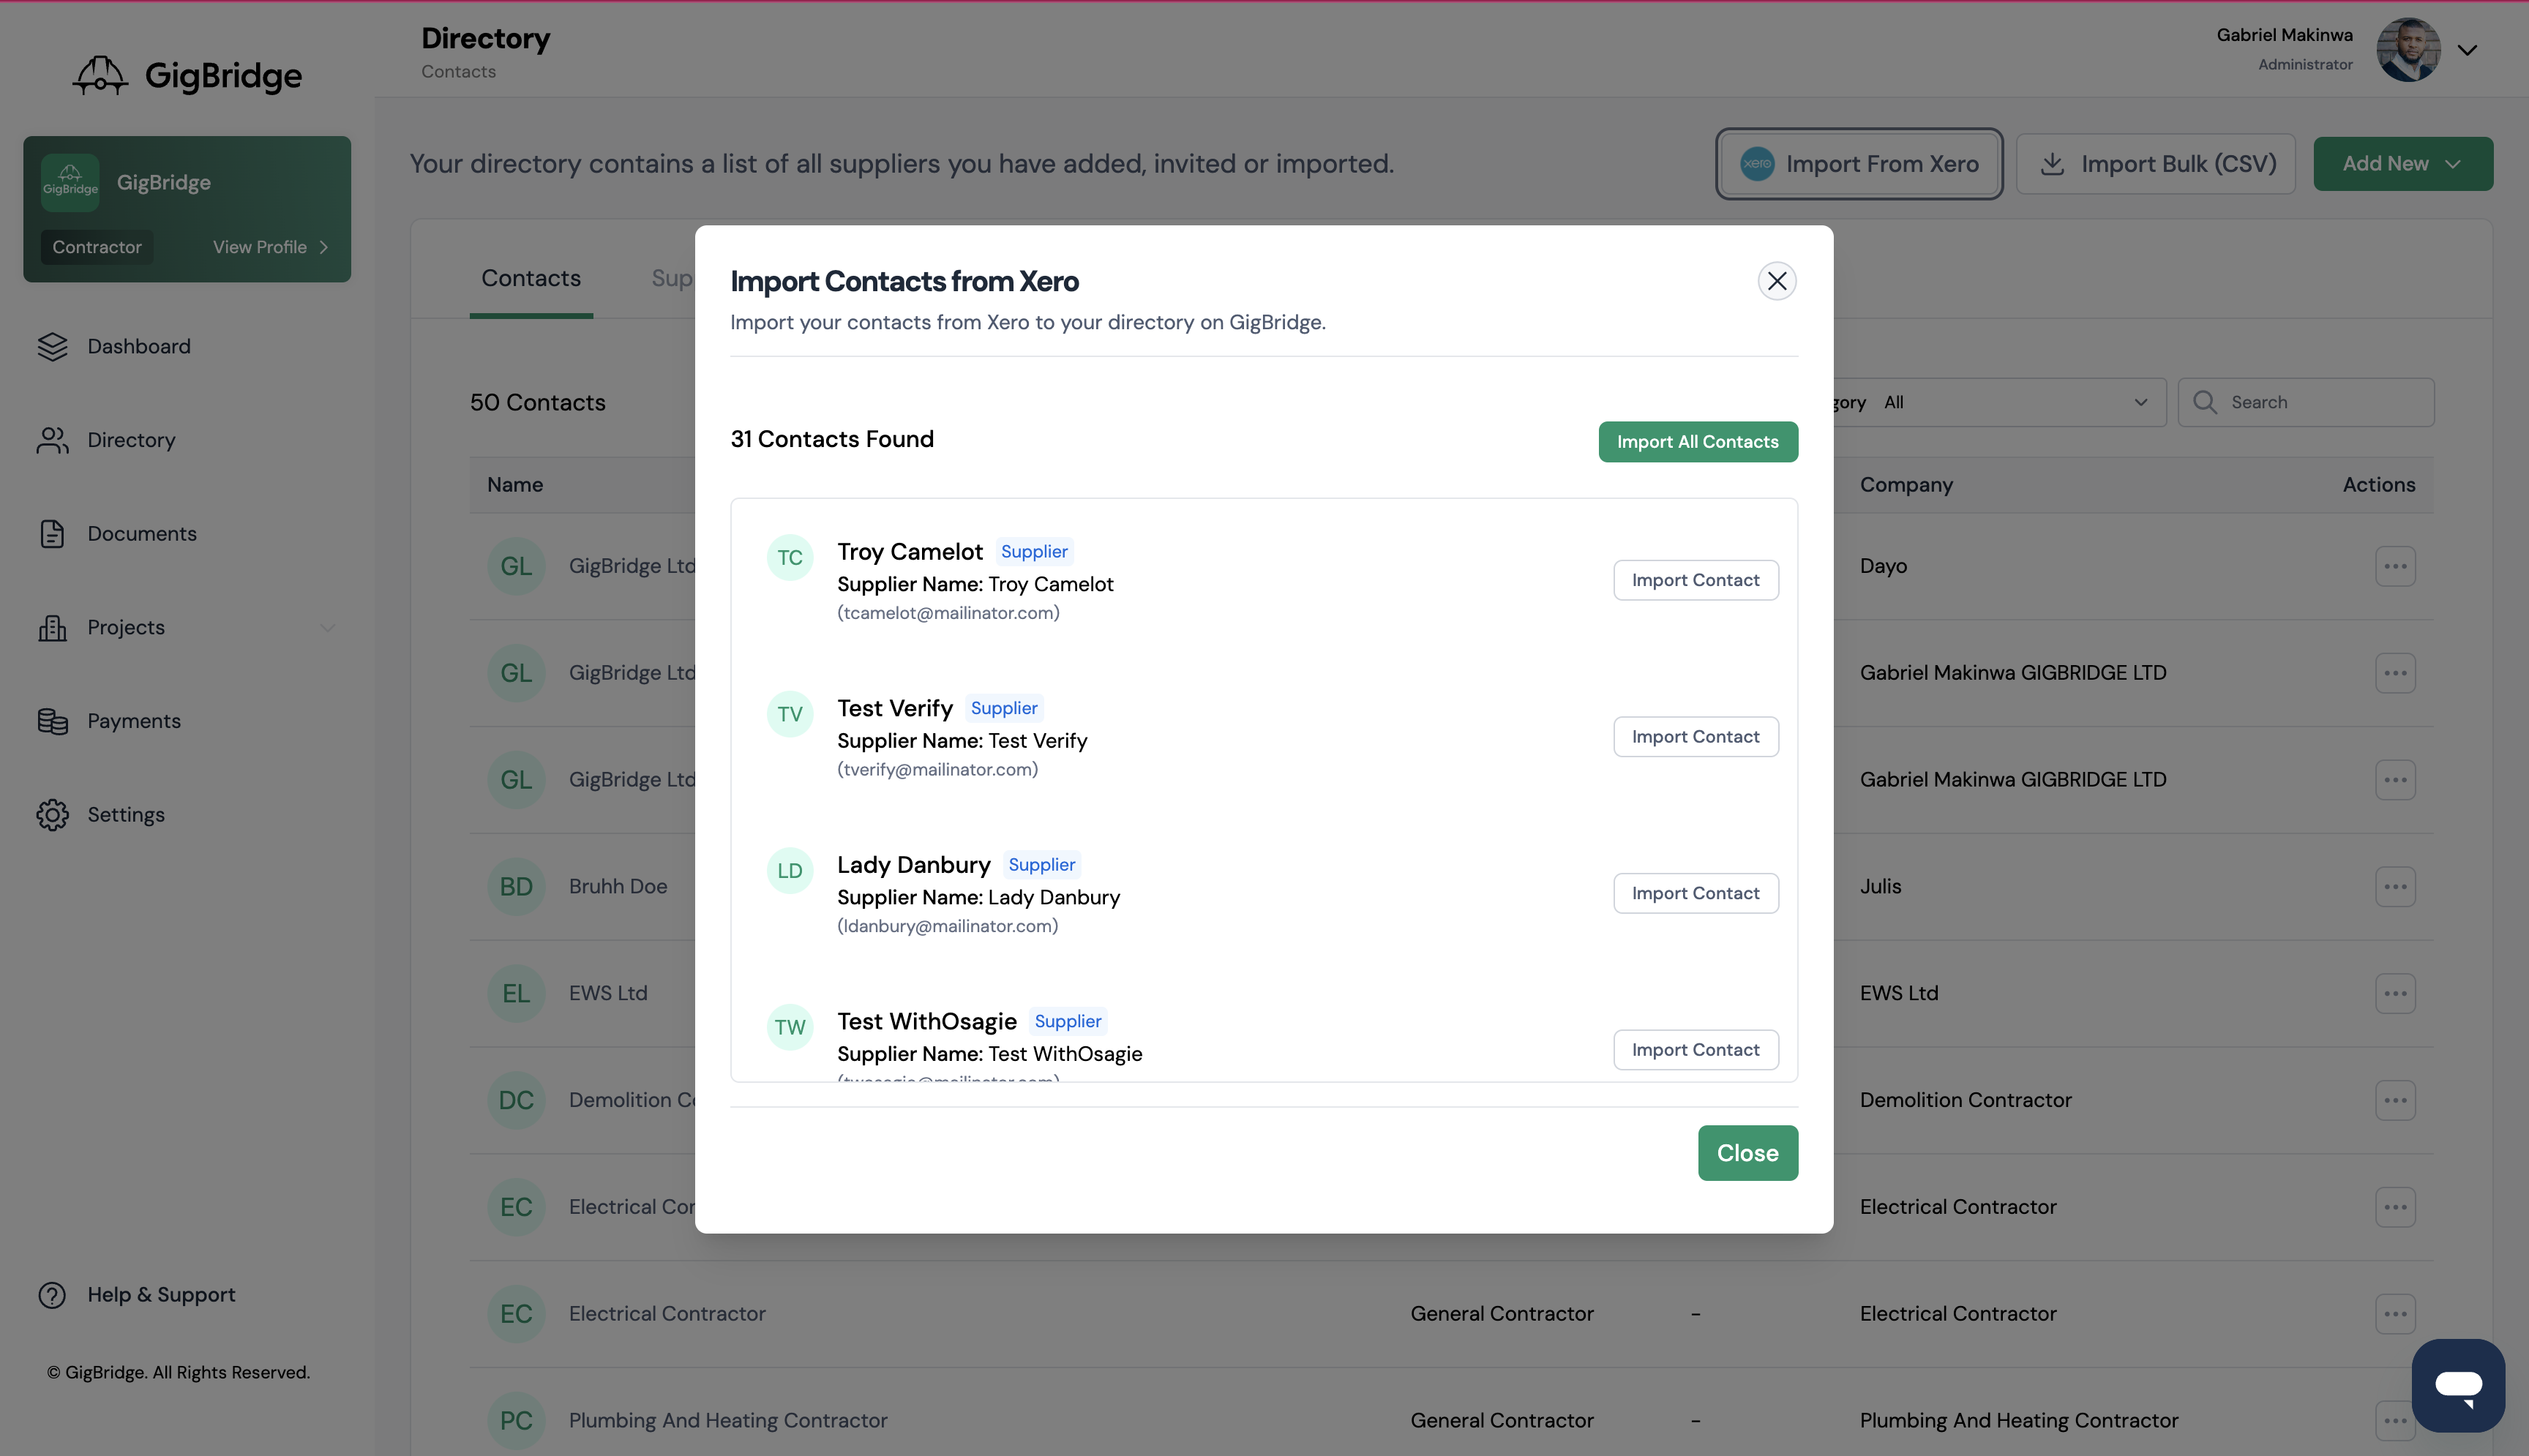
Import your contacts
Head over to the directory tab by clicking on directory in the menu on the left hand side.
- Click on Import from Xero in the right hand corner
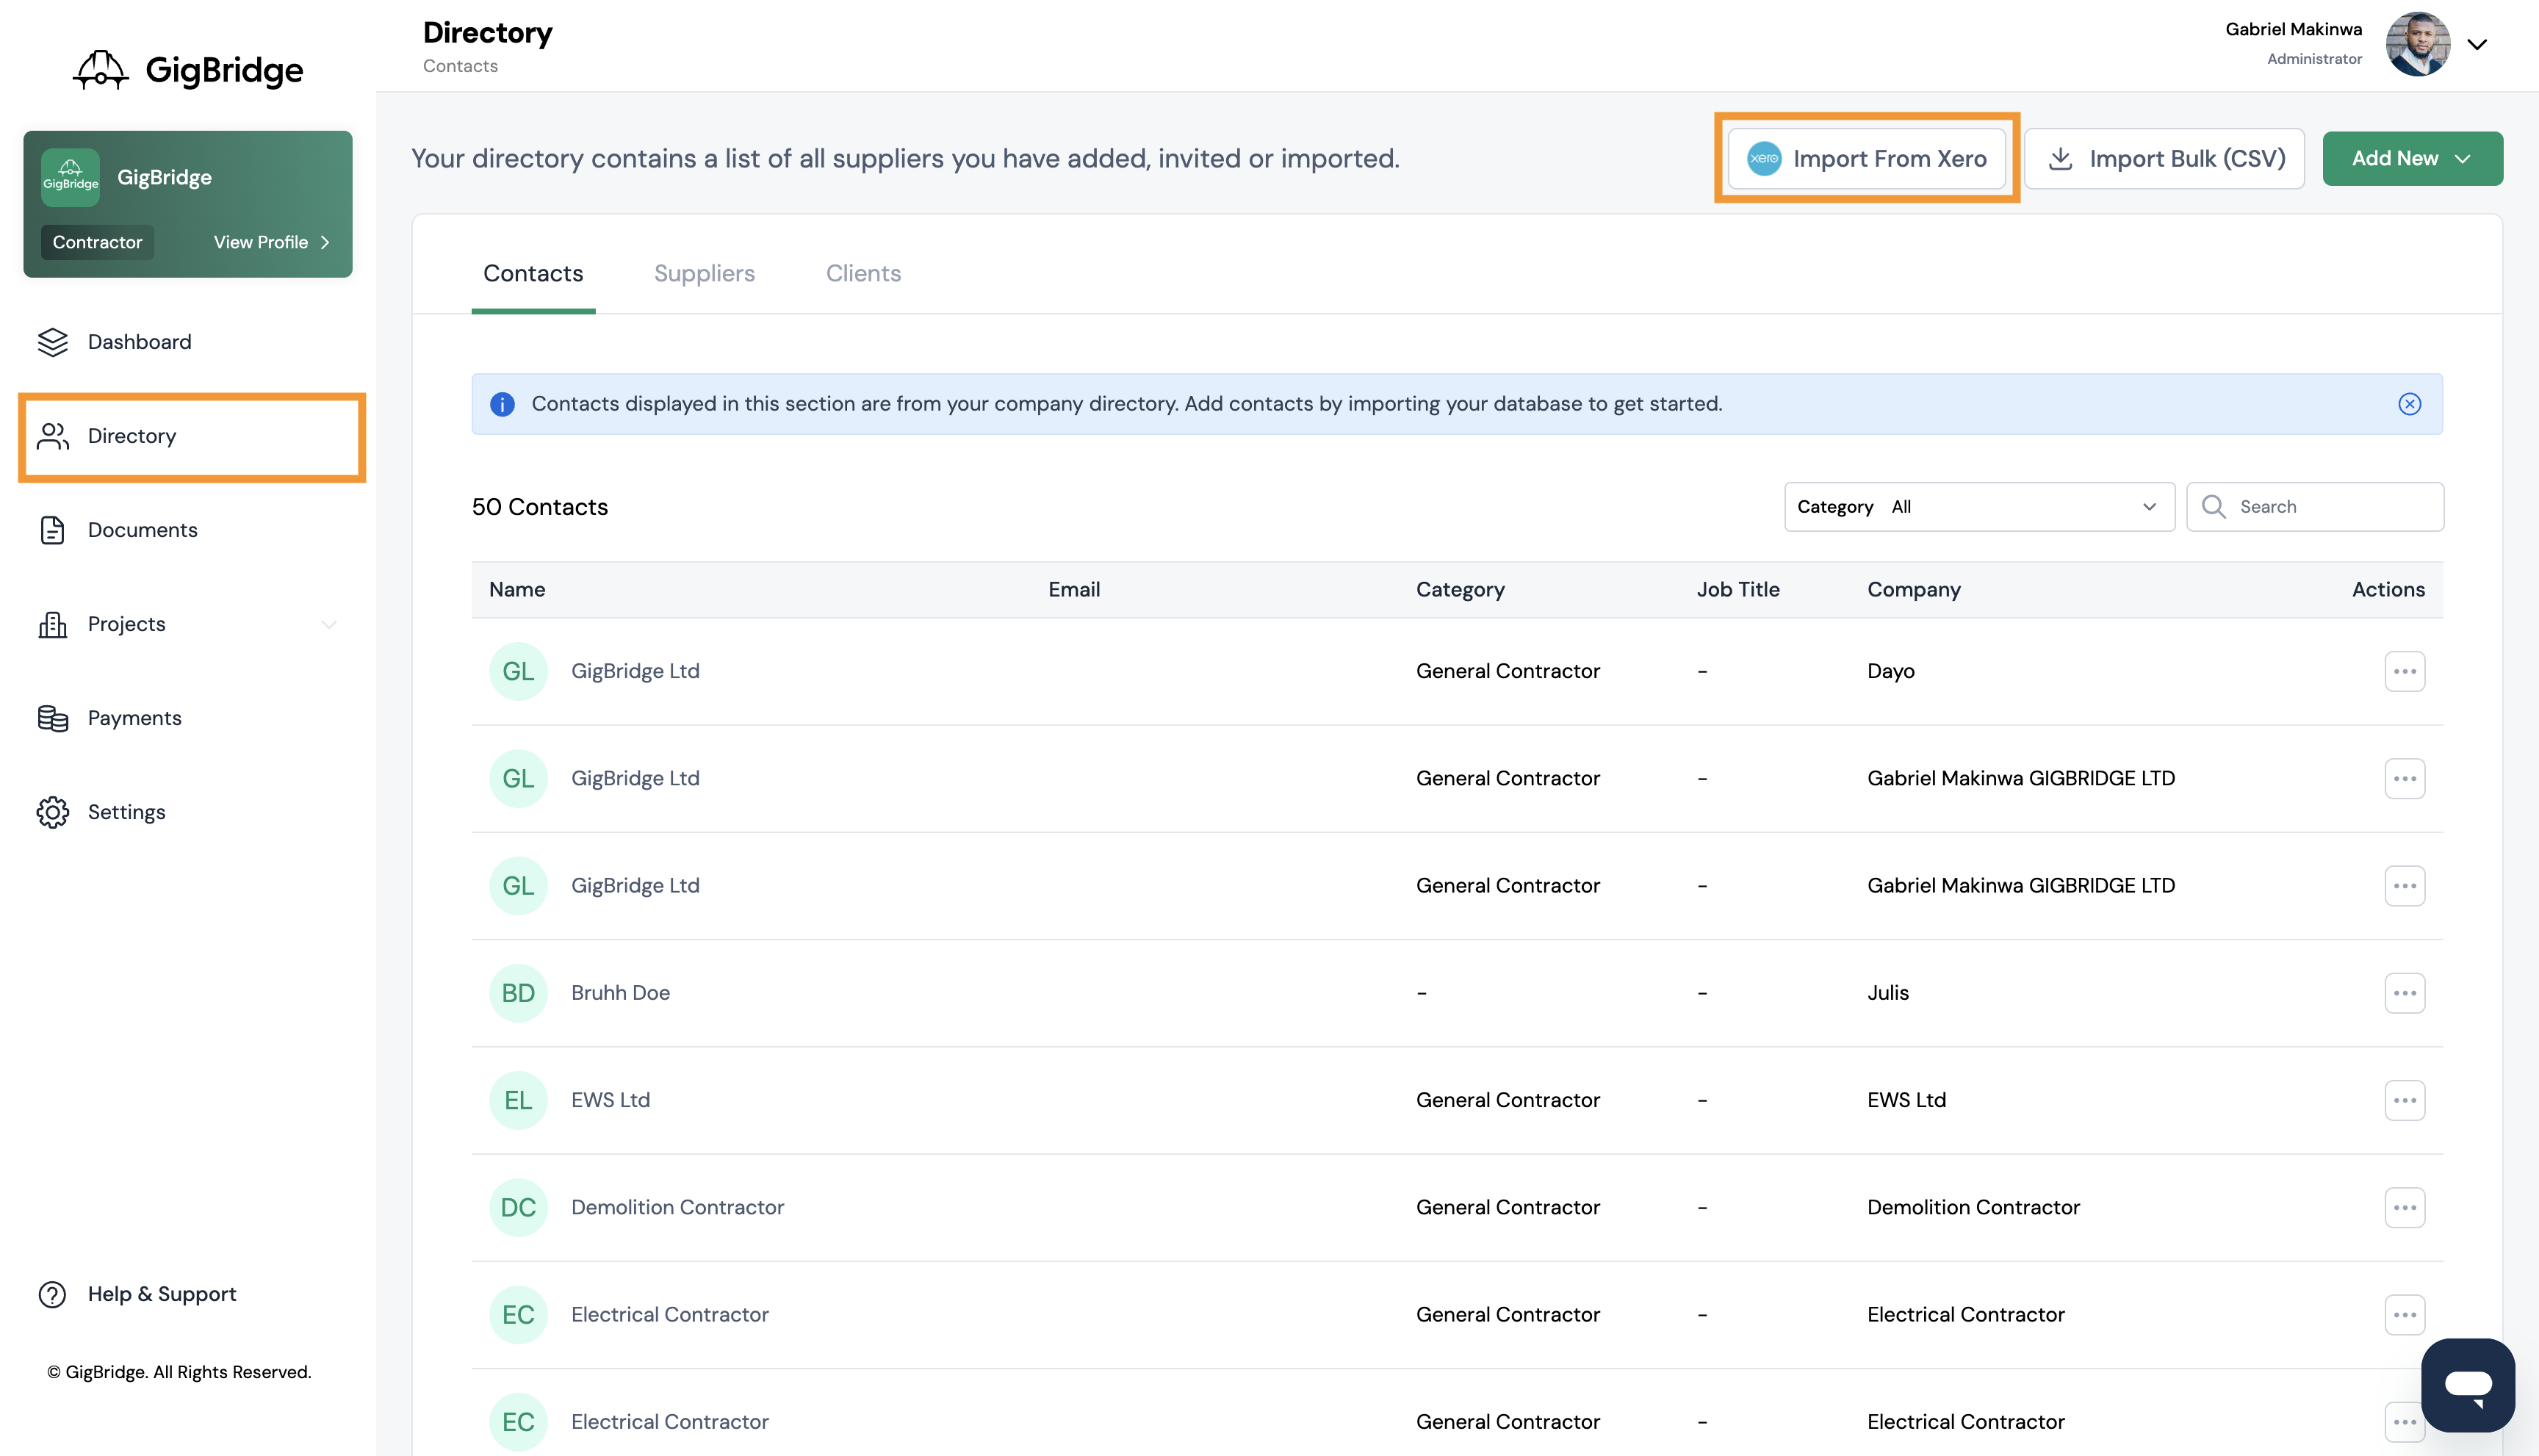
You'll see all of your contacts from Xero for you to select which you'd like to import into GigBridge. You can import all of them by clicking import all or select the contacts you'd like to import individually.
Once you've imported your contacts you can then sync your cost codes to Xero chart of accounts.
Connect Cost Codes to Chart of Accounts
When syncing your purchases to GigBridge you can configure which accounts they are synced to by connecting your cost codes.
- Head over to settings then click on the projects tab
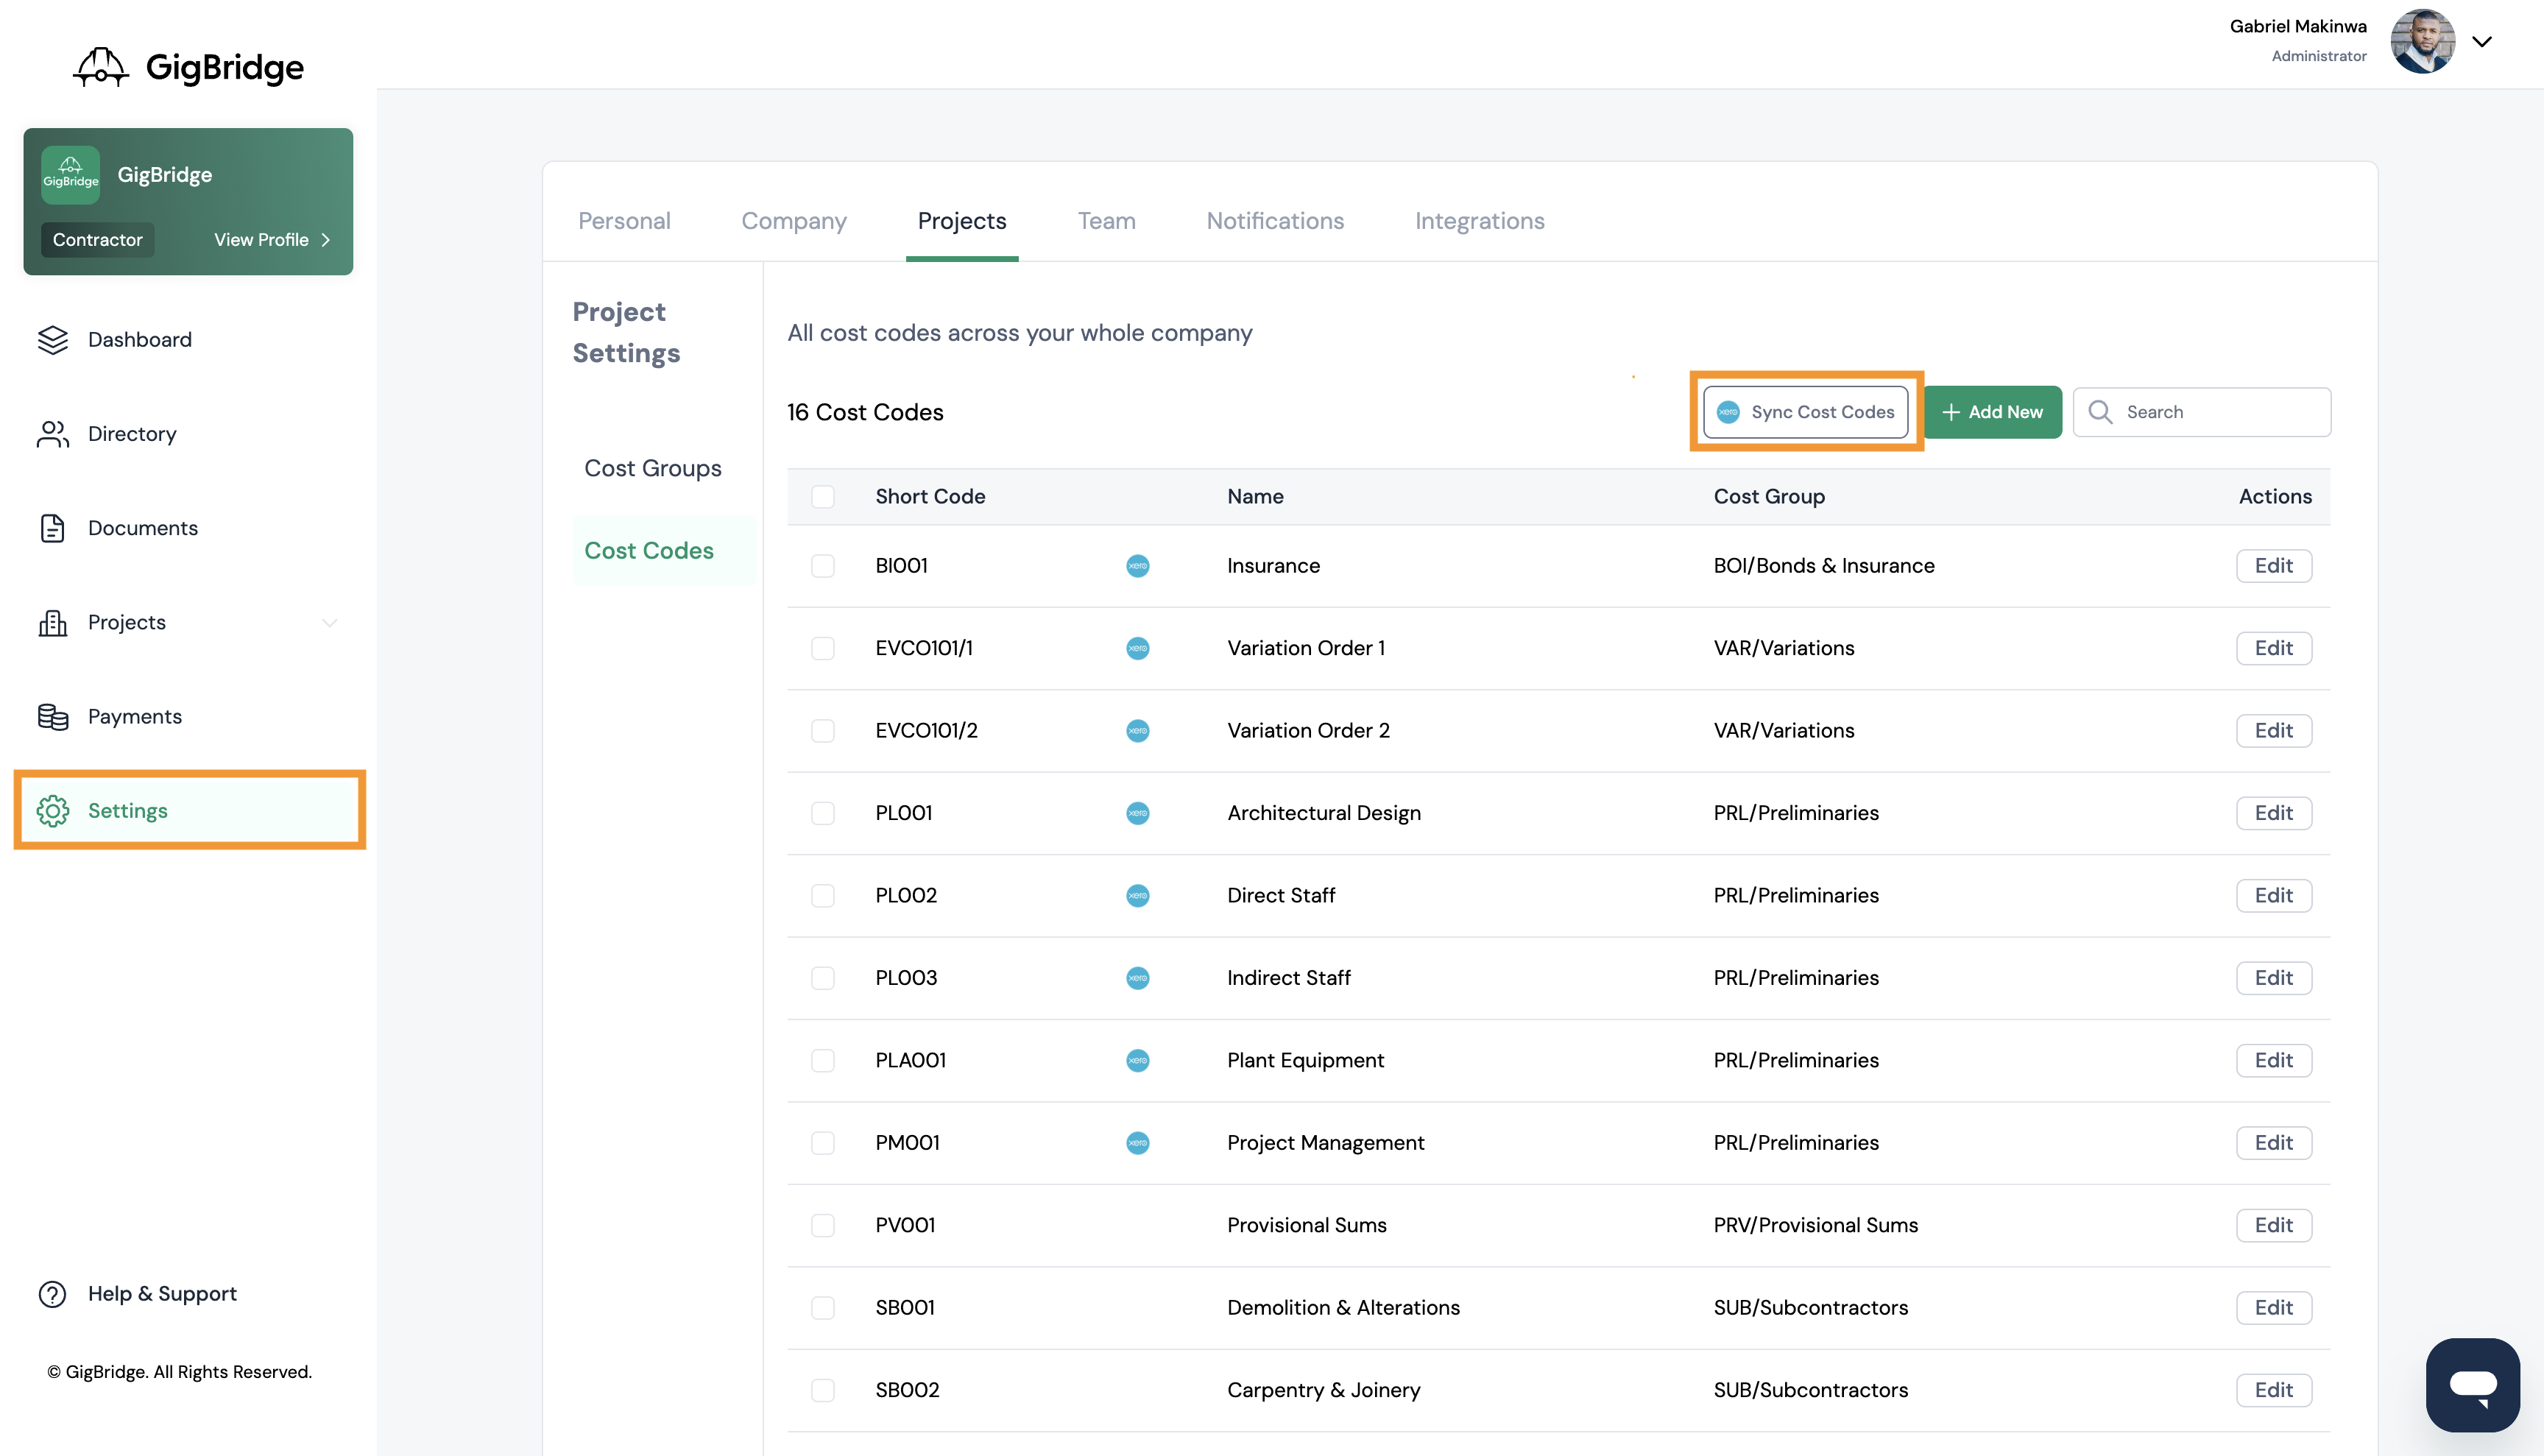
- Click on Sync cost codes
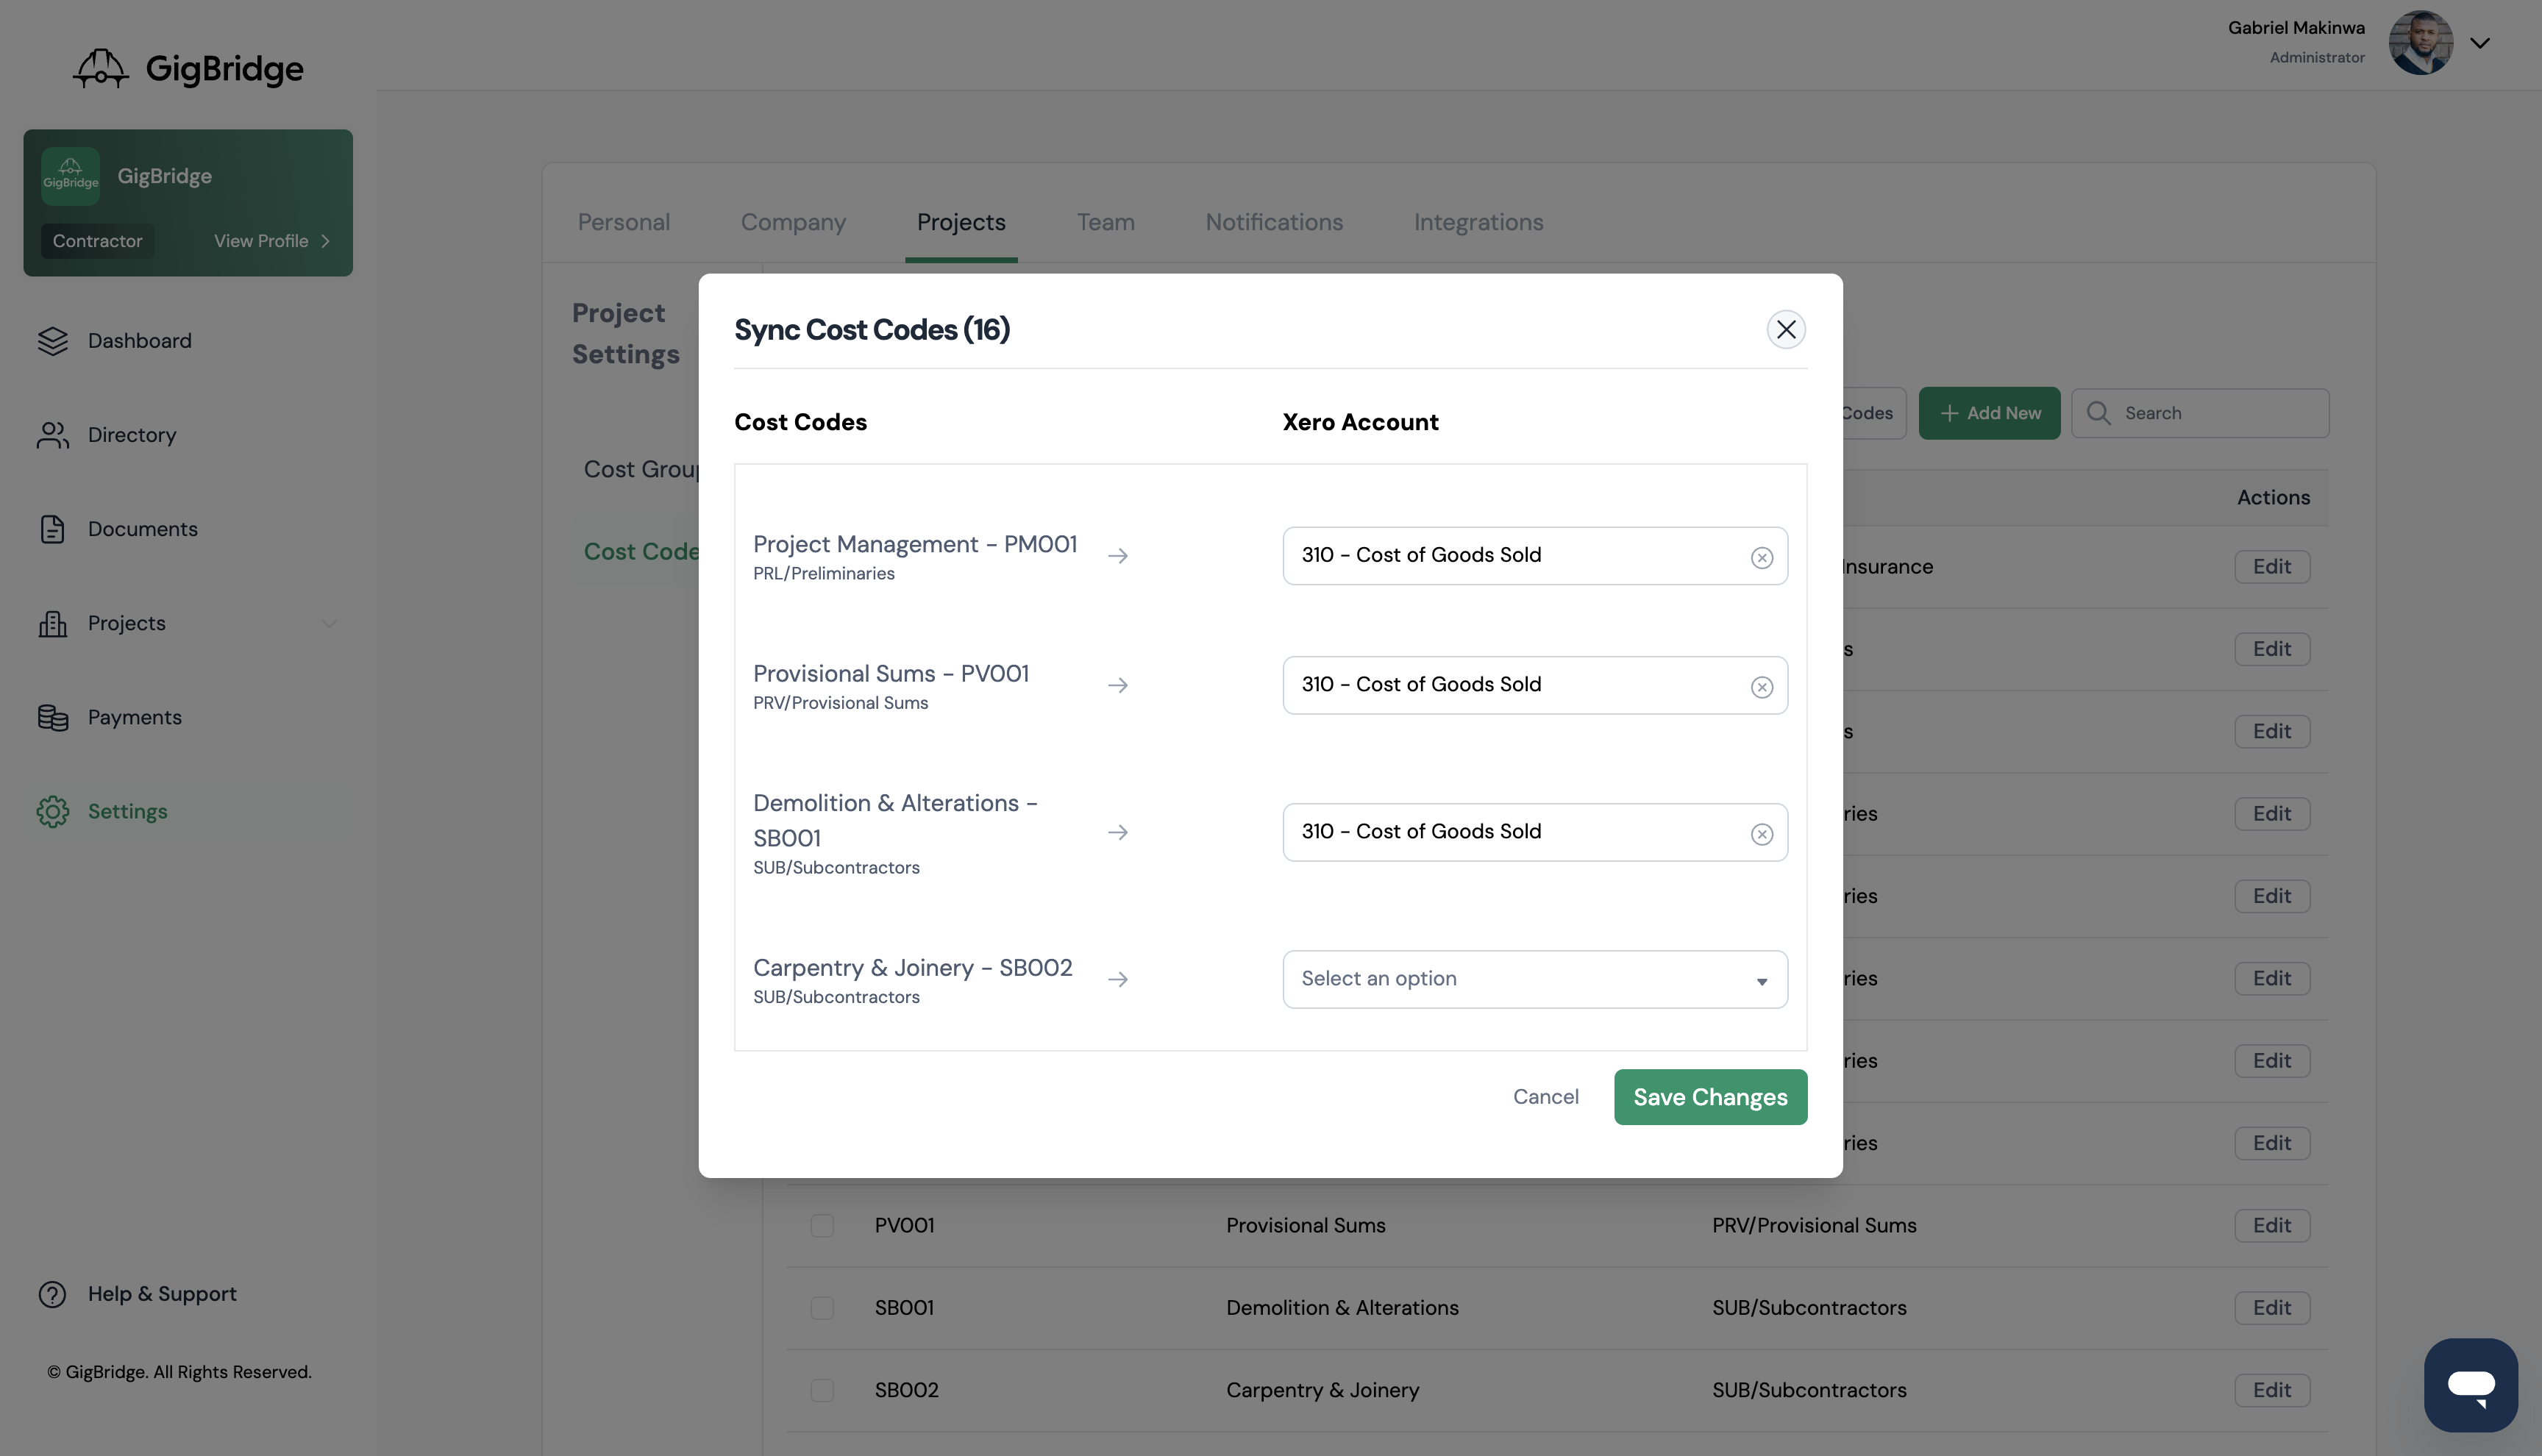
- Select which chart of account that each cost code should be synced to. By syncing a cost code to a chart of account each purchase (or part of it) assigned to this cost code will be sent into Xero and categorised to the respective account.
Note: When a purchase is split and allocated to several different cost codes it will be sent to Xero as one purchase with a line item for each part of the split purchase. Each line item will be allocated to the connected account or the default account, if codes haven't been synced.